In this guide
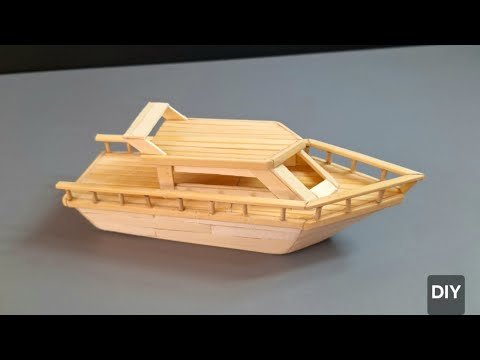
Have you ever wanted to create something simple, fun, and lasting with your own hands? Building a toy boat out of wood is a perfect project for you.
It’s not just about making a boat; it’s about enjoying the process, learning new skills, and feeling proud of what you create. Whether you’re a beginner or looking for a quick, rewarding craft, this guide will walk you through every step.
By the end, you’ll have a beautiful wooden toy boat ready to sail—and a new skill you’ll want to use again and again. Ready to get started? Let’s dive in!
Materials Needed
Gathering the right materials is key to building a sturdy and attractive wooden toy boat. The materials you choose affect the boat’s durability, appearance, and how easy it is to work with. Have you ever noticed how a small change in wood type can make your project either a joy or a struggle?
Think about the tools and supplies you already have. This can save time and money. Let’s look at what essentials you’ll need to start crafting your toy boat.
Wood Types
Choosing the right wood matters. Softwoods like pine are easier to cut and shape, making them perfect if this is your first project. Hardwoods such as oak or maple offer more durability but require sharper tools and more effort.
Basswood is another favorite for toy boats because it sands smoothly and paints well. What kind of wood do you feel comfortable working with? That comfort can speed up your progress and improve your results.
Basic Tools
- Hand saw or jigsaw:To cut the wood pieces precisely.
- Sanding block or sandpaper:For smoothing edges and surfaces.
- Wood glue:To hold pieces firmly together.
- Clamps:To keep parts in place while glue dries.
- Paintbrushes:For finishing touches.
Having these tools on hand makes the building process smoother and more enjoyable. Missing just one can cause frustration.
Additional Supplies
- Non-toxic paint or wood stain:To decorate and protect your boat.
- Waterproof sealant:Essential if you want your boat to float outdoors.
- Small nails or brads:For extra strength if needed.
- Wood filler:To fix any small gaps or cracks.
Do you plan to let your boat sail in a pond or just display it? The choice of sealant depends on your answer.

Credit: www.amazon.ca
Designing Your Toy Boat
Designing your toy boat is where your creativity truly takes shape. This stage sets the foundation for how your boat will look and perform on water. Taking time here can make the building process smoother and more enjoyable.
Choosing The Boat Style
Think about what kind of boat excites you the most. Do you want a sleek speedboat, a classic sailboat, or maybe a sturdy fishing vessel? Each style has unique shapes and features that affect both appearance and stability.
Consider the materials you have and your skill level. Some designs are simpler and better suited for beginners, while others might challenge your woodworking skills. What kind of boat would you be proud to show off to friends or family?
Sketching The Design
Start with rough sketches on paper to get your ideas down quickly. Don’t worry about perfection—focus on outlining the main parts like the hull, deck, and cabin. Sketching helps you visualize dimensions and balance before cutting any wood.
Use a ruler to add measurements to your sketch. This makes the building process more precise and reduces mistakes. Have you thought about adding personal touches like painted details or a tiny flag? Sketch them too to see how they fit into your design.
Preparing The Wood
Preparing the wood is a crucial stage in building your toy boat. The quality and precision of this step can shape the entire project. Taking time here ensures your boat will be sturdy and look great.
Selecting The Right Wood
Choosing the right wood affects both the boat’s durability and ease of construction. Softwoods like pine or balsa are light and easy to cut, making them perfect for beginners.
Hardwoods such as oak or maple offer strength but can be harder to work with. Think about how you want your boat to perform and feel—will it float well or just sit on display?
Consider the wood’s grain and texture too. Smooth, even grain helps with sanding and painting later on.
Cutting The Pieces
Accurate cutting is where your measurements come to life. Use a fine-toothed saw or a craft knife depending on the wood’s thickness.
Always double-check your measurements before cutting. A small mistake here can throw off the entire assembly.
Keep your workspace clean and well-lit to avoid errors. If you’ve ever struggled with uneven edges, you know how frustrating it can be to fix later.
Try cutting a test piece first to get comfortable with your tools and technique. This practice can save you time and wood in the long run.

Credit: www.facebook.com
Building The Hull
Building the hull is the heart of creating a wooden toy boat. The hull shapes the boat’s look and how well it floats. Careful crafting ensures the boat is strong and smooth.
Assembling The Base
Start by selecting a flat piece of wood for the base. Cut it to the size you want your boat to be. Use sandpaper to smooth the edges and surface. Attach small wooden strips along the sides for extra support. Secure them with wood glue or small nails. This frame forms the foundation of the hull.
Shaping The Hull
Use a pencil to draw the hull’s shape on the wood. Follow simple curves for easy shaping. Carve the wood carefully with a small saw or knife. Sand the surface to remove rough spots and make it smooth. Check the shape often to keep it balanced. The hull should be rounded below and flat on top for stability.
Adding The Deck
Adding the deck is an important part of building a wooden toy boat. It gives the boat its shape and adds strength. A well-made deck makes the boat look neat and helps it float better. Take your time to craft it carefully.
Crafting The Deck
Start by choosing a flat piece of wood. The deck should fit the top of the boat’s hull perfectly. Use sandpaper to smooth the edges and surface. This prevents splinters and creates a clean finish. You can cut small holes or slots if you want to add masts or flags later.
Securing The Deck
Place the deck on the hull and check its fit. Use wood glue to attach the deck firmly. Press it down and hold for a few minutes. For extra strength, use small nails or clamps. Let the glue dry completely before moving the boat. This ensures the deck stays in place during playtime.
Creating The Mast
Creating the mast is a key part of building your wooden toy boat. It not only supports the sails but also adds character to your craft. Paying attention to the materials and how you attach the mast will ensure your boat is sturdy and looks great on water or display.
Choosing The Mast Material
Wood is the obvious choice for the mast, but not all wood is equal. You want something lightweight yet strong, like balsa or pine. These woods are easy to shape and sand, which helps when you’re aiming for a smooth finish.
Consider the thickness of the mast too. A thicker mast provides stability but adds weight. If your boat is small, a thinner mast works better to keep balance.
Have you thought about using a dowel rod? They come in various sizes and are perfect for a clean, straight mast. Plus, they save time since you don’t have to carve one from scratch.
Attaching The Mast
Securing the mast firmly to the hull is crucial. You don’t want it wobbling or falling off when you test your boat in water.
One effective method is to drill a small hole in the hull where the mast will sit. Insert the base of the mast into the hole and add wood glue to hold it tight. Clamping it while the glue dries will give you the strongest bond.
If you want extra strength, try wrapping a small strip of thin wire or thread around the base where it meets the hull. This can prevent the mast from twisting or pulling loose.
What’s your plan for sails? Attaching a mast that can hold them securely will make your boat look and perform better. Take your time to get this part right—it’s worth the effort.
Finishing Touches
Finishing touches bring your wooden toy boat to life. They protect your creation and add a personal flair that makes it truly yours. Paying attention to these final details can make all the difference between a simple model and a cherished keepsake.
Sanding And Painting
Start with sanding to smooth all surfaces and edges. Use fine-grit sandpaper to avoid scratching the wood but ensure every rough spot is gone. This step not only improves the look but also makes painting easier and more even.
Choose paint that works well on wood and is safe, especially if children will handle the boat. Acrylic paints dry quickly and come in many colors, letting you customize your boat exactly how you want. Applying thin coats helps avoid drips and keeps the finish smooth.
Have you tried sealing your paint with a clear varnish? It protects the colors and adds a subtle shine. This small step can extend the life of your boat and keep it looking fresh longer.
Adding Decorative Elements
Think about what makes your boat unique. You can add small details like miniature sails, flags, or even tiny wooden figures to bring your boat’s story to life. These elements don’t need to be complicated; sometimes simple touches stand out the most.
Use non-toxic glue to attach decorations securely. If you want to get creative, try using natural materials like small shells or twine for a rustic look. What kind of theme fits your boat best—classic pirate, sleek speedboat, or maybe a colorful fishing vessel?
Remember, the goal is to add personality without overwhelming the design. Each decorative piece should enhance the boat’s charm, not distract from its craftsmanship.

Credit: ericjacobydesign.com
Testing Your Toy Boat
Testing your toy boat is an exciting part of the building process. It shows if your hard work pays off. This step checks if the boat floats and stays dry inside. Small adjustments might be needed to improve its performance.
Careful testing helps avoid sinking or water damage. It also makes sure the boat can sail smoothly. Let’s explore how to test your wooden toy boat effectively.
Waterproofing Tips
Protect wood from water by applying a sealant. Use waterproof paint, varnish, or wood oil. Cover all surfaces, including edges and corners. Let each coat dry completely before adding the next. Check for any gaps or cracks and seal them well. Proper waterproofing keeps the boat light and strong.
Floating Test
Fill a basin or tub with water for testing. Gently place your toy boat on the water surface. Watch if it floats without tipping or sinking. Check if water leaks inside the boat. Try pushing the boat lightly to see if it moves well. If it tips or sinks, adjust weight or sealant. Repeat the test until your boat floats perfectly.
Frequently Asked Questions
What Type Of Wood Is Best For Building Toy Boats?
Balsa wood is ideal due to its light weight and easy carving. Basswood and pine are also good choices for beginners. These woods float well and are simple to shape, making them perfect for toy boats.
How Do I Waterproof A Wooden Toy Boat?
Use a non-toxic waterproof sealant or marine varnish. Apply multiple thin coats, allowing drying time between layers. This protects the wood from water damage and ensures your toy boat lasts longer.
What Tools Are Needed To Build A Wooden Toy Boat?
Basic tools include a small saw, sandpaper, wood glue, and clamps. You may also need a carving knife and paintbrushes for finishing touches. These tools help you shape and assemble the boat efficiently.
How Long Does It Take To Build A Wooden Toy Boat?
Building a simple wooden toy boat typically takes 2 to 4 hours. More detailed designs may take longer. Time depends on your skill level and the complexity of the boat.
Conclusion
Building a wooden toy boat is a fun and rewarding project. You only need simple tools and materials. Take your time cutting and assembling each part carefully. Painting your boat adds a personal touch. Watching it float brings great joy.
This project helps improve your skills step by step. Try different designs once you feel confident. Enjoy making memories while crafting something special. Keep practicing to build even better boats. Happy building!