In this guide
Have you ever wanted to create something simple, fun, and exciting with your own hands? Building a toy parachute is a perfect project for you.
It’s easy, affordable, and a great way to learn how things fly. Imagine watching your parachute float gently to the ground, feeling proud that you made it yourself. You’ll discover step-by-step how to build your own toy parachute using materials you probably already have.
Ready to start? Let’s dive in and bring your creation to life!

Credit: www.youtube.com
Materials Needed
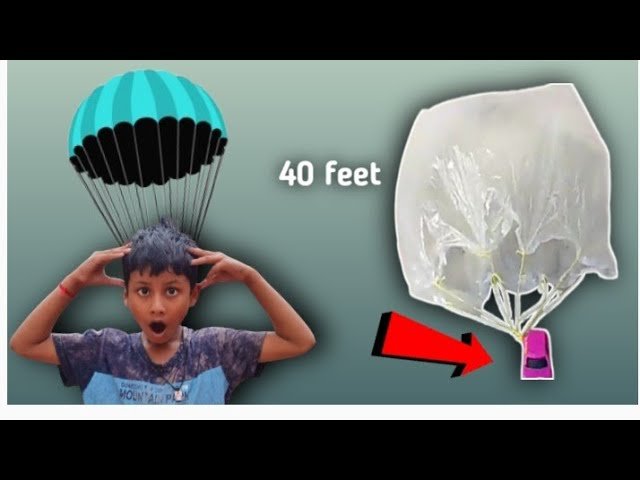
Gather a lightweight plastic bag, string, scissors, and a small toy or weight. These simple items help create a fun and working toy parachute. Choose materials that are easy to cut and tie for best results.
Building a toy parachute can be an exciting project that combines creativity and basic principles of physics. The right materials are key to ensuring your parachute flies efficiently and safely. Let’s dive into the essentials you’ll need to gather before you start crafting your parachute masterpiece.Choosing The Right Canopy
The canopy is the heart of your parachute, and selecting the right material can make all the difference. Opt for lightweight, durable fabrics like nylon or polyester. These materials offer a great balance of strength and flexibility, allowing your parachute to catch the air effectively. Consider the color and design as well. A vibrant canopy can add a fun, personalized touch to your creation. Have you ever thought about why parachutes are often brightly colored? It’s not just for aesthetics; it helps in visibility during flight.Selecting The Suspension Lines
Suspension lines are crucial as they connect the canopy to the payload. Choose a strong, thin string that can withstand tension without breaking. Kite string or fishing line are excellent choices due to their strength and lightweight properties. Ensure the lines are evenly spaced and of equal length to maintain balance during descent. Ask yourself—how do the lines affect the parachute’s stability and descent speed? Experiment with different lengths to see the impact.Picking A Suitable Payload
The payload is what your parachute will carry, and it needs to be chosen carefully. Ideally, select something lightweight yet substantial enough to allow for a controlled descent. Small toys, like action figures or plastic soldiers, are popular choices. Consider the shape and weight of your payload. How might its aerodynamics affect the parachute’s performance? Try different items to see how they influence the flight pattern. This not only improves your parachute but also deepens your understanding of flight dynamics. Gathering these materials is the first exciting step in your parachute-building journey. What creative ideas do you have for customizing your parachute? Let your imagination take flight!
Credit: www.youtube.com
Preparing The Canopy
Preparing the canopy is an essential part of building a toy parachute. The canopy catches air and slows the fall. It needs to be made from lightweight, strong fabric. This section covers cutting the fabric and marking attachment points. Both tasks must be done carefully for the parachute to work well.
Cutting The Fabric
Choose a square or circular piece of fabric. Nylon or thin plastic works best. Use scissors that cut cleanly to avoid frayed edges.
- Measure the size of the canopy based on your parachute design.
- Mark the shape on the fabric using a pencil or fabric chalk.
- Cut along the marked lines slowly and carefully.
- Check the edges to make sure they are smooth and even.
Neat edges help the canopy hold its shape in the air.
Marking Attachment Points
Attachment points connect the strings to the canopy. They must be evenly spaced to balance the parachute.
- Fold the canopy gently to find the center.
- Mark four or eight points equally around the edge.
- Use a ruler to space the points evenly.
- Mark with a pencil or fabric chalk for clear visibility.
Even attachment points keep the parachute stable during flight.
Attaching Suspension Lines
Attaching suspension lines is a key part of building your toy parachute. These lines connect the canopy to the payload and control how smoothly your parachute descends. Getting this step right ensures your parachute opens evenly and floats gently, rather than tumbling or falling too fast.
Measuring And Cutting Lines
First, decide how long your suspension lines need to be. Too short, and the canopy won’t inflate properly; too long, and the parachute might wobble during the fall. A good rule is to measure lines about twice the diameter of your parachute canopy.
Use a ruler or measuring tape to mark your lines, then cut them carefully with sharp scissors. Cutting all lines to the same length is crucial for balance. You can test the lengths by holding the canopy up and letting the lines hang freely to see if they reach the right distance.
Tying Secure Knots
Next, attach the suspension lines to the canopy corners using strong knots. Simple knots like the double overhand or square knot work well because they hold tight without slipping. Make sure to pull each knot firmly to secure it completely.
Double-check your knots by gently tugging on each line. If any feel loose, re-tie them before moving on. A single loose knot can cause your parachute to fail mid-air, so taking time here saves frustration later.
Have you ever noticed how a small knot undone can ruin an entire project? Paying attention to these details can be the difference between a smooth landing and a crash.
Connecting The Payload
Connecting the payload to your toy parachute is a crucial step that determines how well your parachute will perform. This stage requires careful attention to how the lines are attached and how balanced the load is. Getting this right can make the difference between a smooth, gentle descent and a chaotic crash landing.
Attaching Lines To Payload
Start by securely tying each parachute line to the payload. Use strong knots like the double knot or bowline to prevent slipping during flight.
Make sure all lines are the same length to avoid uneven tension. Unequal lines can cause the parachute to tilt or spin, which reduces stability.
Try attaching the lines to a small, lightweight object first to test the strength of your knots. This quick test can save you from frustrating mid-air failures.
Ensuring Balance And Stability
Balance the payload so it hangs evenly from the parachute. If one side is heavier, the parachute might swing wildly or fall faster on that side.
You can check balance by holding the parachute lines and observing how the payload hangs. Adjust by shifting the attachment points or redistributing weight.
Think about how you want your parachute to land. Would a steady, upright landing work best, or do you want it to drift gently? Adjusting balance affects how the parachute moves through the air.
Testing Your Parachute
Testing your toy parachute is the moment where all your effort comes to life. It’s exciting to see how your creation behaves in the air and to find out if it floats gently or falls too fast. Careful testing helps you improve the design and ensures a safe, successful flight every time.
Choosing A Safe Drop Location
Pick an open area free of obstacles like trees, power lines, or sharp edges. A park or a backyard with plenty of space works well. Hard surfaces like concrete can damage your parachute or cause injury, so try to test over grass or sand.
Think about the height from which you’ll drop the parachute. Higher drops give more time to observe, but make sure it’s safe and legal to drop from that height. Always check the weather too; calm days without strong wind provide more consistent results.
Observing Flight And Adjustments
Watch your parachute closely as it falls. Does it float smoothly or wobble side to side? Notice if the canopy opens fully or if it twists during descent.
Use a checklist to track what you see:
- Is the parachute stable or unstable?
- Does it descend too quickly?
- Are the strings tangled or unevenly attached?
Small tweaks like tightening knots or adjusting the canopy shape can make a big difference. Have you tried shortening the strings or using lighter material? Each test gives you clues on how to improve your design.
Troubleshooting Flight Issues
Dealing with flight issues is a common part of building and testing your toy parachute. It’s easy to get frustrated when your parachute doesn’t float smoothly or tears during a drop. But these problems offer valuable clues about what needs adjusting, helping you improve your design and enjoy better flight performance.
Fixing Uneven Descents
If your parachute wobbles or spins as it falls, uneven weight distribution is often the cause. Check that all the suspension strings are the same length and securely attached. Even a slight difference can cause your parachute to tilt or spiral.
Look at the canopy shape too. A canopy that isn’t symmetrical can create uneven air resistance, leading to a shaky descent. You might need to trim edges or reposition the strings to balance the canopy perfectly.
Have you tried dropping your parachute from different heights or in different wind conditions? Sometimes, external factors play a role, but fixing the basics first gives you a better chance of smooth, steady flights.
Repairing Canopy Tears
Canopy tears happen when the material catches on something or experiences a hard landing. Small tears can be patched using clear tape or lightweight fabric glue without adding too much extra weight.
For larger tears, replace the damaged section with a similar material to maintain the parachute’s performance. Avoid using heavy or thick patches that can alter how your parachute catches the air.
Keep a repair kit handy with scissors, tape, and extra fabric. Regularly inspecting your parachute after each flight helps you catch damage early. What’s your go-to fix when your canopy gets hurt?
Creative Variations
Adding creative variations to your toy parachute can turn a simple project into a fun and personalized experience. These tweaks let you test how changes affect flight, while making the parachute uniquely yours. Playing around with decorations and shapes invites curiosity and sparks new ideas.
Decorating The Canopy
Personalize the parachute canopy with bright colors, patterns, or even stickers. Using markers or paint, you can create designs that stand out in the sky. Have you ever noticed how a colorful parachute is easier to spot? This makes watching its descent more exciting.
Try adding reflective tape or glow-in-the-dark stickers for extra visual effects. These small touches do more than decorate—they help you track the parachute during dusk or on cloudy days. What designs do you think would catch your eye first?
Experimenting With Sizes And Shapes
Changing the size and shape of the canopy affects how your parachute falls. Larger canopies slow the fall, while smaller ones drop faster. Try making a square, circle, or even a star-shaped canopy to see which shape floats best.
Cutting the canopy into different shapes can teach you about air resistance and balance. Notice how a circular parachute might spin differently than a square one. How would a triangular parachute behave in the air? Testing these variations makes learning fun and hands-on.

Credit: www.youtube.com
Frequently Asked Questions
What Materials Do I Need To Build A Toy Parachute?
You need lightweight fabric, string, scissors, tape, and a small toy or weight. These items ensure your parachute floats gently and functions properly.
How Do I Attach The Strings To The Parachute Canopy?
Tie each string securely to the corners of the canopy. Ensure knots are tight to keep the parachute stable during descent.
What Is The Best Fabric For A Toy Parachute?
Lightweight, durable fabrics like nylon or plastic work best. They catch air effectively and help the parachute float smoothly.
How Can I Test If My Toy Parachute Works Well?
Drop it from a height and observe its descent. It should float down slowly and land softly without spinning.
Conclusion
Building a toy parachute is fun and simple. It helps you learn about air and gravity. You can try different materials to see what works best. Testing your parachute lets you see how well it flies. This project is great for kids and adults alike.
Keep experimenting and enjoy watching your parachute float down. Small steps lead to big learning. Give it a try and have fun!