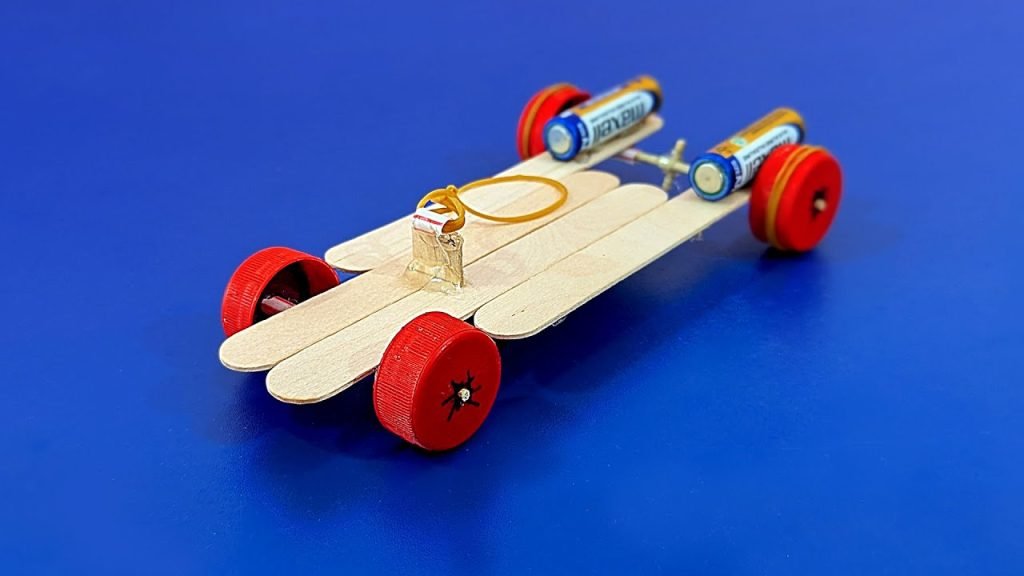
In this guide
Do you want to build a toy race car that zooms across the floor and grabs everyone’s attention? Imagine the thrill of creating something with your own hands that’s fast, fun, and unique.
Whether you’re a beginner or just looking for a simple project, this guide will show you exactly how to make a toy race car step by step. By the end, you’ll have a cool car to play with or show off to your friends.
Ready to get started? Let’s dive in and make your dream toy race car come to life!
Materials Needed
Gather small wooden blocks, wheels, glue, and paint for building your toy race car. Simple tools like scissors and a pencil help with shaping and marking. These basic materials make crafting easy and fun.
Building a toy race car is not only a fun and creative activity, but it’s also an opportunity to learn about engineering and design. Before you get started, having the right materials on hand can make the process smoother and more enjoyable. Knowing what you need will help you plan effectively and avoid unnecessary trips to the store. Plus, it gives you a chance to explore different options and customize your race car to your liking. Let’s dive into the essential materials you’ll need to bring your toy race car to life.Body Material
Your toy race car needs a sturdy body to withstand the speed and excitement of racing. Many choose lightweight materials like cardboard or plastic. If you’re feeling adventurous, consider using wood for a more durable car. Each material has its unique benefits, so think about what suits your racing style.
Wheels And Axles
The wheels are crucial for smooth motion. Opt for rubber wheels for better traction or plastic ones for ease of assembly. Axles can be made from metal or sturdy plastic rods. Ensure they fit securely with your wheels to avoid any mid-race mishaps.
Decorative Elements
Personalize your race car with decorative elements like stickers, paint, or decals. These materials allow you to express creativity and make your car stand out on the track. Remember, a visually appealing car can be just as thrilling as a fast one!
Glue And Fasteners
To keep all parts together, you’ll need reliable glue or fasteners. Hot glue guns offer quick adhesion, while screws and bolts provide a more permanent solution. Choose based on your desired durability and ease of disassembly for future modifications.
Power Source
If you’re building a motorized race car, consider small batteries or solar panels. These components can power your car and add an exciting element to your race. Evaluate the power source options to match the weight and design of your car.
Safety Equipment
Don’t forget safety gear such as goggles and gloves, especially if you’re working with tools or hot glue. Protecting yourself ensures that the building process remains fun and accident-free. Safety should always be your priority when working on any DIY project.
With these materials ready, you’re all set to start building your toy race car. Each component is crucial in creating a unique racing experience. What design will you choose for your car?Choosing The Right Design
Choosing the right design is the first and most important step in building a toy race car. The design affects how fast and stable the car will be. It also impacts how easy the car is to build and customize. Picking a simple, clean design helps beginners start without frustration.
The design should match the materials you have and the tools you can use. Some designs need more precision, while others are more flexible. A good design balances speed, control, and ease of assembly.
Understanding Aerodynamics For Speed
Aerodynamics means how air flows over the car. A smooth, sleek shape reduces air resistance. This helps the car move faster. Designs that are low and narrow usually perform better on straight tracks. Rounded edges and a pointed front can improve airflow.
Choosing A Lightweight Structure
Lighter cars move faster and need less force to start. Use materials like balsa wood or lightweight plastic. Avoid bulky parts that add unnecessary weight. A simple frame with minimal parts helps keep the weight down.
Ensuring Stability And Balance
A stable car stays on the track and corners well. Balance the weight evenly between front and back. Place heavy parts low to keep the car from tipping. Wider wheelbases increase stability, especially on curves.
Designs For Easy Assembly
Choose designs with clear, simple parts. Fewer pieces mean less time and fewer errors during building. Designs that use common tools and materials are best. Avoid overly complex designs that may frustrate beginners.
Customizing For Personal Style
Adding your touch makes the project more fun. Pick a design that allows paint, decals, or small changes. Custom parts like spoilers or fins can improve looks and performance. Keep changes simple to avoid hurting speed or stability.
Cutting And Shaping The Parts
Cutting and shaping the parts is a key step in building a toy race car. This stage turns raw materials into the exact pieces needed. Accurate cuts ensure the car fits together well and runs smoothly.
Start by preparing the work surface. Clear space and gather all tools. Use a ruler and pencil to mark precise lines on wood or plastic. Clear marks help make straight cuts.
Choosing The Right Tools
Select tools based on the material you use. For wood, a small saw or craft knife works best. For plastic, use a sharp utility knife or scissors. Sandpaper smooths rough edges after cutting.
Measuring And Marking Parts
- Measure parts twice for accuracy.
- Use a fine-tip pencil for clear lines.
- Mark both sides to guide cutting.
Clear markings reduce mistakes and save time.
Cutting Techniques For Safety And Precision
- Cut slowly and steadily to avoid slips.
- Hold the material firmly while cutting.
- Keep fingers clear of the blade.
- Wear safety goggles to protect eyes.
Shaping And Smoothing Edges
Use sandpaper or a file to shape parts. Round off sharp corners for safety. Smooth edges improve the car’s look and performance.

Credit: www.amazon.ca
Assembling The Car Body
Assembling the car body is where your toy race car really starts to take shape. It’s a hands-on process that lets you see your vision come alive. The key is to stay patient and precise, making sure each part fits perfectly for a sturdy and sleek finish.
Gathering And Organizing Your Materials
Before you start building, lay out all the pieces and tools you need. This includes the car body panels, screws, glue, paint, and sandpaper. Having everything organized helps you avoid frustration and keeps your workspace tidy.
Think about how each part connects—do the panels have pre-drilled holes? Are the edges smooth? Taking these details into account now saves time later.
Fitting And Securing The Panels
Start by aligning the main body panels together without fastening them. This helps you spot any gaps or misalignments early. Adjust the parts until they fit snugly.
Use small clamps or gentle pressure to hold the pieces while you screw or glue them together. Don’t rush this step; a loose panel can affect the whole car’s stability.
Sanding And Smoothing Edges
After assembling the panels, run sandpaper along the edges to smooth out any rough spots. This makes the car look polished and prevents splinters or sharp edges.
Focus on corners and joints—these areas often need extra attention. A smooth finish not only improves appearance but helps paint stick better.
Customizing The Design
Now that the body is assembled and smooth, think about adding your personal touch. You can paint stripes, add decals, or even carve small details for realism.
What colors will make your car stand out on the track? Experiment with different patterns and textures to find a look that’s uniquely yours.
Adding Wheels And Axles
Adding wheels and axles is a key step in building a toy race car. Wheels let your car roll smoothly. Axles hold the wheels in place and allow them to turn. Together, they help your car move fast and straight.
Choosing the right wheels and axles affects how well your car drives. The wheels need to be light but strong. The axles must be straight and fit tightly. This part of the build needs care and patience.
Choosing The Right Wheels
Select wheels that fit your car size. Plastic or wooden wheels work well for toy cars. Wheels should be smooth to reduce friction. Bigger wheels can speed up the car, but they may be less stable.
- Check that wheels spin easily.
- Make sure wheels are balanced and not wobbly.
- Consider the weight of the wheels for better speed.
Preparing The Axles
Axles are usually thin rods or sticks. Use metal or wooden rods that are straight and smooth. Cut the axles slightly longer than the car’s width. This gives room for wheels and prevents rubbing on the body.
- Sand rough edges to avoid wheel damage.
- Test fit wheels on axles before fixing them.
- Ensure axles rotate freely but stay secure.
Attaching Wheels To Axles
Slide each wheel onto an axle carefully. The fit should be snug but allow easy rotation. Use glue or small washers to keep wheels from sliding off. Avoid over-gluing to keep wheels turning smoothly.
- Place a drop of glue on the axle ends.
- Add washers or small caps for extra hold.
- Spin wheels to check smooth movement before glue dries.
Installing Axles On The Car Body
Attach axles securely under the car body. Use slots or small holes to hold axles in place. Ensure axles are parallel and level for straight rolling. Test the car on a flat surface to check wheel alignment.
- Use glue or small brackets to fix axles.
- Double-check axle alignment before glue sets.
- Adjust if wheels touch the car body or drag on the ground.
Decorating Your Race Car
Decorating your toy race car brings it to life. It shows your style and makes your car unique. This part is fun and creative. You can use colors, stickers, and designs to make it stand out.
Choosing The Right Paint
Pick paint that sticks well to wood or plastic. Use bright colors for a sporty look. Spray paint works fast and covers evenly. Let each layer dry before adding another.
Adding Stickers And Decals
Stickers add cool details without much effort. Look for racing numbers, flames, or checkered flags. Place them carefully to avoid wrinkles. Press down firmly for a smooth finish.
Using Markers And Pens
Markers let you draw fine lines and small shapes. Use permanent markers for lasting color. Draw racing stripes, logos, or your name. Take your time for neat designs.
Applying Clear Coat For Protection
A clear coat protects your paint and stickers. It gives a shiny, smooth finish. Spray a thin layer and let it dry well. This makes your car look polished and strong.
Adding Personal Touches
- Glue small accessories like tiny spoilers or headlights.
- Use glitter for sparkle effects.
- Attach lightweight materials like paper or fabric for texture.
These small touches make your car truly one of a kind.
Testing The Race Car
Testing the race car is an exciting part of building it. This phase shows how well your design works. You can spot problems and make your car faster. Careful testing helps improve performance and durability.
Preparing The Test Track
Choose a smooth, flat surface for testing. A wooden floor or a long table works well. Avoid rough or uneven areas that slow the car down. Mark a start and finish line to measure distance clearly.
Checking The Car’s Speed
Push the car gently and watch how fast it moves. Try different push strengths to see how the car reacts. Note the speed and how far it travels on each push. This helps find the best balance between power and control.
Observing The Car’s Stability
Watch if the car stays straight or veers off course. Check if wheels spin freely without wobbling. A stable car runs faster and smoother. Adjust wheel alignment or weight distribution if needed.
Measuring Performance With A Stopwatch
Use a stopwatch to time how long the car takes to cross the track. Run several tests for accurate results. Record each time to compare improvements after adjustments.
Identifying Areas For Improvement
Look for parts that slow the car down or break easily. Listen for strange noises that may mean friction or loose parts. Fix these issues before the final race to boost performance.

Credit: www.amazon.ca
Troubleshooting Common Issues
Building a toy race car is exciting, but it’s normal to hit snags along the way. Troubleshooting common issues helps you keep your project on track and ensures your car performs at its best. Let’s look at some typical problems and how to fix them effectively.
Checking Wheel Alignment
Misaligned wheels make your car veer off course or slow down. You can spot this if your car doesn’t run straight or feels unstable. Adjust the wheels by gently bending the axles or repositioning the wheels until your car rolls smoothly in a straight line.
Improving Motor Performance
If your motor feels weak or stops suddenly, check the battery connections first. Loose wires or low battery power often cause this issue. Clean the contacts and replace batteries if needed to get a stronger, consistent motor run.
Fixing Body And Frame Issues
Loose parts on the car’s body or frame can reduce speed and cause wobbling. Tighten screws and use glue to secure any loose pieces. A sturdy frame not only looks better but also improves your car’s overall stability.
Addressing Friction Problems
Too much friction slows your car down significantly. Inspect the moving parts like axles and wheels for rough spots or debris. Lightly sanding or applying a small amount of lubricant can make a big difference in speed and smoothness.
Ensuring Proper Weight Distribution
Weight imbalance affects your car’s handling and speed. If your car tips or feels uneven, redistribute the weight by adding or shifting small weights like washers or clay. Test different placements until your car runs balanced and steady.

Credit: www.youtube.com
Frequently Asked Questions
What Materials Are Needed To Build A Toy Race Car?
You need lightweight wood or plastic, small wheels, axles, glue, and paint. Optional items include decals and a small motor for speed.
How Do I Make A Toy Race Car Fast?
Use lightweight materials and smooth wheels. Ensure axles are aligned well to reduce friction and consider adding a small motor.
Can Kids Safely Build A Toy Race Car?
Yes, with adult supervision. Use child-friendly tools and non-toxic materials. Simple designs are best for young builders.
What Tools Are Essential For Toy Race Car Building?
Basic tools include a hobby knife, sandpaper, glue gun, small screwdriver, and paintbrushes. These help shape and assemble parts precisely.
Conclusion
Building a toy race car is fun and rewarding. You learn new skills while creating something cool. Each step helps your car move faster and look better. You can try different designs and parts to see what works best. This project also teaches patience and creativity.
Keep practicing, and your cars will improve every time. Enjoy the process, and share your cars with friends or family. Simple tools and a little time can make a great toy. Start building today and have fun racing!