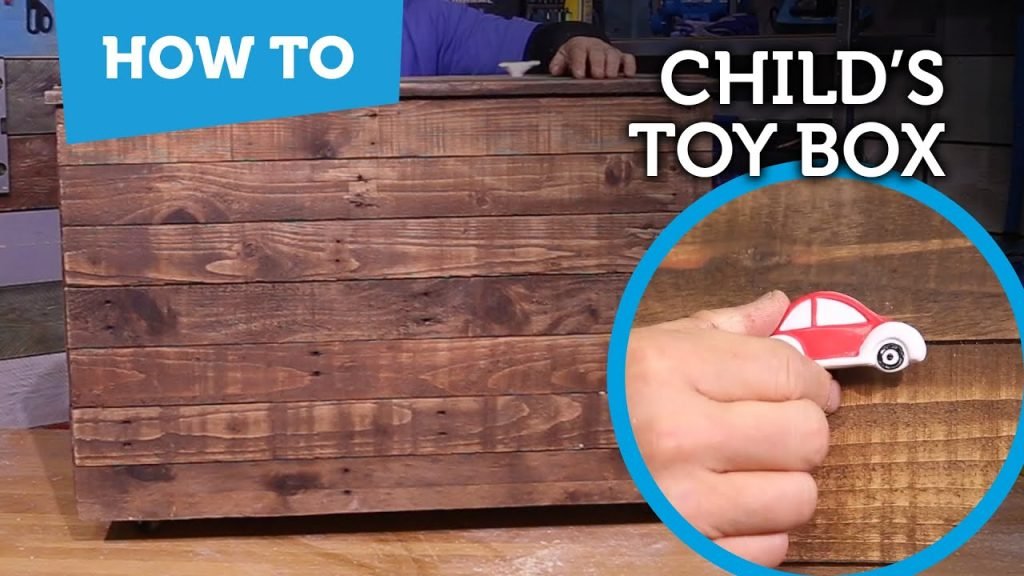
In this guide
Looking for a fun and practical project that adds charm to your home? Building a toy box out of pallets is easier than you think—and it gives you a unique, sturdy storage solution that your kids will love.
Imagine having a custom-made toy box that not only keeps your space tidy but also brings a rustic touch to your room. In this guide, you’ll discover simple steps and expert tips to transform ordinary pallets into a beautiful, functional toy box.
Ready to create something special with your own hands? Let’s dive in!

Credit: www.facebook.com
Materials Needed
Building a toy box from pallets is a rewarding project. Gathering the right materials ensures a smooth process. Use quality items to make a safe and sturdy toy box.
Wooden Pallets
Select pallets with solid, smooth wood. Avoid pallets treated with harmful chemicals. Look for ones that are clean and free from cracks or splinters.
Measuring Tools
Use a tape measure and a carpenter’s square. These tools help you get precise cuts and angles. Accurate measurements make assembly easier.
Cutting Tools
A handsaw or power saw works best for cutting wood. Make sure blades are sharp for clean cuts. Sandpaper or a power sander smooths rough edges after cutting.
Fasteners
Use wood screws or nails to join pieces. Screws offer better hold and are easier to remove. Keep a screwdriver or drill handy for fastening.
Paint Or Wood Finish
Choose non-toxic paint or wood finish safe for children. Paint adds color and protects the wood. A clear finish keeps the natural look while sealing the wood.
Safety Gear
Wear gloves to protect your hands from splinters. Use safety glasses to guard your eyes from dust and debris. A dust mask helps when sanding or cutting wood.

Credit: www.tiktok.com
Selecting The Right Pallets
Selecting the right pallets is key to building a sturdy toy box. The quality and type of pallets affect the final look and strength. Not all pallets are safe or suitable for a children’s toy box. Choose pallets that are clean, strong, and free from chemicals. This ensures a safe and durable toy box for your child’s use.
Checking Pallet Condition
Look for pallets without cracks, splinters, or broken boards. Avoid pallets with signs of rot or insect damage. Pallets in good condition make the building process easier and safer. Rough or damaged pallets require extra sanding and repair.
Choosing The Right Wood Type
Softwoods like pine are easy to work with and light. Hardwoods like oak are very strong but harder to cut. Select wood that fits your skill level and the toy box design. Avoid pallets made of treated wood to keep the toy box safe.
Identifying Safe Pallets
Check for stamps or markings on the pallet. Look for “HT” which means heat-treated and safe. Avoid pallets marked with “MB” for methyl bromide, a toxic chemical. If unsure, opt for pallets without chemical treatments.
Size And Shape Considerations
Choose pallets with boards wide enough for your toy box panels. Uniform size helps in creating a neat and even box. Avoid pallets with missing or uneven boards that complicate assembly.
Cleaning And Preparing Pallets
Clean pallets thoroughly before use. Remove dirt, nails, and staples carefully. Sand the surface smooth to protect little hands from splinters. Proper preparation improves the look and safety of the toy box.
Preparing The Pallets
Before you start building your toy box, preparing the pallets is crucial. This stage sets the foundation for a sturdy and safe finished product. Taking the time to clean, sand, and remove any hazardous elements will make your project smoother and more enjoyable.
Cleaning And Sanding
Start by giving the pallets a good cleaning. Dirt, dust, and old paint can hide underneath the surface, affecting the look and safety of your toy box.
Use a stiff brush and soapy water to scrub the wood thoroughly. Let the pallets dry completely before moving on to sanding.
Sanding smooths out rough areas and splinters that could hurt little hands. A power sander speeds up the job, but sanding by hand gives you more control over delicate spots.
Removing Nails And Staples
Old pallets often have nails or staples sticking out, which can be dangerous and interfere with assembly.
Use a claw hammer or pry bar to carefully pull out all nails and staples. Don’t rush this step—missing a nail could cause injury later on.
Check the pallets thoroughly, including edges and corners. Have you ever felt a splinter or caught your clothing on a hidden nail? Taking extra time now prevents that from happening to your kids.
Designing The Toy Box
Designing the toy box is the first step to a successful pallet project. A good design helps you plan the size and shape. It also makes building easier and faster. Think about the space where the toy box will go. Consider how many toys it should hold. A clear design keeps the project organized and enjoyable.
Choosing A Size
Decide the toy box size based on the room and toy amount. Measure the space where the box will sit. Think about the height, width, and depth. A box too big can crowd the room. Too small means toys won’t fit well. Choose a size that fits the room and holds enough toys.
Creating A Blueprint
Draw a simple blueprint before building. A blueprint shows all parts and measurements. Use a pencil and paper or a digital tool. Include all sides, the base, and the lid. Mark where each pallet board will go. This plan helps avoid mistakes and saves time during building.
Assembling The Base
Assembling the base of your toy box is crucial for stability and durability. A solid foundation supports the entire structure, making it safe for children and long-lasting. The base must be level and strong to hold the weight of toys without wobbling.
Building The Frame
Start by selecting pallet boards that are sturdy and free from cracks. Arrange four boards in a rectangular shape to form the outer edges of the base. Use a carpenter’s square to make sure corners are right-angled. This ensures the frame is perfectly square.
Next, add support beams inside the rectangle. Place these beams evenly spaced across the frame. They will hold the bottom panels and provide extra strength. Use wood screws to attach the beams securely to the outer edges.
Securing The Structure
Use screws instead of nails for a stronger hold. Drill pilot holes before screwing to avoid splitting the wood. Tighten all screws firmly but avoid over-tightening, which can damage the wood.
Check the frame for any loose parts. Shake it gently to test stability. Reinforce any weak joints with extra screws or small metal brackets. This step ensures the base stays sturdy during use.
Adding The Sides
Adding the sides to your pallet toy box shapes its structure and provides storage space. This step requires careful alignment and secure attachment. Properly adding the sides ensures the box looks neat and functions well. Focus on fitting the panels smoothly and making the box sturdy.
Attaching The Panels
Start by measuring each side panel to fit the box frame. Sand down rough edges for a clean finish. Use screws or nails to attach the panels firmly to the pallet base. Work slowly to keep the panels straight and flush. Check alignment often to avoid gaps or uneven edges.
- Place the panel against the base
- Secure with screws at each corner
- Add extra screws along the edges
- Repeat for all sides
Ensuring Stability
Stability keeps the toy box safe and durable. Reinforce corners with wooden braces or metal brackets. Tighten all screws to prevent wobbling. Test the box by gently pressing on the sides. Fix any loose spots before moving on. Strong sides will support the lid and hold toys securely.
Constructing The Lid
Constructing the lid is a crucial part of building your pallet toy box. The lid protects toys from dust and keeps the box looking neat. It also needs to open and close smoothly. Choosing the right hinges and installing the lid correctly ensures durability and ease of use.
Choosing Hinges
Select hinges that fit the size and weight of the lid. Standard butt hinges work well for most pallet lids. They are strong and easy to install. Consider using stainless steel or brass for rust resistance. Soft-close hinges add safety by preventing the lid from slamming shut. Choose hinges that match your skill level and budget.
Installing The Lid
Start by aligning the lid on top of the toy box frame. Make sure it fits evenly on all sides. Mark the hinge positions on both the lid and box. Pre-drill holes to avoid splitting the wood. Attach the hinges to the lid first, then secure them to the box. Check the lid opens and closes smoothly. Adjust the hinges if needed for perfect alignment.

Credit: www.facebook.com
Finishing Touches
Finishing touches make your pallet toy box look complete and protect it. They improve durability and add style. Spend time on these details to create a safe, attractive storage solution for toys.
Painting Or Staining
Choose paint or stain to protect the wood and add color. Paint offers bright, solid colors. Stain shows the wood’s natural grain and texture. Use non-toxic, child-safe options to keep kids safe.
Sand the box lightly before applying paint or stain. This helps the finish stick better. Apply thin coats and let each dry fully. Two or three coats usually work well. Finish with a clear sealant for extra protection.
Adding Handles
Handles make the toy box easier to move. Choose handles that fit your style and are strong enough for frequent use. Wood, metal, or rope handles work well.
- Attach handles on both sides for balance.
- Use screws or bolts for secure fixing.
- Round edges prevent scratches and injuries.
Handles add function and a nice decorative touch. They make lifting and carrying simple for adults and kids alike.
Safety Tips
Safety plays a big role in building a toy box from pallets. It keeps children safe while they enjoy the box. Careful attention to safety helps avoid accidents and injuries.
Check the pallets for any hazards before starting. Clean and prepare the wood well. Use the right tools and protective gear during the build. Follow safety tips to make a sturdy, safe toy box.
Avoiding Sharp Edges
Check all pallet boards for splinters and rough spots. Sand the edges smooth using sandpaper or an electric sander. Round off corners to prevent cuts and scrapes. Remove any nails or staples that stick out. Use wood filler to cover holes or cracks. A smooth surface makes the toy box safe for kids to touch and play around.
Ensuring Structural Integrity
Inspect the pallet wood for cracks or weak spots. Use strong screws and nails to join pieces securely. Reinforce corners with metal brackets or extra wood blocks. Test the toy box for wobbling or loose parts. Make sure the lid opens and closes easily without sticking. A firm structure prevents collapse or accidents while using the box.
Frequently Asked Questions
How Do I Choose The Best Pallets For A Toy Box?
Select pallets that are sturdy, clean, and free from chemicals. Look for smooth wood with minimal cracks. Avoid pallets treated with harmful chemicals to ensure safety for children’s toys.
What Tools Are Needed To Build A Pallet Toy Box?
You’ll need a saw, hammer, nails or screws, sandpaper, measuring tape, and a drill. These basic tools help cut, assemble, and finish the toy box efficiently.
How Do I Make The Toy Box Safe For Kids?
Sand all surfaces thoroughly to remove splinters. Use non-toxic paint or sealant. Ensure no sharp edges or loose nails remain to keep it child-friendly.
Can I Customize The Toy Box Design Easily?
Yes, pallets offer flexible design options. You can paint, stain, or add decorations. Customize size and compartments to suit your storage needs perfectly.
Conclusion
Building a toy box from pallets is a fun and useful project. It saves money and helps recycle wood. You can customize the size and look to fit your space. The steps are simple and easy to follow. You only need basic tools and materials.
Making your own toy box gives a sense of pride and joy. Try it yourself and enjoy a neat storage solution. Your kids will love having a special place for their toys. Give it a try and see the difference it makes.