In this guide
Are you looking for a fun and creative way to keep yourself or your kids busy? Making your own craft kit is easier than you think, and it gives you everything you need right at your fingertips.
Imagine opening a box filled with colorful supplies, ready to spark your imagination anytime you want. In this guide, you’ll discover simple steps to create a personalized craft kit that fits your style and interests perfectly. Keep reading, and soon you’ll have a go-to collection that turns every craft project into a joyful experience.

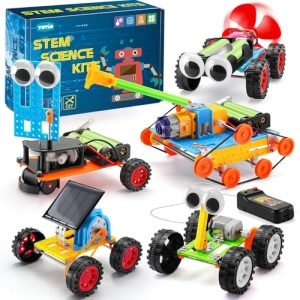
Credit: www.amazon.com
Choosing The Right Craft Kit
Choosing the right craft kit sets the foundation for a fun and successful project. The perfect kit matches the crafter’s interests, skills, and age. It should inspire creativity without causing frustration. Understanding the different types and the skill level helps pick the best fit.
Types Of Craft Kits
Craft kits come in many varieties. Some popular types include:
- Painting kits with brushes and colors
- Jewelry-making kits with beads and strings
- Knitting or crochet kits with yarn and needles
- Model building kits with pieces and glue
- Paper craft kits with scissors and decorative paper
Each type offers a unique way to create. Choose one based on what interests the crafter most.
Skill Levels And Age Appropriateness
Craft kits usually indicate the skill level needed. Levels range from beginner to advanced. Beginners need simple instructions and fewer tools. Advanced kits may have complex steps and many parts.
Age recommendations guide safe and suitable projects. Younger children benefit from kits with big parts and easy steps. Older kids and adults can handle smaller pieces and detailed work.
Matching the kit’s difficulty to the user’s skill keeps crafting enjoyable. It helps avoid boredom or frustration. Always check age and skill details before buying a kit.
Essential Materials And Tools
Gathering the right materials and tools sets the foundation for a successful craft kit. Knowing what you absolutely need versus what you can add later helps you stay organized and focused. It also makes your crafting experience smoother and more enjoyable.
Basic Supplies Needed
Start with essentials that fit most craft projects. These are items you’ll use repeatedly and form the core of your kit.
- Scissors:Choose a pair that cuts paper, fabric, and light cardboard easily.
- Glue:A good all-purpose glue stick and a bottle of liquid craft glue cover most bonding needs.
- Colored Paper:Include plain and patterned sheets for versatility.
- Markers and Crayons:These add color and detail to your projects.
- Ruler:Helps measure and cut straight lines precisely.
- Tape:Clear tape or masking tape can be handy for quick fixes.
Think about what you grab first when you start crafting—those are your must-haves.
Optional Add-ons For Creativity
Once you have the basics, consider adding extras that spark more creativity. These materials let you experiment and personalize your projects.
- Stickers and Washi Tape:Fun for decoration and quick embellishments.
- Sequins and Beads:Add texture and a bit of sparkle.
- Paints and Brushes:Watercolors or acrylics let you add depth with color.
- Stamp Pads and Stamps:Easy way to create repeating patterns or motifs.
- Yarn or Ribbon:Great for tying, weaving, or adding dimension.
Ask yourself: What materials inspire you the most? Adding those will make your kit uniquely yours and encourage you to keep crafting.
Step-by-step Crafting Process
Creating a craft kit requires a clear and simple process. Each step builds on the last to ensure success. Following a step-by-step crafting process helps keep everything organized and fun. This way, anyone can enjoy making crafts without confusion or stress.
Preparing Your Workspace
Choose a clean, flat surface with good lighting. Gather all your materials before starting. Keep tools like scissors, glue, and markers within reach. Use containers or trays to hold small items. Protect your workspace with newspaper or a plastic mat. A tidy area helps focus and prevents mistakes.
Following Instructions
Read the instructions carefully from start to finish. Understand each step before beginning the craft. Use simple phrases and visuals to guide you. Follow the order of steps exactly for best results. Take your time to avoid rushing. Double-check your work as you go along.
Troubleshooting Common Issues
Some problems might occur during crafting. Glue may not dry fast enough or pieces might not fit well. Stay calm and try these solutions:
- Use a small amount of glue to avoid mess.
- Press pieces firmly and hold for a few seconds.
- Let glue dry completely before moving on.
- Trim uneven edges with scissors carefully.
- Ask for help if you feel stuck.
Fixing mistakes is part of the learning process. Patience and practice improve your craft skills over time.

Credit: www.youtube.com
Enhancing Your Crafting Experience
Enhancing your crafting experience means making your craft kit truly yours. It’s about going beyond basic supplies to create something that reflects your style and sparks your creativity every time you open the kit. Small changes can make a big difference in how inspired and motivated you feel.
Adding Personal Touches
Personal touches make your craft kit feel unique and inviting. Try labeling your containers with fun names or colorful tags to keep things organized and visually appealing. Adding a small notebook with your favorite quotes or doodles can also inspire you when you’re stuck.
Think about including tools or materials that hold special meaning. Maybe a brush you bought during a memorable trip or scraps of fabric from a loved one’s old shirt. These items turn your kit into a collection of memories, not just supplies.
Incorporating Mixed Media
Mixing different materials adds texture and interest to your projects. Don’t limit yourself to one type of craft supply—combine paper, fabric, paint, and even natural elements like leaves or twine. This variety challenges you to experiment and develop new skills.
Consider adding a section in your kit for unexpected items like old magazines, buttons, or stamps. You might be surprised how these can spark fresh ideas or add a creative twist to your work. What new combinations can you discover by blending different media?
Crafting Safety Tips
Crafting can be a fun and rewarding experience, but safety should always be your top priority. Without the right precautions, even simple projects can lead to unexpected accidents. Paying attention to safety tips helps you enjoy your creativity without interruptions or injuries.
Handling Tools Safely
Sharp scissors, hot glue guns, and cutting knives are common in craft kits. Always hold tools firmly and cut away from your body to avoid slips. If you’re working with kids, supervise their tool use closely and choose age-appropriate options.
Have you ever accidentally poked yourself with a needle or cut a fingertip? That moment reminds us why storing tools properly matters. Keep blades capped and tools out of reach when not in use to prevent accidents.
Maintaining A Clean Work Area
Messy spaces lead to misplaced tools and accidental injuries. Clear your work surface before starting and tidy up scraps and sharp objects as you go. This habit reduces distractions and keeps your hands free to focus on crafting.
Think about how many times you’ve lost a tiny bead or pin because of clutter. A clean area prevents frustration and helps you stay organized. Regularly check your workspace for hazards like spills or tangled cords that could cause slips or trips.
Sharing And Displaying Your Crafts
Sharing and displaying your crafts brings joy and pride. It lets others see your creativity and effort. Displaying your work can inspire friends and family. It also encourages you to keep creating. Presenting crafts nicely adds value to your handmade items.
Photographing Your Creations
Good photos make your crafts stand out online or in a portfolio. Use natural light to show true colors. Avoid harsh shadows or bright spots. Capture your craft from different angles. A plain background keeps attention on your item. Use close-ups to highlight details and textures.
- Use a clean, simple background.
- Take photos in daylight near a window.
- Focus on the main features of your craft.
- Try different angles for variety.
- Edit photos lightly to enhance colors.
Showcasing In Your Home
Display crafts where you and guests can enjoy them. Choose places with good lighting and space. Group similar items to create a theme. Use shelves, tables, or wall hangers for variety. Change displays often to keep your space fresh. Personal touches make your craft display unique.
- Place crafts on shelves or side tables.
- Use frames or shadow boxes for small items.
- Create a dedicated craft corner or wall.
- Mix crafts with plants or books for interest.
- Rotate items to highlight new creations.
Exploring New Craft Kit Ideas
Finding fresh ideas for craft kits can keep your projects exciting and your creativity flowing. Trying new themes or materials can open up surprising possibilities. Think about what would make your craft kit unique and fun to use.
Trending Crafts
Look at what’s popular right now in the crafting world. Items like resin art, macramé, or DIY candles often catch people’s attention. You might want to test a few trending crafts yourself to see if they fit your style and audience.
Do you notice any patterns in what people are making? Sometimes simple crafts with a twist gain a lot of interest. Adding seasonal or holiday themes can also make your kits more appealing.
Sourcing Inspiration
Inspiration can come from anywhere—nature, books, or even everyday objects around you. I once found a great idea just by observing patterns in my kitchen tiles. Try to keep a notebook or digital list of ideas as they come to you.
Don’t hesitate to mix and match ideas from different sources. What unusual combination can you create? This approach often leads to the most memorable craft kits.

Credit: www.rd.com
Frequently Asked Questions
What Materials Are Needed To Make A Craft Kit?
To make a craft kit, gather basic supplies like scissors, glue, paper, markers, and tape. Include items for specific crafts, such as beads or fabric. Choose versatile materials that encourage creativity and suit all skill levels. Organize them neatly in a container or box for easy use.
How Do I Choose Crafts For A Beginner’s Kit?
Select simple, fun projects that require minimal tools. Focus on crafts with clear instructions and quick results. Avoid complex techniques or hard-to-find materials. Choose activities that build confidence and allow creativity, such as paper crafts, simple sewing, or painting kits.
How Can I Personalize A Craft Kit?
Add unique items based on the recipient’s interests, like themed stickers or colors. Include custom instructions or project ideas. Personal touches make the kit more engaging and meaningful. Tailor materials to their skill level to encourage learning and enjoyment.
Where Should I Store A Homemade Craft Kit?
Store the craft kit in a sturdy container with compartments for organization. Use clear boxes to easily see contents. Keep it in a dry, accessible place to prevent damage. Proper storage ensures materials stay in good condition and ready for use.
Conclusion
Creating a craft kit is simple and fun. Gather basic supplies you enjoy using. Organize materials in a box or bag. Keep your kit ready for any creative moment. This way, you can start crafting anytime. Craft kits also save time and reduce mess.
Try making one today and enjoy your projects more. Small steps lead to great creativity. Your personalized kit makes crafting easy and fun.