In this guide
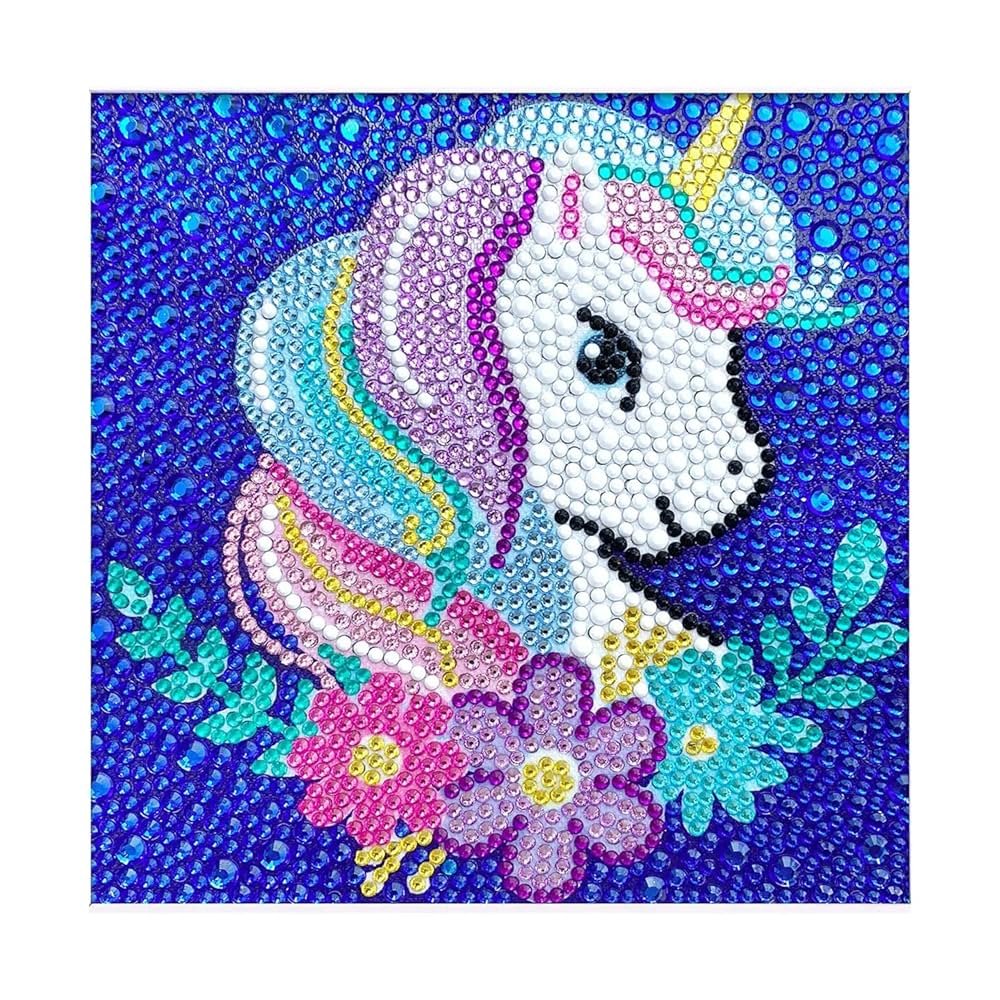
Are you ready to create something truly sparkling with your own hands? The 5D DIY Diamond Painting Craft Kit is an exciting way to bring vibrant colors and shining diamonds to life in a beautiful design.
Whether you’re new to this craft or looking for a fun project to relax and unwind, this guide will show you exactly how to get started and finish your masterpiece with ease. Keep reading, and discover how simple steps can turn your creativity into a dazzling work of art you’ll be proud to display.
Your sparkling adventure begins here!
What Is 5d Diamond Painting?
5D diamond painting is a fun and creative craft. It combines painting and mosaic art using tiny, shiny diamonds. These diamonds stick to a sticky canvas to create bright, sparkling images. The “5D” refers to the multifaceted diamonds that shine from different angles, adding depth and sparkle.
Origins And Popularity
Diamond painting started in China in the early 2010s. It quickly spread worldwide because it is easy and relaxing. People of all ages enjoy this craft. It helps reduce stress and improves focus. Online shops and craft stores now offer many kits. These kits include everything needed to start diamond painting at home.
Key Features
- Uses small resin rhinestones called diamonds
- Sticky canvas with printed design and symbols
- Diamonds placed with a special pen tool
- Creates a shimmering, mosaic-like artwork
- Variety of designs from simple to detailed
- Easy to learn and suitable for beginners
Essential Tools And Materials
Starting your 5D DIY diamond painting project means getting familiar with the right tools and materials. These essentials make the process smoother and more enjoyable. They also help you achieve that beautiful, sparkling finish you’re aiming for.
Diamond Applicator Pen
The diamond applicator pen is your main tool for placing each tiny gem. It’s designed to hold the diamonds securely so you can drop them precisely on the canvas. A good pen feels comfortable in your hand and reduces strain during long crafting sessions.
Many kits include a pen with a wax tip that helps pick up diamonds easily. If your pen isn’t gripping well, adding a bit of extra wax can improve its hold. Have you ever struggled with diamonds slipping off? This little adjustment can save you lots of frustration.
Multi-faceted Diamonds
These tiny, shiny diamonds are the heart of your craft. Their multi-faceted design catches the light from different angles, giving your painting a dynamic sparkle. The quality and color accuracy of the diamonds affect the final look, so check your kit’s diamonds before starting.
Diamonds usually come in plastic bags labeled with numbers matching the canvas chart. Organizing them in small containers or trays can speed up your work and prevent mix-ups. How much do you think the sparkle changes when you use high-quality diamonds?
Adhesive Canvas
The adhesive canvas is where all your diamonds will stick. It has a printed pattern covered by a protective film that you peel back as you work. The sticky surface holds the diamonds firmly but allows repositioning if needed.
Make sure to keep the protective film on when you’re not working to avoid dust and dirt sticking to the adhesive. Also, flatten your canvas on a hard surface to keep your work neat. Have you noticed how a clean workspace affects your crafting flow?
Choosing The Right Design
Choosing the right design for your 5D DIY diamond painting craft kit shapes your crafting experience. The design influences your enjoyment and the final artwork’s beauty. Select a design that matches your interests and skill level. This choice keeps the project fun and rewarding. Consider the time you want to spend and the detail you prefer. A well-chosen design makes your craft relaxing and satisfying.
Skill Levels And Complexity
Designs vary from simple to complex. Beginners should pick easy patterns with fewer colors. These designs finish faster and build confidence. Intermediate crafters can try medium complexity with more details. Advanced designs include many colors and small diamonds. These require patience and steady hands.
Check the pattern size and diamond count before choosing. Small designs suit quick projects. Large, detailed designs take more time but look impressive.
Popular Themes And Patterns
Popular themes fit many tastes and styles. Nature scenes like flowers, animals, and landscapes are common choices. They bring calm and beauty to your space. Abstract patterns offer creativity and color fun. Portraits and famous art copies attract art lovers.
- Floral designs brighten rooms and inspire peace.
- Animal themes add charm and warmth.
- Landscape scenes create a relaxing vibe.
- Abstract art invites imagination and color play.
- Portraits connect with emotions and stories.

Credit: www.amazon.ca
Setting Up Your Workspace
Creating a perfect workspace helps make your 5D DIY diamond painting enjoyable. The right setup reduces mistakes and keeps you focused. A clean and well-lit area improves your crafting experience. Comfort and organization keep your hands steady and your mind calm. Let’s explore how to prepare your workspace for success.
Lighting And Comfort
Good lighting is essential for diamond painting. Natural light is best, but a bright desk lamp works well too. Avoid harsh shadows or glare on your canvas. Place your light source so it shines directly on your work area.
Comfort matters as well. Choose a chair that supports your back. Sit at a table with enough space for your tools and canvas. Keep your posture straight to avoid strain. Take short breaks to rest your eyes and hands.
Organizing Materials
Organize your diamond painting tools before starting. Sort diamonds by color using small containers or trays. Label each section to find colors quickly. Keep your pen, wax pad, and tweezers close at hand.
Use a flat surface to hold your canvas steady. Clear extra items that may clutter your space. A tidy area helps you work faster and reduces stress. Arrange your materials so everything is easy to reach.
Step-by-step Guide To Crafting
Crafting your 5D DIY diamond painting is a rewarding process that combines creativity with patience. Taking it step-by-step helps you avoid mistakes and ensures your artwork shines brilliantly. Let’s walk through the essential stages that will make your diamond painting experience smooth and enjoyable.
Preparing The Canvas
Start by carefully unrolling your canvas on a flat surface. Make sure it’s free of dust or wrinkles that could interfere with placing the diamonds.
Check the canvas symbols closely—each corresponds to a specific diamond color. Organizing your diamonds by these symbols before you begin saves you time and frustration later.
Have you noticed how much easier it is to work when everything is neatly arranged? Use small containers or trays to keep diamonds sorted and accessible.
Applying Diamonds
Peel back a small section of the protective film on the canvas to reveal the sticky surface beneath. Avoid removing the entire covering at once to prevent dust from sticking.
Use the applicator tool included in your kit to pick up diamonds. Press them gently but firmly onto the corresponding symbols on the canvas.
Patience is key here. You might want to start from the top and work your way down to avoid smudging your work. Notice how each diamond adds depth and sparkle?
Finishing Touches
Once all diamonds are placed, cover your painting with parchment paper and press down gently using a flat object. This step secures the diamonds firmly to the canvas.
Consider framing your masterpiece to protect it from dust and damage. How satisfying will it be to display your handiwork for everyone to admire?
Remember, the finishing touches not only preserve your art but also highlight the detailed effort you invested in every diamond.

Credit: www.amazon.ca
Tips And Tricks For Success
Success in 5D DIY diamond painting comes with some useful tips and tricks. These help you enjoy the process and create beautiful art. Patience and care are key to avoid frustration and mistakes. Follow simple guidelines to keep your work neat and bright. Small steps make a big difference in your final piece.
Maintaining Patience
Diamond painting requires calm and steady hands. Work in small sections to avoid feeling overwhelmed. Take regular breaks to rest your eyes and fingers. Focus on one color at a time to keep your mind clear. Enjoy the relaxing rhythm of placing each diamond carefully.
Remember, the art grows slowly but surely. Celebrate small progress to stay motivated. Patience turns tiny beads into a stunning picture.
Avoiding Common Mistakes
- Keep your workspace clean and organized.
- Check diamond colors before placing them.
- Use the right tools for picking and placing diamonds.
- Do not peel off too much of the protective film at once.
- Press diamonds gently but firmly to ensure they stick well.
- Store extra diamonds in labeled containers to avoid loss.
- Match the symbols on the canvas carefully with diamond colors.
These simple steps prevent errors and save time. Careful handling keeps your artwork neat and lasting longer.
Displaying Your Finished Art
Displaying your finished 5D DIY diamond painting craft kit is the moment where your hard work truly shines. It’s not just about showing off your creation but also about protecting it and making it a lasting part of your space. How you choose to present your art can enhance its beauty and make it a conversation starter in your home or office.
Framing Options
Framing your diamond painting adds a polished, professional look. You can select a simple frame to keep the focus on the vibrant colors and sparkling diamonds. Clear glass or acrylic frames protect your artwork from dust and damage while allowing the shine to catch the light.
If you want to avoid glare, consider using non-reflective glass. For a more casual look, use a shadow box frame, which gives depth and space between the painting and the glass. Don’t forget to choose a frame size that fits your painting perfectly—too large or too small can distract from your masterpiece.
Creative Display Ideas
Why limit yourself to traditional framing? You can get creative with how you display your diamond painting. Try mounting it on a canvas or wooden board and hanging it with decorative clips or washi tape for a fun, modern look.
Another idea is to create a gallery wall by mixing your diamond painting with photos, prints, or other crafts. This adds personality to your space and highlights your creative side. Have you thought about lighting? Adding LED strip lights around your painting can make the diamonds sparkle even more at night.
Think about rotating your display regularly. This keeps your space fresh and lets you enjoy different pieces without clutter. Which display idea fits your style best?
Exploring Advanced Techniques
Once you’ve mastered the basics of 5D DIY diamond painting, it’s time to push your creativity further. Advanced techniques let you add a unique touch to your projects, making them truly your own. These methods challenge your skills and open up new ways to enjoy this craft.
Customizing Designs
Customizing your diamond painting design means taking control over every detail. You can start by altering the color palette to fit your personal style or match your home decor better. Swapping out a few colors can completely change the mood of your piece.
Another way is to create your own patterns using digital tools. Upload your favorite photo and convert it into a diamond painting template. This approach makes your artwork one-of-a-kind and more meaningful.
Have you tried mixing symbols or shapes in the pattern? Adding your own symbols or changing the chart can make the design stand out. Think about which parts of the image you want to highlight or simplify.
Mixed Media Approaches
Mixed media means combining diamond painting with other art forms to create texture and depth. You might add acrylic paint to the canvas before sticking the diamonds, giving a painted background that enhances the sparkles. This technique adds a new layer of creativity and complexity.
Using materials like fabric, beads, or ribbons alongside diamonds can bring an interesting tactile quality. Imagine a flower with diamond petals and a fabric stem—it makes your project more dynamic and fun to touch.
Have you considered framing your diamond painting with decorative elements? Attaching small LED lights around the edges can make your art glow, turning it into a captivating display piece. These additions make the craft more interactive and eye-catching.

Credit: www.amazon.ca
Frequently Asked Questions
What Is A 5d Diy Diamond Painting Craft Kit?
A 5D DIY diamond painting craft kit includes a canvas, resin diamonds, and tools. It allows you to create sparkling artwork by placing diamonds on a sticky canvas. The “5D” means the diamonds have multiple facets, adding depth and shine to your art.
How Do I Start A 5d Diamond Painting Project?
Begin by organizing your diamonds by color. Peel back a small section of the canvas’s protective film. Use the applicator pen to pick up diamonds and place them on the matching symbols. Work section by section for best results and avoid touching the sticky surface.
What Tools Come With A 5d Diamond Painting Kit?
Most kits include a printed canvas, resin diamonds, an applicator pen, wax pad, and a tray. These tools help you pick up and place diamonds accurately. Some kits may also offer extra accessories like tweezers or storage bags for convenience.
How Long Does It Take To Complete A Diamond Painting?
Completion time varies by size and detail. Small projects may take a few hours, while larger, complex designs can take several days or weeks. Working consistently for short periods is recommended to avoid fatigue and improve accuracy.
Conclusion
Creating with the 5D DIY diamond painting kit is fun and relaxing. You see your artwork come alive with every sparkling diamond placed. It helps improve focus and patience while you enjoy a quiet hobby. Anyone can try this craft, no special skills needed.
Just follow the simple steps, and you will feel proud of your finished piece. This craft can brighten your room or make a nice gift. Keep practicing to improve your technique and enjoy the process. Diamond painting is a great way to add color and joy to your day.