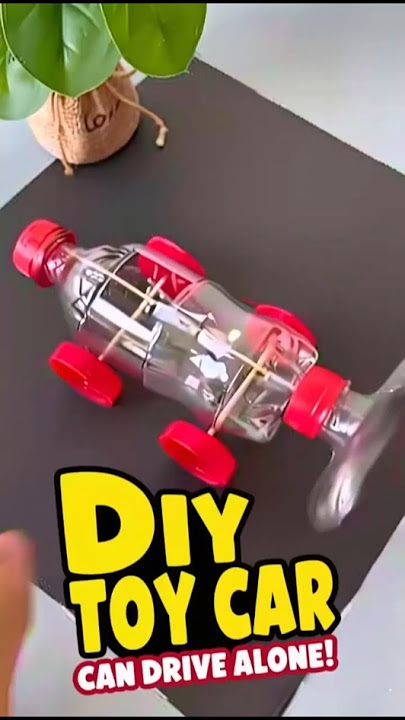
Have you ever wanted to create something fun and exciting with your own hands? Building a toy car is a perfect way to do just that.
Imagine the pride you’ll feel when you see your car rolling smoothly across the floor, knowing you made it yourself. In this guide, you’ll discover simple steps that anyone can follow, even if you’ve never built anything before. Ready to turn your ideas into a cool toy car?
Let’s get started!
Materials Needed
Gathering the right materials is the first crucial step to building a toy car that works well and looks great. Without the proper supplies, you might find yourself stuck or frustrated halfway through the project. Think about what you need to create a sturdy, functional, and visually appealing toy car before you start.
Choosing The Right Tools
Your tools will shape how smoothly the building process goes. Basic tools like a small screwdriver, a pair of pliers, and a craft knife are essential. If you have a mini drill or a hot glue gun, these can speed things up and make your toy car more durable.
Do you have space to work safely with sharp tools? Setting up a clean, organized workspace helps you avoid losing small parts or hurting yourself accidentally.
Selecting Car Parts
Focus on parts that fit together easily and are safe for handling. Wheels can be bought from a hobby store or recycled from old toys. Axles can be simple metal rods or sturdy wooden dowels.
Think about the car body: lightweight wood, plastic, or even thick cardboard can work well. Have you checked if your parts are compatible? Mismatched pieces can cause your car to wobble or not roll properly.
Gathering Decorative Elements
Adding personality to your toy car makes the project more fun and rewarding. Stickers, paint, and markers are perfect for customizing the exterior. Small plastic or metal bits like buttons or beads can serve as headlights or grills.
What colors or themes excite you? Choosing decorations that reflect your style will keep you motivated and proud of the finished product.
Designing Your Toy Car
Designing your toy car is an exciting part of the building process. This is where your ideas start to take shape, and you get to decide how your car will look and perform. A thoughtful design can make your toy car unique and fun to play with.
Sketching The Blueprint
Start by putting your ideas on paper. Sketching a blueprint helps you visualize the size, shape, and key features of your toy car.
Keep your drawings simple but clear. Use basic shapes and lines to outline the body, wheels, and other parts. This doesn’t have to be perfect—just enough to guide your build.
Try to think about how each part connects. Will the wheels fit well? Is there space for the axles? This early planning saves time and frustration later.
Choosing Car Shape
The shape of your toy car affects both its look and how it moves. Do you want a sleek race car or a sturdy off-road vehicle? Your choice impacts the materials and construction techniques you’ll use.
Consider simple shapes like rectangles or ovals if this is your first time building. They are easier to cut and assemble. You can add details later to make your car stand out.
Ask yourself: What kind of play experience do you want? A lightweight, aerodynamic shape might speed up your car, but a wider base could improve stability on rough surfaces.
Constructing The Car Body
Constructing the car body is a key part of building a toy car. It gives the car its shape and strength. A well-built body holds all parts firmly. This part also decides the car’s style and look. Focus on making the body sturdy and balanced. Choose materials that are easy to shape but tough enough to last. Follow clear steps for cutting and assembling.
Cutting The Frame
Start by selecting a flat piece of wood or plastic for the frame. Use a ruler and pencil to draw the outline of the car’s base. Keep the shape simple for easier cutting and assembly. Use a saw or strong scissors to cut along the lines carefully. Smooth the edges with sandpaper to avoid rough spots. Make sure the frame is even and flat for better stability.
Assembling The Chassis
The chassis is the car’s backbone. Attach the frame to the chassis parts like axles and wheels. Use glue or small screws to fix parts tightly. Check that the wheels spin freely and align straight. Reinforce joints with extra glue or tape for strength. Let the chassis dry completely before moving on. This ensures the car body stays secure during play.
Adding Wheels And Axles
Adding wheels and axles is a crucial part of building your toy car. This step transforms a simple frame into a moving vehicle, giving life to your creation. Getting these components right ensures your car rolls smoothly and lasts longer during play.
Attaching Axles
Start by choosing sturdy axles that fit well with your car’s body. You want them straight and strong enough to hold the wheels and support weight without bending. Attach the axles securely to the car base using glue or small brackets, making sure they are parallel to each other.
Test the alignment by rolling the axles gently. If they wobble or rub against the car body, adjust their position before the glue dries. A well-attached axle keeps your toy car stable and easy to steer.
Securing Wheels
Once the axles are in place, slide the wheels onto them carefully. Wheels should spin freely but not be loose enough to fall off. Use small caps, clips, or glue to secure the wheels in place.
Check the movement by rolling the car on a flat surface. If the wheels stick or drag, try repositioning or trimming any parts that cause friction. You want your toy car to glide smoothly, making playtime more fun and satisfying.
Installing A Simple Motor
Installing a simple motor is key to bringing your toy car to life. The motor powers the wheels and makes the car move. Choosing the right motor and connecting it properly to the power source ensures smooth operation. This section guides you through these important steps clearly and simply.
Choosing A Motor Type
Select a motor based on size and power. Small DC motors work well for toy cars. They are lightweight and easy to control. Check the motor’s voltage rating to match your power source. Avoid motors that are too big or heavy. They can slow down the car and drain the battery fast.
- Use a low voltage motor, typically 3V to 6V.
- Choose motors with a metal shaft for better durability.
- Consider the motor’s speed (RPM) for faster cars.
Connecting Power Source
Connect the motor to a battery or power supply safely. Use wires with proper insulation to avoid short circuits. Attach the positive wire to the motor’s positive terminal. Connect the negative wire to the motor’s negative terminal. Secure all connections tightly to prevent loose contacts.
- Use AA or AAA batteries for easy replacement.
- Use a battery holder to keep batteries stable.
- Test the connection before fixing the motor in place.
Adding a simple switch allows you to turn the motor on and off. This control makes your toy car more fun to use. Ensure the switch matches the voltage of your power source. Place it where it is easy to reach.

Credit: www.youtube.com
Customizing And Painting
Customizing and painting your toy car is where your creativity really shines. This stage transforms a simple model into a unique masterpiece that reflects your style and imagination. The choices you make here can turn a basic toy into a cherished keepsake or an impressive display piece.
Selecting Paint Colors
Choosing the right paint colors sets the mood and personality of your toy car. Think about what excites you—bold reds, sleek metallic silvers, or vibrant blues. You don’t have to stick to one color; combining complementary shades can create eye-catching effects.
Consider the type of paint too. Acrylic paints dry quickly and are easy to work with, while enamel paints offer a glossy, durable finish. Have you ever tried layering colors? It can add depth and texture, making your car stand out even more.
Adding Unique Features
Adding unique features makes your toy car truly one of a kind. Small details like custom decals, racing stripes, or even glitter can add personality. You might want to attach tiny accessories like spoilers or headlights for a realistic touch.
Don’t hesitate to experiment with different materials like stickers, markers, or even glow-in-the-dark paint. What small feature could surprise someone who sees your toy car for the first time? Often, it’s these little extras that make your project unforgettable.
Testing And Adjustments
Testing and adjusting your toy car is a vital part of the building process. It helps ensure the car runs smoothly and performs well. This phase reveals any design flaws or mechanical issues early on. Taking time to test and tweak will improve your toy car’s speed, balance, and durability.
Running Test Drives
Start by placing your toy car on a flat surface. Push it gently to observe how it moves. Note any wobbling, veering, or slow speed. Try different surfaces to check performance in various conditions. Watch how the wheels spin and if the car stays straight.
Use these tips during test drives:
- Check wheel alignment carefully.
- Listen for unusual noises.
- Observe the car’s balance and stability.
- Test the car multiple times for consistency.
Making Necessary Modifications
After testing, identify parts that need fixing or improving. Tighten loose screws or replace worn-out wheels. Adjust wheel positions to improve alignment. Add small weights to balance the car if it tilts.
Consider these adjustments:
- Lubricate moving parts for smoother motion.
- Trim or reshape parts to reduce friction.
- Strengthen weak joints with extra glue or tape.
- Rebuild sections that cause poor performance.
Test again after each change. Repeat adjustments until the car runs well and is fun to play with.

Credit: www.youtube.com

Credit: www.youtube.com
Frequently Asked Questions
What Materials Are Needed To Build A Toy Car?
To build a toy car, you need basic materials like wood or plastic, wheels, axles, glue, and paint. Optional items include small screws and a motor for advanced models. These supplies are affordable and easy to find at craft or hardware stores.
How Long Does It Take To Build A Toy Car?
Building a simple toy car usually takes 1 to 3 hours. Complex designs with motors or remote controls may take longer. Time depends on skill level, tools, and materials used. Planning and preparation help speed up the process.
Can Kids Safely Build A Toy Car At Home?
Yes, kids can safely build toy cars with adult supervision. Use child-friendly tools and non-toxic materials. Avoid sharp objects or small parts that pose choking hazards. This activity boosts creativity and fine motor skills in a safe environment.
How Do You Make A Toy Car Move?
A toy car moves by attaching wheels to axles that rotate freely. Adding a rubber band motor or electric motor can power movement. Proper wheel alignment reduces friction and improves speed. Testing and adjusting wheels is essential for smooth motion.
Conclusion
Building a toy car can be fun and rewarding. You get to see your ideas come to life. Each step teaches you something new and useful. The best part is sharing your creation with friends or family. Keep practicing to improve your skills.
Small projects like this boost creativity and problem-solving. Try different designs and materials next time. Enjoy the process, not just the result. Making a toy car is a great way to learn and play. Give it a try and have fun!
