Do you want to create endless fun for your kids or even yourself? Building a toy car ramp is a simple project that brings excitement and learning together.
Imagine watching your toy cars zoom down a ramp you made with your own hands. It’s not just play—it’s a way to spark creativity and explore basic physics in action. In this guide, you’ll discover easy steps to build a toy car ramp using materials you probably already have.
Ready to make something fun and memorable? Let’s get started!
Materials Needed
Gather wooden planks, nails, and a hammer to create a sturdy toy car ramp. Smooth sandpaper and paint can add finishing touches. Simple materials help build a fun and safe play area.
Building a toy car ramp is a thrilling project that combines creativity with a dash of engineering. Before you jump into crafting your ramp, it’s crucial to gather the right materials. This part of the process sets the foundation for a safe and enjoyable play experience. Let’s dive into the materials you’ll need and consider how to make smart choices.Choosing Safe Materials
Safety is paramount when crafting a toy car ramp. You want materials that are not only durable but also non-toxic and child-friendly. Opt for materials like untreated wood or sturdy cardboard, which are safe to handle and easy to work with. Consider using recycled materials to add an eco-friendly touch to your project. This can be both fun and educational, teaching kids about sustainability. Avoid sharp edges or materials that could splinter. Smooth surfaces make for safer play and a smoother ride for those little cars.Tools For Assembly
Having the right tools on hand makes the assembly process a breeze. Basic tools like a screwdriver, hammer, and measuring tape will suffice for most ramp projects. If you’re working with wood, a small saw can be handy for cutting pieces to size. Always ensure tools are used under adult supervision, especially when kids are involved. Think about using adhesive tape or glue for added stability. This ensures that your ramp stays intact during those intense racing sessions. When selecting tools, remember that simplicity is key. You don’t need a workshop full of gadgets to create a fantastic toy car ramp. Often, the most straightforward solutions are the most effective. Building a toy car ramp isn’t just about construction; it’s about creativity and fun. Are there any unique materials or tools you’ve considered using? Share your thoughts and experiences with us!
Credit: www.tiktok.com
Designing The Ramp
Designing the ramp is a key part of building a toy car ramp. This step shapes how your ramp will work and how fun it will be for play. A well-designed ramp ensures smooth rides and exciting car speeds. Keep the design simple but effective. Focus on size and slope to make the best ramp.
Selecting The Right Size
Choose a size that fits your space and the cars you have. A ramp too small limits the car’s run. Too big makes it hard to build and store. Consider the length and width carefully. Use materials that are easy to cut and handle.
- Length: Long enough for a good run but fits your area
- Width: Wide enough for the car to stay on track
- Height: Safe and stable for play
Measure your toy cars before picking the ramp size. This helps avoid cars falling off or getting stuck. Balance size with safety for the best experience.
Planning The Incline Angle
The ramp’s angle controls the car’s speed and smoothness. Too steep makes the car jump or flip. Too flat slows the car too much. Aim for a gentle slope for steady speed. Usually, an angle between 20 to 30 degrees works well.
| Incline Angle | Effect on Car |
|---|---|
| Less than 15° | Slow, may stop before the end |
| 20° to 30° | Good speed, smooth ride |
| More than 35° | Fast, risk of flipping |
Test different angles before fixing the ramp. Small changes can improve the fun and safety.
Step-by-step Assembly
Building a toy car ramp is more than just putting pieces together—it’s about creating a fun and functional track that sparks imagination. Taking your time during assembly ensures the ramp is sturdy and enjoyable for endless play sessions. Let’s break down the process into clear, manageable parts so you can see exactly how each step contributes to the final build.
Preparing The Base
The base is the foundation of your ramp, so it needs to be strong and level. Choose a flat surface like a sturdy board or a piece of plywood to start. If you want extra stability, consider adding rubber pads underneath to prevent slipping during play.
Make sure the base is wide enough to support the ramp and any additional features like side rails. Have you checked if your base fits well in the play area? This simple check can save frustration later on.
Constructing The Ramp Surface
Next, focus on the ramp surface where the toy cars will race down. Use a smooth piece of wood or plastic to allow cars to glide without resistance. If you want to add some excitement, try painting lines or adding small bumps for a challenge.
Attach the ramp securely to the base at an angle that’s steep enough to let cars roll but not so steep that they fly off. Adjusting the angle might take a few tries—don’t hesitate to test different slopes to find the perfect speed.
Securing The Ramp
Securing every part of your ramp is crucial for safe and reliable play. Use screws or strong glue to fix the ramp to the base firmly. If your ramp has joints, reinforce them with brackets or corner braces to avoid wobbling.
Have you thought about adding side rails? They keep cars on track and prevent crashes. Small nails or clips work well to hold these rails in place without ruining the ramp’s look.
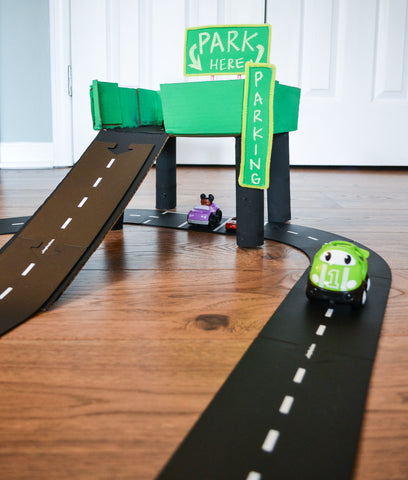
Decorating The Ramp
Decorating the toy car ramp makes the project more exciting and personal. It brings color and creativity to the ramp. A well-decorated ramp can inspire kids to play more and use their imagination. Simple decorations can change the ramp from plain wood to a fun play object.
Choose bright colors and playful details. Use safe, non-toxic paints and materials. Let the kids join in the decorating process for extra fun and pride in their creation.
Painting Ideas
Use bright colors like red, blue, yellow, or green to catch the eye. Paint stripes or checkered patterns for a racing look. Add numbers or letters for a learning twist. Try painting the ramp surface with smooth, even strokes. Use painter’s tape to make sharp lines and shapes.
- Paint the sides with bold colors
- Create a road with black paint and white lines
- Use stencils for stars, cars, or animals
- Choose water-based paint for easy cleanup
Adding Fun Details
Small decorations make the ramp unique and playful. Glue on stickers or decals related to cars or racing. Attach small flags or signs near the ramp’s edges. Use foam shapes or craft paper to add texture and interest. Add ramps or tunnels made from cardboard for extra challenge.
- Stick reflective tape for a cool shine
- Use washable markers to draw track lines
- Attach small toy figures or animals
- Personalize with the child’s name or favorite colors
Safety Tips
Safety should be your top priority when building and using a toy car ramp. Even simple projects can lead to accidents if you overlook small details. Taking a moment to focus on safety ensures that playtime stays fun and worry-free for everyone involved.
Supervision During Play
Always keep an eye on children while they play with the ramp. Kids can get excited and may try to climb or stand on the ramp, which can cause falls. Your presence helps prevent risky behavior and allows you to step in quickly if something goes wrong.
Think about the last time you watched a child play with a DIY toy. Did you notice how easily they got distracted? That’s why active supervision is key—it keeps play safe and enjoyable.
Checking For Stability
Before each play session, inspect the ramp for any loose parts or wobbling. A shaky ramp can tip over and hurt a child or damage the toy cars. Make sure the ramp is placed on a flat surface and all joints are tight.
Try giving the ramp a gentle shake. If it moves, tighten screws or add support until it feels solid. A stable ramp not only protects your child but also improves the car’s run, making playtime smoother and more satisfying.

Credit: ar.pinterest.com
Fun Ramp Activities
Building a toy car ramp is only the beginning of the fun. Once your ramp is ready, you can turn playtime into exciting challenges and creative adventures. These activities keep kids engaged and help develop their problem-solving skills, hand-eye coordination, and creativity.
Race Challenges
Set up thrilling races by timing how fast different toy cars travel down the ramp. You can use a stopwatch or even a smartphone app to measure the speed.
Try these ideas to spice up your races:
- Use cars of different sizes and weights to see which one wins.
- Adjust the ramp’s height or angle and observe how it affects speed.
- Create a bracket-style tournament where cars compete head-to-head.
Have you noticed how small changes in the ramp’s angle can drastically change the race outcome? Experimenting with these variations keeps the activity fresh and exciting.
Creative Play Ideas
Let your imagination take the wheel by turning the ramp into more than just a race track. Add tunnels, loops, or obstacles to challenge your cars and boost creativity.
Try mixing materials like cardboard, blocks, or craft sticks to build new features. For example, build a tunnel out of a paper towel roll or add a loop made from flexible tubing.
Encourage kids to invent stories around their ramps. What if the car is on a rescue mission or racing to deliver an important package? This storytelling adds depth and makes playtime more meaningful.
What new obstacle or design can you create next? Each change invites fresh ideas and endless fun.

Credit: www.tiktok.com
Frequently Asked Questions
What Materials Do I Need To Build A Toy Car Ramp?
You need wood or cardboard, glue or nails, a saw or scissors, and paint for decoration. These basic materials help build a sturdy and fun toy car ramp.
How Do I Make A Toy Car Ramp Safe For Kids?
Smooth all edges, secure parts firmly, and avoid small detachable pieces. Safety ensures kids can enjoy the ramp without injury risks.
What Is The Best Angle For A Toy Car Ramp?
A 30 to 45-degree angle works well. It provides enough speed while keeping the toy cars stable during their run.
Can I Customize The Toy Car Ramp Design?
Yes, customize by adding loops, turns, or multiple lanes. Personalizing makes the ramp more exciting and encourages creativity in play.
Conclusion
Building a toy car ramp is fun and simple. Use the right materials and tools. Follow each step with care and patience. Kids will enjoy playing with their new ramp. It helps them learn about motion and speed. You can change the ramp’s height or angle anytime.
This project encourages creativity and hands-on skills. Start building today and watch the excitement grow. Simple projects like this bring joy and learning together. Give it a try and see the fun unfold!