In this guide
Are you tired of stepping on toys scattered all over your floor? Imagine having a neat, organized space where every toy has its own place.
Building a toy storage shelf can transform your room from messy to magical in no time. In this guide, you’ll discover simple steps to create a sturdy, stylish shelf that fits your needs perfectly. Ready to reclaim your space and make cleanup easy?
Let’s get started!
Choosing The Right Materials
Choosing the right materials for your toy storage shelf is crucial for durability and safety. The materials you select will affect how sturdy the shelf is, how it looks, and how easy it is to maintain. Picking the best options helps you build a shelf that lasts and keeps your kids’ toys organized effectively.
Types Of Wood And Alternatives
Solid wood is a popular choice because it is strong and looks great. Pine is affordable and easy to work with, while hardwoods like oak or maple offer extra durability but can be pricier. If you want a lighter option, plywood or MDF (medium-density fiberboard) can work well and still hold a good amount of weight.
Think about the finish too—some woods absorb paint or stain better than others. You might also consider eco-friendly options like bamboo, which is tough and sustainable. Have you thought about how much moisture or wear the shelf will face? That can help you decide between different wood types or alternatives.
Tools Needed For The Project
Gathering the right tools before you start saves time and frustration. You’ll likely need a saw (a circular saw or handsaw works fine), a drill for screws, sandpaper to smooth edges, and a tape measure to get accurate cuts. Clamps can keep pieces steady while you work.
Don’t forget about a screwdriver, level to ensure straight shelves, and a pencil for marking measurements. Having these tools on hand will make your building process smoother and help you create a professional-looking shelf.
Safety Gear Essentials
Safety should never be an afterthought. Protect your eyes with safety goggles to guard against flying sawdust or wood chips. Wearing gloves can prevent splinters and give you a better grip on materials.
Hearing protection is important if you’re using power tools, especially in enclosed spaces. And a dust mask helps avoid inhaling fine particles, especially when sanding or cutting. Do you have all your safety gear ready before you begin? It’s a small step that makes a big difference.

Credit: www.infinitidy.com
Planning Your Shelf Design
Planning your toy storage shelf is the first step to a neat playroom. Thoughtful design saves time and effort later. A good plan fits the space and meets your storage needs. It helps you avoid mistakes and wasted materials. Focus on accurate measurements, practical shelf sizes, and flexibility for different toys.
Measuring Your Space
Start by measuring the area where the shelf will go. Use a tape measure to check width, height, and depth. Write down the exact numbers. Look for obstacles like power outlets or vents. Ensure enough room for opening doors or moving around. Double-check measurements to avoid errors. Small mistakes can cause big problems.
Deciding Shelf Dimensions
Choose shelf sizes based on the toys you need to store. Bigger toys require wider and taller shelves. Small toys fit well in narrow spaces. Balance shelf height so kids can reach their toys easily. Consider leaving some space for future toys. Use simple shapes like rectangles for easy cutting and assembly. Keep shelves sturdy by selecting the right thickness of materials.
Incorporating Adjustable Features
Adjustable shelves add flexibility to your design. They allow changing shelf heights as toys grow or change. Use shelf brackets or pegs that can move up and down. This feature helps keep the shelf useful for years. Adjustable shelves prevent clutter by fitting different toy sizes. Make sure the adjustment system is strong and safe for children.
Cutting And Preparing Pieces
Cutting and preparing the pieces is where your toy storage shelf starts to take shape. Getting this part right ensures your shelf will be sturdy and look professional. Pay attention to precision and safety as you work through these steps.
Marking Measurements
Measure twice, cut once is a rule that never gets old. Use a tape measure and a pencil to mark your wood clearly. Draw straight lines with a carpenter’s square to keep your cuts accurate.
Consider labeling each piece after marking to avoid confusion later. Have you ever cut a piece just to realize it was the wrong size? Taking your time here saves you from that frustration.
Cutting Techniques
Choose the right saw for the job— a circular saw works well for straight cuts, while a jigsaw is perfect for curves or notches. Keep your hands steady and follow the lines carefully. Use clamps to hold the wood in place, so it doesn’t move while cutting.
Don’t rush. Smooth, controlled cuts reduce splintering and keep edges cleaner. If you’re new to power tools, practice on scrap wood first to build confidence.
Sanding For Smooth Edges
Sanding is key to making your shelf safe for kids and giving it a polished finish. Start with medium-grit sandpaper to remove rough spots, then switch to fine-grit for a silky smooth surface. Sand along the grain of the wood, not against it.
Don’t forget to sand the corners and edges where splinters are most likely. How much time do you usually spend sanding? Try adding a few extra minutes here—you’ll notice the difference when assembling your shelf and when your kids use it.
Credit: www.etsy.com
Assembling The Shelf Frame
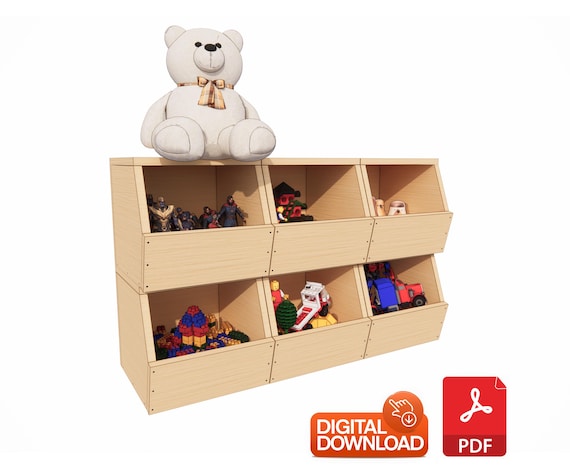
Begin by connecting the wooden pieces to form a strong rectangle for the shelf frame. Use screws and a drill to secure each joint tightly for stability. Check that corners are square to keep the frame even and balanced.
Assembling the shelf frame is a crucial step in building a toy storage shelf. This is where your project begins to take shape, transforming scattered materials into a functional piece of furniture. Think of it as laying the foundation for a sturdy and reliable shelf that will hold countless hours of playtime treasures.Joining Methods
Choosing the right joining method can significantly impact the durability of your toy storage shelf. You might consider using wood glue for a seamless, sturdy bond. Alternatively, screws provide a secure hold, especially if your toys are a bit heavier. Pocket holes can offer a neat finish, hiding screws from view. Ever wondered which method suits your skills best? Sometimes experimenting with different techniques can lead to surprising results.Ensuring Stability
Stability is paramount in preventing any unwanted tumbles or collapses. Make sure each connection is tight and firm. Consider the balance by checking that all legs and supports are evenly aligned. Are you worried about uneven floors? Adjustable feet can help maintain balance, even on tricky surfaces. A stable shelf not only protects toys but also assures peace of mind.Adding Support Braces
Support braces add extra strength to your shelf frame, reducing the chance of wobbling. You can install horizontal braces between vertical posts for additional rigidity. L-shaped brackets can fortify corners, especially if you foresee heavy loads. Have you thought about the aesthetic aspect? Invisible braces can maintain a clean look while enhancing strength. Adding these reinforcements is like giving your shelf a backbone, ensuring it stands the test of time.Installing Shelves And Dividers
Installing shelves and dividers is a key part of building a toy storage shelf. This process shapes how well the shelf holds toys and how easy it is to keep things organized. Proper installation creates sturdy storage that fits toys of all sizes and types. It also helps keep the shelf looking neat and tidy.
Spacing For Different Toy Sizes
Plan shelf spacing based on the size of toys to be stored. Small toys need narrow shelves to prevent falling. Larger toys require wider shelves for easy access. Use a tape measure to check toy heights and widths. Leave extra space to allow easy removal and replacement. Adjustable shelves offer flexibility as toy collections grow or change.
Securing Shelves Firmly
Attach shelves securely to prevent wobbling or falling. Use strong brackets or shelf pins for support. Screw shelves into side panels tightly for stability. Check levelness with a spirit level to keep toys from sliding. Make sure all fasteners are properly tightened. A solid shelf ensures safety and long-lasting use.
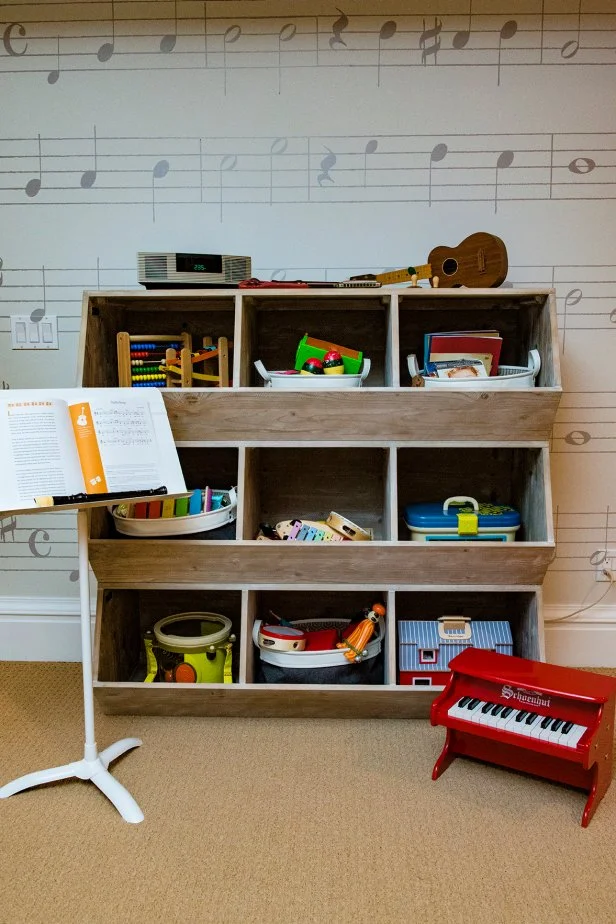
Customizing With Bins Or Baskets
Add bins or baskets on shelves to organize smaller toys. Choose containers that fit shelf dimensions well. Open bins make it easy for kids to grab toys. Label baskets to help find items faster. Bins keep toys grouped and reduce clutter. This customization makes the shelf more practical and kid-friendly.
Credit: www.hgtv.com
Finishing Touches
Finishing touches bring your toy storage shelf to life. They make the shelf look great and last longer. These final steps also help keep the shelf safe for kids. Small details make a big difference in the shelf’s style and function.
Painting And Sealing
Choose paint that is safe for children. Water-based paints work well and dry fast. Pick bright or soft colors to match the room. Paint all surfaces evenly for a clean look.
Seal the paint with a clear, non-toxic finish. This protects the shelf from scratches and spills. Sealing also makes cleaning easier. Let the paint and seal dry fully before use.
Adding Labels Or Decorations
Labels help children find toys quickly. Use simple words or pictures on the labels. Attach them with glue or tape that won’t damage the shelf. Decorations like stickers or stencils add fun style.
Keep decorations kid-friendly and easy to clean. Avoid small parts that can fall off. This makes the shelf both pretty and practical.
Safety Checks For Kids
Check for sharp edges and smooth them with sandpaper. Tighten all screws and bolts firmly. Make sure the shelf is stable and won’t tip over.
Place the shelf in a safe spot away from doors or windows. Avoid heavy items on high shelves. Safety ensures kids enjoy their toys without risk.
Maintaining Your Toy Shelf
Maintaining your toy storage shelf helps keep toys neat and easy to find. A clean shelf lasts longer and looks better. Regular care stops dust and dirt buildup. Organizing toys well saves time during play and cleanup. Upgrading your shelf keeps it useful as children grow.
Regular Cleaning Tips
- Dust the shelf every week with a soft cloth.
- Wipe spills or sticky spots immediately using a damp cloth.
- Use mild soap and water for a deeper clean once a month.
- Dry the shelf completely to avoid moisture damage.
- Check for loose screws or broken parts during cleaning.
Organizing Strategies
Sort toys by type or size. Place frequently used toys at eye level. Use bins or baskets to group small items.
- Label each bin for easy identification.
- Rotate toys to keep the shelf interesting and less cluttered.
- Encourage children to return toys to the right spot after playing.
Upgrading Over Time
Adjust shelves to fit larger or new toys. Add hooks or baskets for extra storage. Replace worn parts to keep the shelf safe. Paint or decorate the shelf to match changing room styles. Consider adding wheels for easy movement if needed.
Frequently Asked Questions
What Materials Are Best For Building A Toy Storage Shelf?
Wood is the most durable and easy-to-work-with material for toy shelves. Plywood and MDF are budget-friendly options. Choose non-toxic paint or finish for child safety. Avoid sharp edges by sanding corners smooth.
How Can I Customize A Toy Shelf For Different Toy Sizes?
Use adjustable shelves to fit toys of various heights. Incorporate bins or baskets for smaller items. Label each section to keep toys organized. This flexibility grows with your child’s collection.
What Tools Do I Need To Build A Toy Storage Shelf?
Basic tools include a saw, drill, measuring tape, and screwdriver. Sandpaper smooths rough edges. A level ensures shelves are straight. Safety gear like goggles and gloves is essential.
How Do I Ensure The Toy Shelf Is Safe For Kids?
Anchor the shelf to the wall to prevent tipping. Use rounded edges to avoid injuries. Choose non-toxic paint and finishes. Keep screws and nails flush with surfaces for safety.
Conclusion
Building a toy storage shelf helps keep rooms neat and tidy. It saves space and makes toys easy to find. You can customize the shelf to fit your needs and style. This simple project suits beginners and offers a sense of pride.
Enjoy the process and create a useful piece for your home. A well-made shelf brings order and joy to any play area. Start today and watch clutter disappear.