In this guide
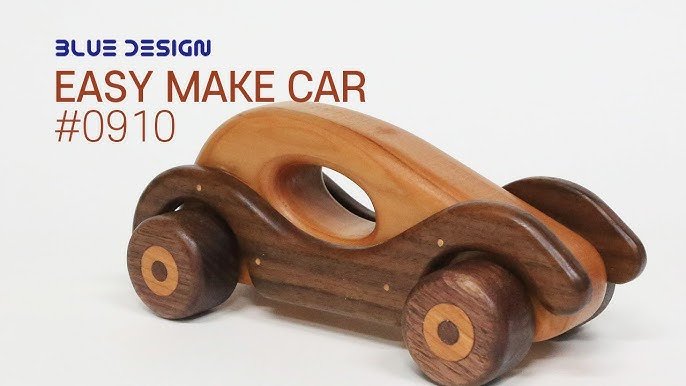
Have you ever wanted to create something special with your own hands? Building a wooden toy car is a fun and rewarding project that anyone can do.
Imagine the joy of playing with a car you made yourself or giving it as a unique gift. In this guide, you’ll find simple, step-by-step instructions that make the process easy and enjoyable. Ready to bring your creativity to life and build a wooden toy car that you’ll be proud of?
Let’s get started!

Credit: www.youtube.com
Materials And Tools Needed
Building a wooden toy car is a fun project. It’s a chance to create something special with your hands. Before starting, gather the right materials and tools. This ensures your car is sturdy and looks great.
Choosing The Right Wood
Wood choice affects your toy car’s durability and appearance. Hardwood like oak or maple is strong. It holds up well to play. Softwood like pine is easier to shape. It’s lighter too, making it perfect for small hands. Check for knots or defects in the wood. Smooth surfaces make crafting easier.
Essential Tools For Crafting
Tools make crafting easier. A saw cuts your wood to size. A coping saw is great for curves. Use sandpaper for smoothing edges. A drill creates holes for axles. A screwdriver tightens the wheels. Paintbrushes add color and style. Have these ready before you start.
Safety Gear To Use
Safety is important when crafting. Wear goggles to protect your eyes. Wood dust can irritate them. Gloves protect your hands from splinters. A dust mask keeps your lungs safe from wood particles. Ensure your workspace is well-lit. Good lighting helps you see clearly.
Designing Your Toy Car
Designing your wooden toy car is where creativity meets practicality. It sets the foundation for the entire project and influences how the final product looks and functions. Taking time to carefully plan your design will save you from headaches during cutting and assembly.
Sketching The Car Shape
Start by drawing rough sketches of your toy car on paper. Don’t worry about perfection at this stage; just get your ideas down visually. Try different shapes—boxy, sleek, or even vintage styles—to see what excites you the most.
Sketching helps you visualize proportions and decide on details like the roof height or wheel arches. You can use tracing paper to layer changes without losing earlier ideas. Have you ever noticed how a simple line change can transform the whole look?
Selecting Dimensions
Decide on the size of your toy car before cutting wood. Think about where it will be played with and who will use it. A smaller car fits well in little hands, while a larger one might be better for display.
Typical dimensions could be around 6 inches long, 3 inches wide, and 2 inches tall, but adjust these to fit your design. Keep in mind the thickness of your wood and the size of the wheels. You don’t want the car to be too heavy or bulky to move easily.
Planning Moving Parts
Moving parts add fun and realism to your toy car. Decide if you want wheels that actually turn, doors that open, or a steering wheel that spins. Each moving part requires extra space and careful thought about how pieces connect.
For example, if your wheels will rotate, plan for axles and enough clearance so they don’t rub against the body. Think about durability too—what kind of joints or fasteners will hold up to play? Have you considered testing a simple prototype to check movement before final assembly?
Cutting And Shaping Wood
Cutting and shaping wood is where your wooden toy car begins to take form. This stage turns flat pieces of wood into the parts that will make up your car. It’s a hands-on process that demands patience and precision, but the result is always worth the effort.
Marking The Wood
Start by carefully marking your wood pieces. Use a sharp pencil or a fine-tip marker to draw clear lines where you’ll cut. Accurate markings help prevent mistakes and save you from wasting wood.
Try using a ruler or a square to keep your lines straight and consistent. If you want your toy car to have symmetrical parts, mark both sides of the wood and check your measurements twice. Have you ever realized a piece was cut too short because the lines were off? Taking time here will avoid that frustration.
Using Saws And Files
Choose the right saw for your cuts. A coping saw works great for curved shapes, while a small handsaw is perfect for straight cuts. Keep your saw blade sharp and steady to avoid splintering the wood.
After cutting, files help refine the shape. Use flat files for straight edges and round files for curved areas. I found that switching between saw and file lets you control the shape better than trying to cut perfectly in one go.
Sanding For Smoothness
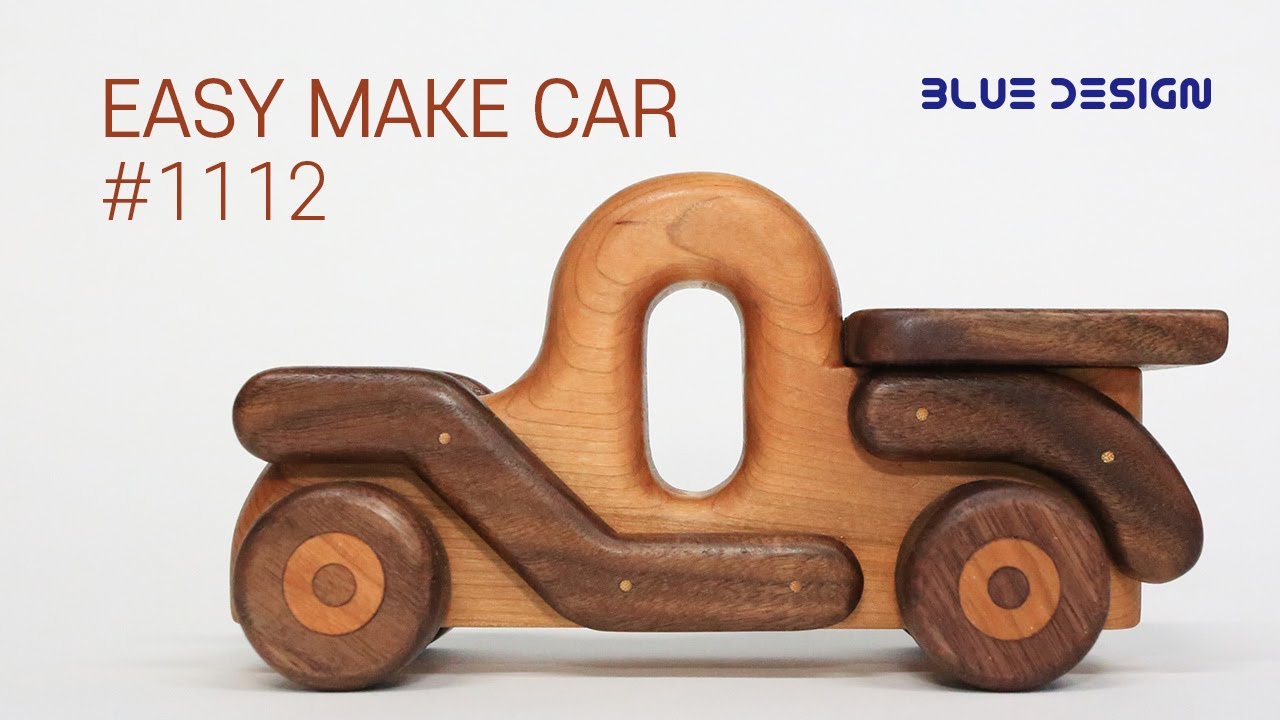
Sanding is essential for a safe and polished finish. Start with coarse sandpaper to smooth out rough edges, then move to finer grits for a soft, even surface. Don’t rush this step—smooth wood feels better in little hands and looks more professional.
Focus on corners and edges where splinters might form. A well-sanded toy car invites touch and play without worry. What small details do you think sanding might improve in your project?
Credit: www.youtube.com
Assembling The Car Body
Assembling the car body is a key part of building a wooden toy car. It brings all the cut pieces together into a strong frame. Careful assembly ensures the car looks great and works well.
Joining Pieces Securely
Use wood glue to join the main parts of the car body. Apply glue evenly on the edges for a tight bond. Clamp the pieces together and let the glue dry fully.
For extra strength, add small nails or screws. Drill pilot holes first to avoid splitting the wood. Check that all parts align properly before fixing them.
Attaching Axles And Wheels
Insert the axles through the holes in the car body. Make sure the axles fit snugly but can still turn. Attach wheels to each end of the axles firmly.
Secure wheels with washers or small nuts to keep them in place. Avoid tightening too much to prevent wheel binding. The wheels should stay on during play.
Ensuring Wheel Movement
Test each wheel to confirm it spins freely. Adjust axle tightness if wheels feel stuck or too loose. Smooth any rough edges on the axles that block movement.
Add a drop of oil on the axles for easier rolling. Check wheel alignment to avoid wobbling or dragging. A well-moving wheel set makes the toy car fun to play with.
Finishing Touches
Finishing touches transform your wooden toy car from a simple project into a cherished keepsake. They add personality and durability, making the car not just fun to play with but also lasting through years of adventures. Paying attention to these final steps can elevate your craftsmanship and delight anyone who sees or plays with the car.
Painting And Decorating
Choose paints that are safe for children, like water-based acrylics or non-toxic craft paints. Use bright colors to make your toy car stand out, or go for classic shades like red, blue, or yellow that never go out of style.
Apply thin, even coats and let each layer dry completely before adding the next. This prevents smudging and keeps the paint smooth.
You can also add patterns or stripes with painter’s tape for clean lines. Stickers or decals work well if you want quick decoration without much mess.
Adding Details And Features
Small touches bring your toy car to life. Think about gluing on tiny wooden or plastic pieces for headlights, bumpers, or spoilers.
Wheels can be enhanced with painted rims or rubber bands for traction. You might even carve simple designs or initials into the wood for a personal touch.
Ask yourself what details make a real car exciting and try to replicate those in miniature form.
Applying Protective Coating
Protective coatings guard your paint and wood from scratches and moisture. Use a clear, child-safe varnish or polyurethane to seal your work.
Apply the coating with a soft brush in thin layers, allowing each to dry well before the next. This keeps the finish smooth and durable.
Think about the environment your toy car will live in—is it likely to get wet or dropped often? Choose a finish that suits those needs to keep your car looking great for longer.
Troubleshooting Common Issues
Building a wooden toy car is a rewarding project, but you might encounter a few hiccups along the way. These common issues can slow you down or affect the final quality of your toy. Knowing how to troubleshoot them not only saves time but also improves your craftsmanship.
Fixing Loose Wheels
Loose wheels can make your toy car wobbly and less fun to play with. Check if the axle is too small or if the hole in the wheel is too big. You can fix this by wrapping a thin piece of tape or adding a small wooden shim around the axle before reinserting the wheel.
If the wheel still spins too freely, try using a drop of wood glue to secure it—but be careful not to glue it permanently. You want the wheels to turn smoothly without falling off. Have you noticed how a small adjustment can transform the way your toy moves?
Smoothing Rough Edges
Rough edges can make the toy unsafe and uncomfortable to hold. Sanding is your best friend here. Start with coarse sandpaper to remove big splinters, then finish with finer grit for a smooth touch.
Don’t rush this step; a well-sanded toy feels professional and safe. If you find stubborn rough spots, a small piece of steel wool can help reach tight corners. How much smoother would your toy feel if you spent a few extra minutes here?
Correcting Paint Mistakes
Painting a wooden toy can be tricky, and mistakes happen. If paint smudges or drips, wait for it to dry and gently sand the area before repainting. This prevents uneven layers and keeps the finish neat.
Using painter’s tape can help create clean lines and avoid color bleed. If you accidentally paint over a part you didn’t want to, a damp cloth might remove water-based paint if caught early. What creative colors will you choose once your paint is flawless?
Tips For Perfect Craftsmanship
Perfect craftsmanship makes a wooden toy car stand out. It brings smooth edges, balanced parts, and a polished look. Small details show care and skill. These tips help improve your work and make the toy safe and fun.
Working With Patience
Take your time during each step. Rushing causes mistakes and rough edges. Pause often to check your progress. Smooth sanding and careful cutting need slow, steady hands. Patience helps avoid cracks and splinters.
Maintaining Tools
Keep tools sharp and clean. Dull blades tear wood and cause uneven cuts. Clean sawdust and resin from tools after use. Store tools in a dry place to stop rust. Well-maintained tools work better and last longer.
Choosing Quality Materials
Select wood that is strong and smooth. Soft woods like pine are easy to shape. Avoid wood with knots or cracks. Use non-toxic paint and finishes to keep toys safe. Good materials make the toy durable and nice to touch.

Credit: scrollsawer.com
Frequently Asked Questions
What Materials Are Needed To Build A Wooden Toy Car?
To build a wooden toy car, you need wood, wheels, axles, glue, sandpaper, and paint. Quality wood like pine or plywood works best. You also need basic tools like saws and drills for shaping and assembling parts safely and accurately.
How Long Does It Take To Build A Wooden Toy Car?
Building a wooden toy car typically takes 2 to 4 hours. This depends on your skill level and design complexity. Beginners may need extra time for cutting and sanding. Proper planning and preparation can reduce the overall build time effectively.
What Safety Tips Should I Follow When Making A Toy Car?
Always wear safety goggles and gloves when cutting or sanding wood. Work in a well-ventilated area to avoid inhaling dust. Use child-safe, non-toxic paints and finishes. Keep tools away from children during the building process to prevent accidents.
Can Kids Help Build A Wooden Toy Car Safely?
Yes, kids can help with simple tasks like sanding or painting. Adult supervision is essential during cutting and assembly. This activity enhances creativity and motor skills. Ensure all materials and tools are age-appropriate and safe for children.
Conclusion
Building a wooden toy car can be fun and rewarding. You get to use simple tools and materials. Each step helps you learn and create something special. Kids and adults enjoy playing with handmade toys. Take your time and follow the instructions carefully.
Small mistakes can teach valuable lessons. Once finished, your wooden car will be a proud achievement. Try making different designs to improve your skills. Enjoy the process and share your creation with friends. Crafting brings joy and a sense of accomplishment.