In this guide
Have you ever looked at your action figures and wished they were just a little more you? Maybe a unique outfit, a fresh paint job, or even a brand-new accessory that no one else has.
Customizing action figures lets you bring your imagination to life, turning ordinary toys into one-of-a-kind treasures. In this guide, you’ll discover simple tips and tricks that make customizing easy and fun, even if you’ve never tried it before. Ready to transform your collection and impress everyone with your creativity?
Keep reading, because your next masterpiece is just a few steps away.
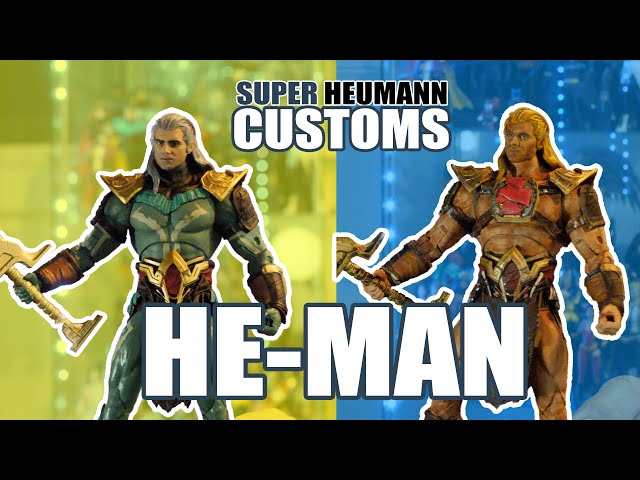
Credit: www.youtube.com
Choosing The Right Base Figure
Choosing the right base figure is a crucial first step in customizing action figures. It sets the foundation for your entire project and can either make or break the final look. Picking a figure that matches your vision will save you time and effort down the line.
Assessing Compatibility
Not all action figures are created equal when it comes to customization. You need a base figure that works well with the parts or accessories you plan to add.
Check the size and scale first. If you want to swap heads or limbs, the joints must line up properly. For example, a 6-inch figure won’t fit parts from a 3.75-inch figure without major adjustments.
Consider the articulation points too. More joints mean more flexibility in posing but also more delicate parts to handle. Ask yourself: will this figure hold up to the modifications I want to make?
Material Considerations
Materials affect how easy it is to cut, glue, or paint your base figure. Most action figures are made from plastic, but types vary widely.
Hard plastics like ABS are durable but tougher to modify, while softer plastics like PVC are easier to work with but might wear out faster. Think about your tools and techniques before choosing.
Also, some paints stick better to certain materials. If you plan to repaint, test your paints on a small area first to avoid surprises. What kind of finish do you want, and will the figure’s material support it?
Planning Your Design
Planning your design is a crucial step in customizing action figures. It lays the foundation for the entire project and helps you avoid costly mistakes. Taking time here ensures your final figure looks exactly how you imagined.
Sketching Ideas
Start by putting your ideas on paper. Sketching helps you visualize changes before making them on the figure itself.
You don’t have to be an artist—simple outlines or stick figures work well. Focus on key details like costume changes, color schemes, or new accessories.
Try multiple sketches to compare different looks. Which design excites you the most? This process can reveal options you hadn’t thought of initially.
Gathering Reference Material
Collecting reference images sharpens your design and gives you clear direction. Use photos from comics, movies, or real life that match your vision.
Create a folder or board to keep everything organized. This makes it easy to check details like texture, color, and proportions during your work.
Have you noticed how a small detail from a reference can transform your figure? Don’t overlook these subtle touches—they often bring your custom figure to life.
Tools And Materials
Customizing action figures is a rewarding hobby that lets you bring your imagination to life. Having the right tools and materials can make all the difference between a frustrating project and a smooth creative process. Gathering these essentials first will set you up for success and help you achieve the detailed results you want.
Essential Tools
Start with a set of basic tools designed for precision and control. You’ll want to have a good pair of hobby knives or X-Acto blades for cutting and shaping parts cleanly. A set of fine files or sanding sticks will help smooth rough edges and prepare surfaces for painting.
Small tweezers come in handy when handling tiny parts or decals. Needle-nose pliers give you the grip to bend wires or adjust small components without damaging them. A cutting mat protects your work surface and keeps your blades sharp longer.
- Hobby knives (X-Acto blades)
- Fine files and sanding sticks
- Needle-nose pliers
- Small tweezers
- Cutting mat
- Paint brushes of various sizes
- Pin vise for drilling small holes
Recommended Materials
Choosing the right materials can be tricky, but starting with common and versatile supplies makes customization easier. Acrylic paints are a favorite because they dry fast and clean up with water. They also stick well to plastic surfaces without needing harsh primers.
Use model putty or epoxy putty to sculpt details or fill gaps. It’s flexible and easy to sand once dry. For adding new parts, plastic cement or super glue will give you a strong, lasting bond.
Have some fine grit sandpaper on hand to prepare surfaces before painting. And don’t forget sealers or clear coats to protect your finished work and keep colors vibrant. If you’ve ever struggled with paint chipping, you’ll appreciate the difference a good sealer makes.
- Acrylic paints
- Model putty or epoxy putty
- Plastic cement or super glue
- Fine grit sandpaper (400-800 grit)
- Clear sealer or varnish spray
- Decals or stickers for extra detail
What’s one tool or material you can’t live without when customizing your figures? Sometimes the smallest item can have the biggest impact on your workflow and final result.
Sculpting Techniques
Sculpting techniques are the heart of customizing action figures. They allow you to transform plain figures into unique characters that reflect your imagination. Mastering these skills helps you add personality and depth to your creations.
Adding Details
Adding details brings your figure to life. Use sculpting putty like epoxy or polymer clay to create textures such as wrinkles, armor plates, or hair strands. Small tools like toothpicks or sculpting needles help you carve fine lines and patterns.
Think about the character’s story while adding details. Does your figure need battle scars, intricate tattoos, or realistic clothing folds? Adding these elements makes your figure stand out and tells a visual story without words.
Modifying Features
Modifying features means reshaping parts of the figure to change its look. You can enlarge muscles, reshape the face, or alter hands and feet to fit your concept. Heat tools or gentle sanding can soften or remove original features before adding new sculpting material.
Ask yourself which features define your character’s personality. Would sharper cheekbones make it fiercer? A broader chest might show strength. Tailoring these details lets you create exactly what you envision, rather than settling for the base figure’s limitations.
Painting Tips
Painting your action figures can bring them to life with vibrant colors and unique details. The right painting approach makes all the difference between a generic look and a standout custom piece. Let’s dive into key painting tips that will help you achieve smooth, lasting results.
Selecting Paint Types
Choosing the right paint is crucial. Acrylic paints are often the best choice because they dry quickly and stick well to plastic surfaces.
Enamel paints offer a glossy finish but take longer to dry and require proper ventilation. Consider using spray paints for base coats—they provide an even layer and save time.
Think about durability too. If you want your figure to withstand handling, pick paints designed for models or miniatures. Have you tested different brands to see which one matches your style best?
Application Techniques
Start with clean, dry surfaces to make sure paint adheres well. Use thin layers rather than thick coats to avoid drips and uneven texture.
Brushes come in various sizes—small detail brushes let you paint fine features, while larger flat brushes cover bigger areas quickly. I found that using a damp brush to smooth edges can make a big difference in the final look.
- Use a primer before painting to help colors pop and stick better.
- Apply paint in multiple thin layers, letting each layer dry completely.
- Try dry brushing to highlight raised details by gently brushing a small amount of paint.
Have you experimented with airbrushing? It can give a professional finish, but even simple hand brushing with patience can yield fantastic results.
Adding Accessories
Adding accessories to your action figures can completely transform their look and personality. Accessories make your figures stand out and help tell a story beyond their basic design. Whether simple or elaborate, the right additions can bring your custom creations to life.
Crafting Custom Weapons
Custom weapons give your action figures a unique edge. Start by sketching a design that fits the character’s style and scale. Use materials like polymer clay, small bits of plastic, or even repurposed toy parts to shape your weapon.
After shaping, smooth the edges with fine sandpaper. Paint details with acrylics to add realism—metallic colors work well for swords or guns. Don’t forget to seal your paint with a clear coat to protect your work.
Have you tried combining parts from different toys to create hybrid weapons? It’s a fun way to get creative without starting from scratch. Think of a sword with a sci-fi twist or a futuristic gun with medieval elements.
Designing Costumes
Costumes add personality and context to your figures. Use fabric scraps, old clothes, or even paper to craft outfits that fit your figure’s scale. Start simple—small capes, belts, or armor pieces can make a big difference.
Sew or glue your materials carefully to avoid bulky seams. Adding tiny details like buttons, studs, or painted patterns brings costumes to life. Don’t hesitate to experiment with layering different fabrics or textures.
Consider your figure’s backstory when designing costumes. Would a battle-worn warrior wear torn leather? Should a hero have shiny armor? These choices make your custom figure feel real and intentional.
Creating Articulations
Creating articulations in action figures brings them to life. It adds flexibility and realism. You can pose the figure in many ways. This process involves careful modifications and enhancements.
Joint Modifications
Start by examining the existing joints on the figure. Some joints may be stiff or too loose. Modify these joints by sanding or trimming plastic parts. Use small screws or pins to improve stability. Replace basic hinge joints with ball joints for better rotation. Consider using epoxy putty to sculpt custom joint covers.
Work slowly to avoid damaging the figure. Test each joint’s movement before final assembly. Proper joint modifications ensure smooth and stable articulation.
Enhancing Movement
Enhance movement by adding extra joints or improving current ones. Double joints in elbows and knees increase bending range. Swivel joints in wrists and ankles allow twisting motions. Use flexible materials like rubber or silicone for joint covers. This prevents paint cracking during movement.
Lubricate joints with a small amount of silicone grease. This reduces friction and wear. Check the figure’s balance after modifications. Good articulation improves play and display options.

Credit: www.tiktok.com
Displaying Your Creations
Displaying your custom action figures is just as important as crafting them. How you present your creations can highlight the fine details and tell a story that draws people in. Thoughtful display choices turn your collection into a captivating showcase.
Choosing Display Methods
Think about where and how you want to show off your figures. Shelves with adjustable heights let you arrange poses and sizes creatively. Transparent acrylic cases protect your work from dust while keeping every angle visible.
Magnetic stands or clear doll stands can help you position figures in dynamic poses. Have you tried wall-mounted shadow boxes? They add depth and keep your figures safe.
- Open shelves for easy access and casual viewing
- Closed display cabinets for protection and a polished look
- Custom-built dioramas to create themed scenes
- Rotating display platforms to show details from every side
Lighting And Presentation
Good lighting brings your figures to life. Soft LED strip lights work well to avoid harsh shadows. Adjustable spotlights let you highlight specific details like painted eyes or sculpted textures.
Try mixing warm and cool light to add mood and dimension. Have you noticed how a small light change can make a figure appear more dramatic or realistic?
Keep cables tidy and hidden to maintain a clean look. Reflective surfaces beneath your figures can also enhance lighting effects without extra equipment.
Troubleshooting Common Issues
Troubleshooting is a key part of customizing action figures. Mistakes happen, and knowing how to fix them can save you time and frustration. Whether it’s a paint smudge or a sculpting flaw, addressing issues early keeps your project on track and looking sharp.
Fixing Paint Errors
Paint errors can be frustrating, but they’re fixable. If you notice a smudge or uneven layer, gently wipe the area with a damp cloth before the paint dries. For dried mistakes, lightly sanding the spot with fine-grit sandpaper smooths the surface without damaging the figure.
After sanding, apply a primer to prepare the area for repainting. Thin layers of paint work best—thick coats can cause drips or clumps. Have you tried using a small detail brush? It gives you more control and reduces the chance of new errors.
Correcting Sculpting Mistakes
Sculpting errors might seem intimidating, but patience helps. If the clay or putty is still soft, you can reshape it using sculpting tools or even your fingers. For hardened areas, gently file down bumps or unwanted shapes with a fine needle file.
Adding small amounts of fresh clay can fix gaps or missing details. Remember to blend new material smoothly into the old to avoid visible seams. Have you considered using liquid sculpting medium? It can fill small cracks and strengthen repairs while drying clear.
Sharing Your Work
Sharing your customized action figures is more than just showing off your skills—it’s about connecting with others who appreciate your creativity. When you share your work, you invite feedback that can help you improve and inspire others to try customizing themselves. How you present your creations can make a big difference in how they’re received and remembered.
Online Communities
Online communities are the perfect place to display your customized figures and get instant reactions. Sites like Instagram, Reddit, and specialized forums host groups where collectors and customizers gather to exchange ideas and tips.
Posting clear photos from multiple angles helps people see the details you worked hard on. Don’t just share finished pieces—show your process, challenges, and tools you used. This transparency makes your posts more engaging and invites constructive comments.
Have you ever noticed how sharing your work sparks conversations you wouldn’t expect? It’s amazing how a simple post can lead to friendships, collaborations, or even commissions. Try joining groups specific to your action figure’s theme to reach the right audience.
Showcasing At Conventions
Conventions offer a unique chance to display your custom action figures in person. You get to meet enthusiasts face-to-face, hear their thoughts, and see their reactions immediately.
Setting up a small display with labels about your inspiration and techniques can attract more attention. Consider preparing business cards or flyers if you want to network or sell your creations.
Have you thought about entering contests or panel discussions? These opportunities boost your exposure and push you to refine your craft. Plus, the energy at conventions often fuels your motivation to create even better figures.

Credit: www.instagram.com
Frequently Asked Questions
What Materials Do I Need To Customize Action Figures?
You need paints, brushes, sculpting clay, sandpaper, and sealants. Quality tools ensure smooth customization. Safety gear like gloves helps during painting and sculpting.
How Can I Safely Remove Paint From Figures?
Use acetone-free nail polish remover or mild paint stripper. Apply gently with cotton swabs. Avoid harsh chemicals to prevent damaging the figure’s surface.
What Techniques Improve Action Figure Painting Quality?
Thin paint layers and multiple coats prevent clumping. Use fine-tipped brushes for detail. Allow full drying between layers for smooth, vibrant finishes.
Can I Customize Action Figures Without Sculpting Skills?
Yes, you can use decals, stickers, or repaint existing details. Modify accessories or clothing to change appearance without sculpting expertise.
Conclusion
Customizing action figures lets you bring your ideas to life. Start small and try different paints or parts. Patience helps you fix mistakes and improve skills. Each figure becomes unique, showing your style and creativity. Share your work with friends or online groups to get feedback.
Keep practicing, and your creations will get better. Have fun and enjoy the process of making something truly yours.