Have you ever dreamed of turning yourself into a real-life action figure? Imagine holding a tiny version of yourself, complete with your favorite outfit and pose.
It sounds fun and maybe a little magical, right? But what if you could actually make it happen? You’ll discover simple steps that bring your action figure to life. By the end, you’ll know exactly how to create a unique, personalized keepsake that’s all about you.
Ready to see yourself in a whole new way? Let’s dive in!

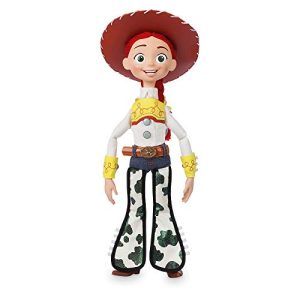
Credit: www.threads.com
Choosing Your Character
Choosing your character is the foundation of turning yourself into an action figure. This step is about defining who you want to be represented as, what qualities you want to highlight, and what story you want your figure to tell. Think about what makes you unique and how that can translate into a small, but powerful, version of yourself.
Personal Traits And Interests
Start by listing the traits that define you. Are you adventurous, thoughtful, or maybe a tech enthusiast? These qualities shape your figure’s pose, accessories, and even facial expression.
Consider your hobbies or passions. Do you love hiking, gaming, or painting? Adding elements like a miniature backpack, a gaming controller, or a paintbrush makes your figure more authentic and personal.
Ask yourself: what part of your personality do you want to emphasize? This reflection helps you choose details that make your action figure truly yours, rather than just a generic toy.
Inspirations From Pop Culture
Look at your favorite movies, comics, or video games for inspiration. Maybe a superhero’s costume sparks ideas for your figure’s outfit, or a sci-fi character’s gadgets inspire your accessories.
Take note of what appeals to you about these characters. Is it their bravery, style, or their unique abilities? These elements can guide your figure’s design and make it resonate with your personality.
Try mixing traits from different characters to create something original. Your action figure can be a blend of qualities that reflect both your interests and your imagination. What combination would best represent your story?
Gathering Materials
Gathering the right materials is the foundation of turning yourself into an action figure. Without proper tools and parts, your project can quickly become frustrating or fall short of your vision. Focus on finding items that balance quality, ease of use, and affordability to keep your process smooth and enjoyable.
Essential Tools And Supplies
Start with a solid toolkit that covers basic crafting and modeling needs. You’ll want to include:
- Modeling clay or polymer clay:Perfect for sculpting facial features or unique details.
- Fine paintbrushes and acrylic paints:These help you add precise colors and realistic touches.
- Craft knives and sculpting tools:Essential for shaping and carving small elements.
- Super glue or epoxy adhesive:For securely attaching parts and accessories.
- Sandpaper or files:To smooth surfaces and refine shapes.
Don’t overlook safety gear like gloves and a mask if you’re working with strong adhesives or paints. Having the right basics ready saves time and frustration later on.
Sourcing Specialty Parts
Some parts can be tricky to create from scratch, so finding specialty components is key. Consider these options:
- Art supply stores:Great for unique materials like miniature eyes, hair fibers, or realistic fabrics.
- Online marketplaces:Sites like Etsy or eBay often have custom doll parts or miniature accessories that fit your needs.
- Hobby shops:These stores carry model kits and small mechanical joints that can add articulation to your figure.
Think about what makes your figure truly yours. Would adding a tiny pair of glasses or a custom outfit make it more lifelike? These details transform your figure from a simple model into a personal keepsake.
Designing The Blueprint
Designing the blueprint is where your action figure starts to take shape. This stage turns your ideas into a clear plan that guides the entire creation process. It’s your chance to decide every detail before building begins, saving time and avoiding mistakes later.
Sketching Your Vision
Start by drawing your action figure from different angles—front, side, and back. Don’t worry about perfect art skills; simple sketches work if they clearly show your ideas.
Focus on key features like facial expressions, hairstyle, clothing, and accessories. Think about what makes you unique and how to capture that in a tiny figure. Have you ever noticed how small details, like a favorite watch or a signature pose, bring a toy to life?
Use pencil and paper or a digital drawing tool if you prefer. Experiment with different looks until you find one that truly represents you. This process is also a great way to spot potential issues early.
Technical Specifications
After sketching, define the technical details that will make your action figure functional and durable.
- Size:Decide on the height and proportions. Standard action figures range from 3.75 inches to 12 inches.
- Material:Choose materials like plastic or resin based on durability and finish.
- Articulation Points:Plan where joints will go—shoulders, elbows, knees—for realistic movement.
- Paint and Finish:Consider colors, textures, and whether you want a matte or glossy look.
Detailing these specs early helps you avoid surprises when making molds or painting. Have you thought about how many movable parts your figure should have? Too many can be fragile, but too few might limit posing options.
Remember, the clearer your blueprint, the easier the next steps become. Designing is about making choices that balance appearance, function, and your personal style.
Crafting The Body
Crafting the body of your action figure is a key step to bring it to life. The body sets the shape and structure. It must be sturdy and detailed. Use materials that are easy to shape and strong enough to hold form. Careful molding and assembling create a figure that looks real and feels solid.
Molding Techniques
Start by choosing a mold material like clay, silicone, or resin. Clay is easy for beginners and allows quick changes. Silicone molds capture fine details and work well for casting. Resin creates a hard, durable body but needs careful handling.
Shape the body parts separately. Focus on small sections like arms, legs, and torso. Use simple tools like sculpting knives, toothpicks, or brushes. Smooth surfaces and add texture to match your design. Let each part dry or cure fully before the next step.
Assembling The Parts
Once all parts are ready, join them carefully. Use strong glue or small pins for joints. Make sure limbs move smoothly if you want articulation. Align parts correctly to avoid gaps or misfits.
Check the figure’s balance by standing it up. Adjust connections to keep the figure stable. Add extra support inside if needed. Seal joints with a thin layer of paint or putty for a clean look.
Painting And Detailing
Painting and detailing bring your action figure to life. This stage lets you add color and personality. The right paint and fine touches create a realistic look. Small details make your figure stand out. Patience and steady hands help a lot. Prepare your workspace with good lighting and clean tools.
Choosing The Right Paints
Pick paints made for plastic or resin models. Acrylic paints work well because they dry fast and clean up easily. Look for non-toxic options, especially if kids are around. Use thin layers to avoid clumps or drips. Test colors on a spare piece before painting the figure. Matte or satin finishes give a natural look. Glossy paint suits shiny parts like armor or helmets.
Adding Unique Features
Details make your figure unique and personal. Use fine brushes to paint eyes, lips, and tiny accessories. Add small highlights and shadows to show depth. Try dry brushing for texture on clothes and hair. Use tiny dots or lines to create patterns or scars. Add decals or stickers for logos or symbols. Seal your work with a clear coat to protect the paint.
Creating Accessories
Creating accessories brings your action figure to life. These small details make your figure unique and fun to display. Accessories show personality and style. Focus on items that match your figure’s character or story. Use simple materials and tools to craft these parts yourself. Creativity is key. Let’s explore some ideas for weapons, gadgets, clothing, and armor that fit your action figure perfectly.
Designing Weapons And Gadgets
Weapons and gadgets add excitement to your action figure. Think about what suits your figure’s role. A superhero might have a shield or a laser gun. A spy could carry a small gadget or a briefcase. Use light materials like clay, foam, or plastic. Paint details carefully to make them look real.
- Sketch your ideas on paper before crafting.
- Use small parts from toys or craft stores.
- Glue pieces securely with strong adhesive.
- Paint with bright colors or metallic tones.
Keep the size right for your figure’s hands. Too big or too small looks awkward. Make sure accessories fit well and can be held or attached easily.
Clothing And Armor
Clothing and armor shape your figure’s appearance and story. Use fabric scraps, felt, or thin leather for clothes. Cut pieces to fit your figure’s body. Simple stitches or glue can hold the clothes together. For armor, use craft foam, cardboard, or thin plastic sheets. Shape them to fit shoulders, chest, or legs.
- Measure your figure before cutting materials.
- Add details like buttons, belts, or patches.
- Paint armor with silver, gold, or rust colors.
- Use Velcro or small magnets for removable parts.
Test the accessories on your figure. Adjust for comfort and look. Well-made clothing and armor make your action figure stand out.
Adding Articulation
Adding articulation is key to making an action figure come alive. It allows the figure to move in natural ways, making poses realistic and fun. Good articulation means your figure can bend, twist, and stretch without breaking or looking odd.
Focus on where to place joints and how to enhance their movement. This creates a balance between durability and flexibility. Proper articulation brings your action figure closer to a lifelike model.
Joint Placement Strategies
Place joints where real body parts bend. Common spots include shoulders, elbows, wrists, hips, knees, and ankles. These points let the figure mimic natural human movements.
- Use ball joints for shoulders and hips for full rotation.
- Hinge joints work well at elbows and knees for bending.
- Swivel joints add twisting motion, useful for wrists and neck.
- Keep joint size small but strong to avoid bulkiness.
Plan joint placement before assembling. This prevents awkward bends or limited motion. Test each joint’s range to ensure smooth movement.
Enhancing Mobility
Use flexible materials around joints to avoid stiffness. Thin plastic or rubber can help joints move easily. Avoid tight fits that restrict motion or cause damage.
- Sand or smooth joint edges to reduce friction.
- Lubricate joints lightly for smoother turns.
- Design overlapping parts to hide joints but keep motion free.
- Build double joints for elbows and knees to increase bending angle.
Good mobility lets you pose the figure in many ways. It increases play value and display options. Aim for balance between solid joints and natural movement.

Credit: www.easemate.ai
Final Touches
Final touches can make or break your action figure project. This stage is where you catch small mistakes and add personality that truly reflects you. Paying attention here ensures your figure stands out and feels complete.
Quality Control Checks
Look closely at every part of your figure. Check for paint smudges, loose joints, or uneven surfaces. Even tiny flaws can distract from the overall look.
Test all movable parts to make sure they work smoothly. Does your figure pose well without falling apart? Fix any stiffness or looseness before moving on.
Ask yourself: Would you be proud to display this on your shelf? If not, take the time to improve those areas.
Personalizing Your Figure
Now is the moment to add details that make your figure uniquely yours. Consider accessories that represent your hobbies or favorite items.
You could add a tiny notebook if you love writing, or a mini guitar if music is your passion. Small touches like these tell your story.
Think about the facial expression too. Does it capture your personality—serious, cheerful, or adventurous? Experiment with customizing eyes or mouth shapes if possible.
Showcasing Your Creation
Once your action figure is complete, the way you showcase it can make all the difference. Presentation brings your creation to life and invites others to appreciate the details and effort you put into it. A well-displayed figure can tell a story and highlight your craftsmanship.
Photography Tips
Good photos help your action figure stand out online or in your personal collection. Use natural light whenever possible; it brings out true colors and minimizes harsh shadows. Avoid cluttered backgrounds to keep the focus on your figure.
Try shooting from different angles to capture the figure’s pose and unique features. Close-up shots reveal the tiny details you worked hard on. Use a plain backdrop or a themed setting that matches your figure’s style.
Have you experimented with using props or small lights to create mood? These small touches can add depth and drama. Remember, steady your camera or phone to avoid blurry images—tripods or stable surfaces work wonders.
Building A Display Stand
A sturdy display stand keeps your figure upright and safe, especially if it has a dynamic pose. You can buy pre-made stands or create one tailored to your figure’s size and style. Consider materials like acrylic, wood, or metal for durability.
Add features like adjustable arms or pegs to hold your figure securely. This allows you to change poses without risking damage. Personal touches like painting the stand or adding a nameplate can enhance its appeal.
Think about the space where you’ll place your stand. Will it be on a shelf, desk, or inside a display case? Designing the stand with that environment in mind ensures your figure looks its best while staying protected.

Credit: www.threads.com
Frequently Asked Questions
How Do I Start Making A Custom Action Figure?
Begin by gathering clear photos of yourself from different angles. Choose materials like clay or resin. Use modeling tools to sculpt your figure based on these images for accuracy and detail.
What Materials Work Best For Diy Action Figures?
Use polymer clay, resin, or plastic for durability. Polymer clay is easy for beginners. Resin offers a professional finish. Choose materials based on your skill level and desired look.
Can I Customize The Figure’s Clothing And Accessories?
Yes, you can craft clothes and accessories using fabric, paint, or small plastic parts. Customize colors and styles to match your personality or favorite outfits.
How Do I Make My Action Figure Poseable?
Add joints by inserting small hinges or ball joints at key points. This allows movement in arms, legs, and head. Use sturdy materials to maintain durability and flexibility.
Conclusion
Creating your own action figure can be fun and rewarding. It shows your creativity and style in a small form. Follow each step with care for the best results. Use simple tools and materials you can find easily. Personalizing your figure makes it truly yours.
Share your creation with friends or keep it as a special keepsake. This project brings imagination to life in a unique way. Start today and enjoy every moment of crafting.