In this guide
Have you ever dreamed of creating your very own toy castle that sparks imagination and hours of fun? Building a toy castle is easier than you think, and you don’t need to be an expert to make something amazing.
In this guide, you’ll discover simple steps to design and build a castle that feels magical and sturdy. Whether it’s for playtime, decoration, or a creative project, this will help you bring your vision to life. Ready to turn your ideas into a fantastic toy castle?
Let’s get started!
Gather Materials
Gathering the right materials sets the foundation for building a toy castle that stands out and lasts. You want to have everything at hand before you start, so your creative flow doesn’t get interrupted. Think about the tools and supplies that will make your project easier and more enjoyable.
Essential Tools
Having the correct tools simplifies the building process and improves precision. Basic tools like a ruler and pencil help you measure and mark your materials accurately. A pair of scissors or a craft knife is necessary to cut shapes cleanly.
Don’t forget to include glue or tape for assembling parts securely. If you want to add details like windows or battlements, a small paintbrush or marker can help you add fine touches. These tools are inexpensive but make a big difference in the quality of your castle.
Recommended Supplies
- Cardboard or foam board:These provide a sturdy base that’s easy to cut and shape.
- Colored paper or paint:Use these to decorate your castle and bring it to life.
- Craft sticks or wooden dowels:Great for towers, drawbridges, or structural support.
- Glue sticks or hot glue:Choose depending on how strong and quick you want the bonds.
- Decorative elements:Small beads, stickers, or fabric scraps can add texture and charm.
Have you thought about what style of castle you want? A medieval fortress might need different materials than a fairy tale palace. Picking the right supplies based on your vision helps avoid frustration later and keeps your project exciting.
Designing Your Castle
Designing your toy castle is the first creative step. This phase sets the foundation for your build. Thoughtful design makes the project fun and satisfying. Planning details helps avoid mistakes and saves time. Focus on style and layout to shape your castle’s look and feel.
Choosing A Style
Pick a style that excites you. Castles can be medieval, fantasy, or modern-themed. Think about towers, walls, and gates. Decide if you want a simple or elaborate design. Use inspiration from books, movies, or pictures. Keep in mind the size and materials you will use.
Sketching The Layout
Draw a basic plan on paper or a digital tool. Mark where each part will go. Include towers, courtyards, and entry points. Use shapes like squares, rectangles, and circles. This helps visualize space and balance. Adjust the sketch until it feels right. A clear layout guides the building process smoothly.
Constructing The Base
Constructing the base of your toy castle sets the stage for everything that comes next. This part requires attention to detail because a strong and stable base keeps your castle standing tall and looking great. Think of it as laying down the groundwork that supports all your creative efforts.
Creating The Foundation
Start by choosing a flat surface to build on, like a sturdy piece of cardboard or a wooden board. This will prevent your castle from tipping over or collapsing as you add more pieces.
Cut the foundation to the size you want your castle to be. Don’t make it too small, or you’ll run out of room for towers and walls later.
Use glue or double-sided tape to secure the base material to your work table. This keeps it steady while you build.
Building Walls
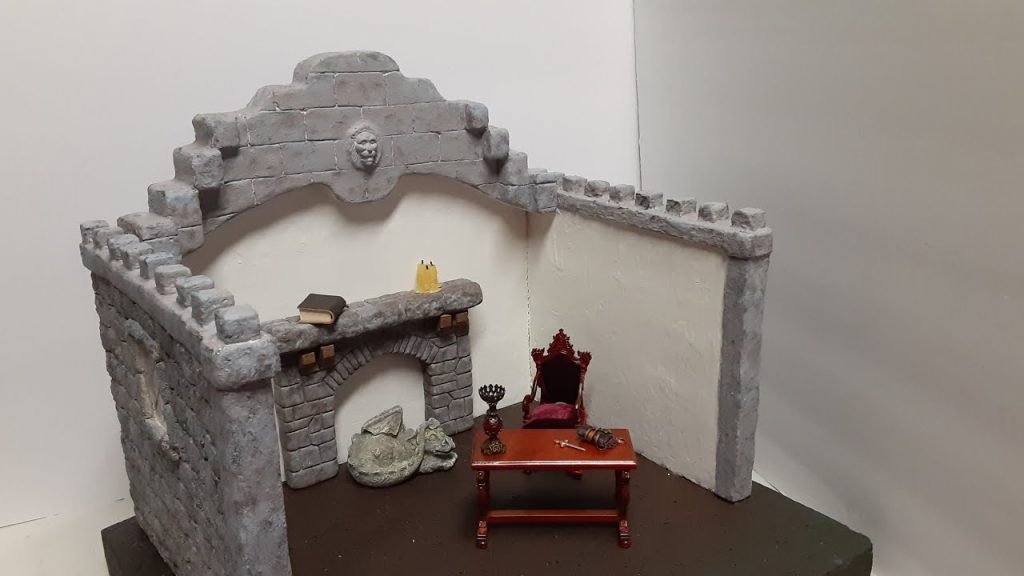
Walls give your castle shape and character. You can use small blocks, foam, or even LEGO bricks depending on what you have.
Place your walls along the edges of the foundation. Make sure they’re evenly spaced and straight. Using a ruler or a straight edge can help with this.
As you stack each layer, press gently to keep the walls firm. Add a bit of glue between layers if you want extra stability.
Have you considered where the castle doors and windows will go? Planning this now saves you from having to make adjustments later.

Credit: www.etsy.com
Adding Towers
Adding towers to your toy castle instantly boosts its charm and realism. Towers give your castle a strong, majestic look and offer fun spots for imaginative play. Knowing how to build them well will make your castle stand out and last longer.
Tower Construction Techniques
Start with a sturdy base—use thick cardboard, wooden blocks, or stackable building bricks to ensure your tower won’t wobble. Keep the shape simple at first, like a cylinder or square, so it’s easier to build and decorate.
Use glue or tape to hold pieces firmly together. If you want your tower to be tall, add internal supports like toothpicks or small rods to keep it steady. Don’t forget to leave openings or windows; these add character and make your tower feel real.
Incorporating Turrets
Turrets add a decorative edge to your towers and make your castle look more detailed. You can create turrets by attaching smaller cones or cylinders on top of your main tower structure.
Try using paper or lightweight materials to craft turret roofs—cut out circles or triangles and fold them into shape. Paint them with bright colors to make the turrets pop and catch attention.
Ask yourself: How can you use simple materials around your home to build turrets? Sometimes, bottle caps, small cones from craft stores, or even cut-up cardboard tubes work perfectly. Experiment and see what fits your style best!
Decorative Elements
Decorative elements bring your toy castle to life. They add personality and make the castle feel real and inviting. Focusing on details like color and architectural features can transform a simple structure into a magical play space.
Painting And Finishing
Choose colors that match the theme of your castle. Earthy tones create a classic medieval look, while bright colors add a playful touch. Use acrylic paint for easy application and quick drying.
Apply a base coat first to cover all surfaces evenly. Then, add details like stone textures or wooden panels by using a small brush. Sealing the paint with a clear varnish protects your work and keeps it looking fresh after many play sessions.
Adding Windows And Doors
Windows and doors give your castle character and encourage imaginative play. Cut out shapes from cardboard or thin wood to create openings. You can add shutters or curtains using fabric scraps or colored paper.
Consider using transparent plastic sheets for windowpanes. This adds realism and lets light through. For doors, try making them functional with small hinges or simple sliding panels. This small effort can make a big difference in how your castle feels.
Creative Additions
Creative additions make your toy castle stand out and feel alive. They add charm and invite more play ideas. Simple features can bring a whole new world to your castle. Small details spark imagination and make the castle unique.
Including A Moat
A moat adds a classic castle look and a fun obstacle. Use blue paper or fabric to create water around the base. You can also use a shallow tray filled with water for a real moat effect. Add small toy boats or bridges to increase play options. The moat creates a barrier that makes the castle feel protected.
Creating Flags And Banners
Flags and banners give your castle personality and color. Use colored paper or fabric scraps to craft simple flags. Attach them to toothpicks or small sticks to place on towers. Draw symbols or shapes to represent your castle’s kingdom. Flags wave in the imaginary wind, making the castle look lively. They also help tell stories during playtime.
Safety Tips
Building a toy castle is fun and creative. Safety must come first to protect children during play. Use simple safety tips to make the castle safe and enjoyable. These tips help avoid accidents and keep the play area secure.
Child-friendly Materials
Choose materials that are safe and non-toxic. Wood, soft foam, and thick cardboard work well. Paints and glues should be free of harmful chemicals. Always check labels for safety certifications. Avoid small parts that children can swallow. Pick lightweight materials to prevent injuries from falls.
Avoiding Sharp Edges
Cut edges can hurt little hands easily. Sand down wooden pieces until they are smooth. Cover sharp corners with soft tape or foam padding. Round off any pointy parts before assembly. Inspect the castle regularly for new hazards. Safe edges help keep playtime fun and injury-free.

Credit: www.youtube.com
Encouraging Imaginative Play
Encouraging imaginative play with a toy castle sparks creativity and joy. Children dive into worlds of knights, dragons, and royalty. This type of play develops language, problem-solving, and social skills. A simple toy castle becomes a stage for endless stories and adventures. Guiding children to explore this play helps their minds grow and have fun at the same time.
Storytelling With The Castle
The castle invites children to create their own stories. They can invent kings, queens, heroes, and villains. Stories build characters and settings inside the castle walls. This encourages language growth and memory skills. Asking questions like, “Who lives here?” or “What happens next?” helps deepen the story. Children learn to express ideas and feelings through these tales. The castle becomes a place for sharing stories with friends or family.
Interactive Play Ideas
- Create a royal feast with toy food and dishes.
- Organize a knight’s tournament using small action figures.
- Build secret passages or traps inside the castle.
- Use costumes to become characters from the castle world.
- Play roles like a castle guard or a visiting merchant.
- Make up challenges or quests for the castle heroes.
These activities invite children to use their hands and minds. They encourage cooperation and role-playing. Each idea helps the castle feel alive with action and fun.

Credit: www.amazon.com
Frequently Asked Questions
What Materials Are Best For Building A Toy Castle?
Wood, cardboard, and foam are ideal materials for toy castles. They are lightweight, easy to cut, and safe for children. Using these materials ensures durability and allows creative customization with paint and decorations.
How Long Does It Take To Build A Toy Castle?
Building a simple toy castle takes 2 to 4 hours. Complex designs may require a full day or more. The time depends on materials, design complexity, and skill level.
What Tools Do I Need For Making A Toy Castle?
Basic tools include scissors, glue, a craft knife, ruler, and paintbrushes. For wood, use a small saw and sandpaper. Safety tools like gloves are recommended for kids.
How Can I Make My Toy Castle More Durable?
Use sturdy materials like thick cardboard or wood. Apply a protective sealant or varnish after painting. Reinforce joints with strong glue or small nails for added strength.
Conclusion
Building a toy castle can be a fun and creative project. It brings joy to both kids and adults. Use simple materials and follow easy steps. Let your imagination guide the design. Playtime becomes more exciting with your own castle.
Share the experience with family or friends. Creating something with your hands feels great. Keep practicing to improve your building skills. Soon, you will build bigger and better castles. Enjoy every moment of this creative adventure!