In this guide
Have you ever wanted to create a special toy house that brings joy and sparks imagination? Building your own toy house is easier than you think, and it’s a fun project you can enjoy step by step.
Whether you want a cozy little home for your dolls or a creative play space for your kids, this guide will show you exactly how to make it happen. Keep reading, and you’ll discover simple tips and tricks that turn your ideas into a charming toy house you’ll be proud of.
Ready to start building? Let’s dive in!

Credit: www.youtube.com
Materials Needed
Gathering the right materials is the first and most important step in building your toy house. The quality and type of materials will affect not only how your toy house looks but also how sturdy it will be. Choosing materials you enjoy working with can make the whole process more fun and satisfying.
Wood And Cardboard
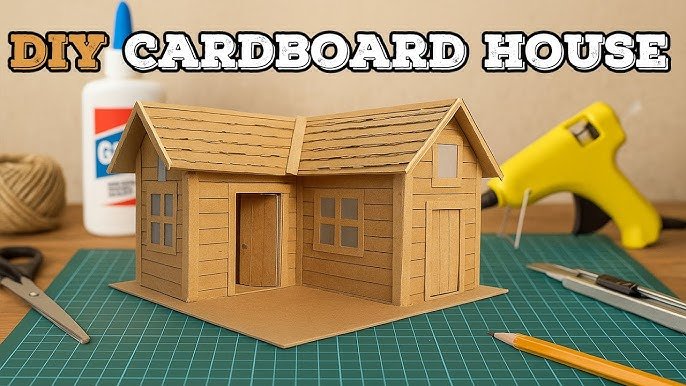
Wood is a popular choice because it’s strong and easy to paint. Thin plywood or balsa wood works well for walls and roofs. Cardboard is a budget-friendly alternative and easy to cut, but it might need extra support to stay durable.
Think about what fits your skill level and tools. Do you have a small saw for wood, or would scissors and a craft knife for cardboard be easier?
Adhesives And Fasteners
Glue is essential for holding your toy house together. Wood glue or hot glue sticks work well with most materials. If you want extra strength, small nails or screws can help, but they require more care and tools.
Ask yourself if you want a quick assembly or a more permanent build that can last through many playtimes.
Decorative Materials
Paints, markers, and stickers let you add personality to your toy house. Acrylic paint dries fast and offers bright colors. You might also want fabric scraps, buttons, or tiny accessories to make your house feel real and cozy.
What kind of style are you imagining? Modern, rustic, or maybe a fairy-tale cottage?
Tools Needed
Having the right tools makes your work smoother. Basic tools include scissors, craft knives, rulers, and paintbrushes. If you’re working with wood, a small saw and hammer might be necessary.
Do you have a safe space and time to use these tools carefully? Safety is key to enjoying your project.

Credit: www.youtube.com
Choosing The Design
Choosing the design is an important first step in building a toy house. The design shapes the look and feel of the final product. It also affects how easy or hard the building process will be. A good design matches your skill level and the materials you have. It also fits the space where the toy house will be placed.
Consider simple shapes for beginners. Complex designs can be fun but may take more time and tools. Think about the size of the toy house. Small houses are quicker to build but may limit details. Larger houses allow more creativity but need more materials.
Understanding Different Design Styles
Toy houses come in many styles. Some are modern with clean lines. Others are classic with detailed windows and doors. A cottage style feels cozy and warm. A castle style looks grand and majestic. Choose a style that fits your taste and the child’s interests.
Sketching Your Toy House Design
Draw a simple sketch before you start. It helps to plan the shape and size. Use basic shapes like squares and rectangles. Mark where doors and windows will go. Sketching saves time and reduces mistakes during building.
Selecting Materials Based On Design
Different designs need different materials. Wood works well for sturdy houses. Cardboard is easy to cut and paint. Plastic can add a modern touch. Match your materials to your design for the best results.
Considering Safety And Durability
Think about who will play with the toy house. Avoid small parts for young children. Use non-toxic paints and smooth edges. Choose designs that are stable and not easily broken. Safety should always come first.
Constructing The Base
Constructing the base is the first and most important part of building a toy house. A strong base keeps the house steady and prevents it from falling. It sets the shape and size of the entire toy house. Use flat, sturdy material that can support the weight of the walls and roof.
Choose a surface that is smooth and even. This makes building easier and helps the parts fit well together. Take time to measure and cut the base carefully. A well-made base saves time during later steps.
Choosing The Right Material
Select materials like wood, cardboard, or foam board for the base. Wood is durable and lasts long. Cardboard is light and easy to cut. Foam board gives good support and is simple to work with. Pick the material based on how much the toy house will be used.
Measuring And Cutting The Base
Measure the base size depending on the toy house design. Use a ruler or tape measure for accuracy. Mark the measurements clearly before cutting. Cut slowly and carefully to avoid mistakes. Smooth the edges with sandpaper or a file for safety.
Securing The Base
Fix the base on a flat surface to keep it stable. Use glue, nails, or tape based on the material. Make sure the base does not move while building the house. Let glue dry fully before adding walls or roof. A stable base makes the building process easier and safer.
Building The Walls
Building the walls of your toy house is an exciting part of the project. These walls form the basic structure and give shape to your creation. Careful measurement and cutting help ensure the walls fit well and stay sturdy. Using the right materials also makes a big difference in the final look and durability.
Choosing The Right Materials For Walls
Wood, cardboard, and foam board work well for toy house walls. Wood offers strong support but may need tools to cut. Cardboard is easy to handle and lightweight. Foam board combines lightness with smooth surfaces, perfect for painting. Pick materials based on your tools and how detailed you want the walls.
Measuring And Cutting Wall Pieces
Accurate measurements keep walls even and balanced. Use a ruler or measuring tape for precision. Mark lines clearly before cutting. Cut slowly and follow the lines carefully to avoid mistakes. Smooth edges with sandpaper if using wood. For cardboard and foam board, a sharp craft knife works best.
Assembling And Securing The Walls
Place wall pieces upright around the base. Use glue or tape to hold them together. Hold pieces in place until the glue dries. For extra strength, add small nails or pins if working with wood. Check that all walls stand straight and connect tightly. Gaps weaken the structure and affect appearance.
Creating The Roof
Creating the roof is one of the most exciting parts of building a toy house. It not only adds character but also completes the structure’s look. Getting the roof right can turn a simple toy house into a charming miniature home that sparks imagination.
Choosing The Right Roof Style
Think about the shape you want for your roof. Simple slanted roofs are easy to build and look neat. If you want something more detailed, a gable or hip roof adds a realistic touch.
Consider the size and balance of your toy house. Does a flat roof fit better, or would a pitched roof make it more interesting? Your choice affects how stable and fun the house will be.
Cutting And Assembling Roof Pieces
Measure carefully before cutting your roof pieces. Precision makes assembly smoother and the roof stronger. Use lightweight materials like thin wood or sturdy cardboard for easier handling.
When putting the pieces together, dry-fit them first. This helps you spot any adjustments needed before gluing or nailing. Remember, small gaps can be fixed later with paint or filler.
Adding Roof Details And Finishing Touches
Details like shingles, tiles, or textured paint bring your roof to life. You can create shingles by cutting small strips of paper or thin wood. Paint them in layers for a more natural look.
Don’t forget to seal the roof with a clear coat to protect your work. This also gives a nice shine and makes the roof last longer. What small detail could you add to make your roof unique?
Adding Windows And Doors
Adding windows and doors brings life to your toy house. These elements make the house look real and fun. They also allow light and air to enter, creating a cozy feel. Choose simple shapes and sizes that fit your toy house style. Use bright colors or clear plastic for windows to make them stand out.
Choosing The Right Materials For Windows
Use clear plastic sheets or thin acrylic for window panes. Cardboard or foam board works well for window frames. Small craft sticks or popsicle sticks add structure and detail. Transparent colored paper can create stained glass effects. Cut materials to fit the window openings precisely. Glue pieces carefully to avoid mess and ensure stability.
Crafting Doors That Open And Close
Cut doors from sturdy cardboard or thin wood sheets. Attach doors with small hinges or tape strips for easy movement. Use a craft knife to make smooth edges on the door. Paint or decorate the door to match the house’s style. Add a small handle using beads or buttons for detail. Test the door to ensure it swings freely without falling off.
Decorating Windows And Doors
Frame windows with colored tape or paint for a neat look. Add curtains using fabric scraps or paper for charm. Draw window panes with a marker for extra detail. Use stickers or small decals to decorate doors creatively. Highlight door edges with contrasting colors to make them pop. These small touches make your toy house inviting and lively.
Decorating The Exterior
Decorating the exterior of your toy house is where creativity truly shines. This step lets you bring personality and charm, transforming a simple structure into a delightful miniature home. Think about colors, textures, and small details that make your toy house stand out.
Choosing The Right Paint And Colors
Pick paint that’s safe and easy to work with, like acrylic or water-based paint. Bright colors can make your toy house pop, but softer tones add a cozy feel. Have you thought about matching the house colors to a theme or the room where it will live?
Try painting different parts in contrasting shades—like a red door with white walls—to create eye-catching effects. Use a small brush for details, and don’t rush; thin layers dry faster and look neater. Remember, painting is your chance to set the mood for your toy house.
Windows and doors make your toy house look real and inviting. You can cut out shapes from cardboard or use plastic sheets for windowpanes. Adding shutters or curtains made from fabric scraps adds extra charm.
Think about the style—will your doors be arched, rectangular, or have a tiny handle? Gluing small beads or buttons can act as doorknobs, giving a fun, tactile detail. How detailed do you want your toy house to be? Small touches make a big difference.
Incorporating Outdoor Features
Outdoor elements like tiny flower pots, garden fences, or a mailbox bring life to the exterior. Crafting a garden with fake grass or colorful paper flowers can add a playful touch. You don’t need fancy tools; simple household items often work best.
Consider adding a small pathway using pebbles or painted cardboard strips. Could a miniature bench or swing set fit in your design? These little extras invite imaginative play and create a complete scene around your toy house.

Credit: www.youtube.com
Interior Design Ideas
Designing the interior of your toy house can be as exciting as building its structure. It’s your chance to add personality and charm that make the toy house truly special. Think about the little details that make a space feel cozy and inviting, even on a tiny scale.
Choosing The Right Color Palette
Colors set the mood instantly. You might want to pick soft pastels for a calming effect or bright primary colors for a playful vibe.
Try limiting your palette to three main colors to keep things balanced. If you’re unsure, test your colors on small paper cutouts before painting the walls.
Furniture That Fits And Functions
Furniture should be proportionate to your toy house’s size. Use lightweight materials like foam or cardboard for easy rearrangement.
Think about the rooms you want to include—bedroom, kitchen, living room—and what furniture each needs. Simple shapes often work best to keep the look clean and neat.
Adding Personal Touches
Small accessories bring life to your toy house’s interior. Consider tiny rugs, pillows, or framed pictures made from fabric scraps or printed photos.
I once used buttons as doorknobs and beads as vases, which made the space feel unique and homey. What little items do you have around that could add charm?
Lighting Ideas For Realism
Lighting makes a big difference even in a toy house. Battery-operated LED lights are safe and easy to install.
Place them in strategic spots like the living room or kitchen to mimic real lighting. You could also create lampshades from paper or fabric for an authentic look.
Safety Tips
Building a toy house is fun and creative. Safety must be a top priority during the process. Using safe materials and tools protects both kids and adults. Following simple rules keeps the building experience enjoyable and accident-free.
Choose Non-toxic Materials
Select paints, glues, and finishes labeled non-toxic. Avoid materials with strong odors or harmful chemicals. Use wood or plastic that is smooth and free of splinters or sharp edges.
Use Child-safe Tools
Pick tools designed for children’s use or those with safety features. Avoid sharp blades or heavy tools that can cause injury. Always supervise children closely while handling any tools.
Work In A Clean, Organized Space
Keep the workspace tidy to prevent trips or falls. Clear away clutter and store tools safely when not in use. Good lighting helps avoid mistakes and accidents.
Wear Protective Gear
Use safety glasses to protect eyes from dust or debris. Gloves can shield hands from splinters or sharp objects. Closed-toe shoes prevent foot injuries.
Check For Small Parts
Be cautious with tiny pieces that children could swallow. Secure small parts firmly or avoid using them altogether. Always supervise playtime to reduce choking risks.
Encouraging Creativity
Encouraging creativity helps children explore their ideas freely. It allows them to build unique toy houses with their own style. Creativity turns a simple project into a fun learning experience.
Children gain confidence by making decisions and solving problems during building. They also develop fine motor skills and imagination. The process of creating inspires curiosity and joy.
Provide Various Materials And Tools
Offer different materials like cardboard, fabric, and paint. Include safe scissors, glue, and markers for decorating. Variety sparks new ideas and keeps children interested.
Let Imagination Lead The Design
Encourage kids to draw or describe their dream house first. Support unusual shapes, colors, and themes. Imagination shapes a unique and personal toy house.
Ask Open-ended Questions
- What colors do you want to use?
- How many rooms will your house have?
- What special features will it include?
Questions like these make children think creatively. They help kids express their ideas clearly and confidently.
Create A Supportive Environment
Celebrate all efforts and ideas, no matter the outcome. Avoid correcting too much or pushing for perfection. A relaxed space encourages free and bold creativity.
Frequently Asked Questions
What Materials Are Best For Building A Toy House?
Use lightweight wood, cardboard, or foam board for easy cutting and assembly. Choose non-toxic paint and glue for safety. These materials are durable and kid-friendly, making them ideal for crafting a toy house.
How Long Does It Take To Build A Toy House?
Building a basic toy house takes 2-4 hours, depending on design complexity. More detailed models may require a full day or weekend. Planning and preparation can speed up the process and improve results.
Can I Customize A Toy House Design?
Yes, customizing is easy by altering colors, shapes, and decorations. Add windows, doors, or furniture for a personalized touch. Custom designs enhance creativity and make the toy house unique and special.
What Tools Do I Need To Build A Toy House?
Essential tools include a ruler, craft knife, glue, scissors, and paintbrushes. A cutting mat helps protect surfaces. These simple tools ensure precise cuts and neat assembly, making the process smoother and safer.
Conclusion
Building a toy house can be fun and rewarding. You only need simple tools and patience. Follow each step carefully to create a strong house. Enjoy the process and learn as you go. This project helps improve skills and creativity.
Share your toy house with friends or family. Keep practicing to build even better toys next time. Small efforts make big differences. Start building today and see your ideas come to life.