In this guide
Have you ever wanted to create your very own doll? Imagine holding a unique doll that you made with your own hands—a special creation that tells your story.
Making dolls is not just fun; it’s a way to express your creativity and bring your ideas to life. In this guide, you’ll discover simple steps that anyone can follow, whether you’re a beginner or just looking to improve your skills.
Ready to turn your imagination into a beautiful doll? Keep reading, and let’s make it happen together.

Credit: galaxiadolls.co.uk
Materials Needed
Gathering the right materials sets the foundation for creating beautiful dolls. Choosing what to use can make your project smoother and more enjoyable. Let’s look at the essential supplies that help bring your doll to life.
Fabric Choices
Picking the right fabric affects the doll’s look and feel. Cotton is soft and easy to sew, making it great for beginners. Felt offers sturdiness and doesn’t fray, perfect for detailed parts.
Consider plush or fleece if you want a cuddly doll. These materials add a cozy texture that kids love. Think about the doll’s purpose—will it be a plaything or a decorative piece? That decision guides your fabric choice.
Sewing Supplies
Having the right sewing tools makes the process faster and less frustrating. Needles should match your fabric thickness; small sharp needles work well for fine materials. Thread color matters too—pick shades close to your fabric to hide stitches.
- Basic sewing needles
- Thread (various colors)
- Scissors with sharp blades
- Pins or clips to hold pieces together
- Stuffing material like polyester fiberfill
Don’t forget a measuring tape or ruler to keep your doll’s proportions just right. I once struggled without a tape and ended up with uneven arms—lesson learned!
Decorative Accessories
Details give your doll character and charm. Buttons make great eyes or clothing accents, but safety eyes offer a more polished look. Ribbons, lace, or tiny beads can add personality and style.
Think about the doll’s theme—does it need a hat, scarf, or shoes? Adding these touches lets your creativity shine and makes the doll truly unique. What small feature could you add that tells a story about your doll?
Designing Your Doll
Designing your doll is the most exciting part of the creation process. It lets you bring your ideas to life with creativity and style. Every choice you make shapes the doll’s personality and look. This stage helps your doll stand out and feel unique.
Choosing A Pattern
Selecting the right pattern sets the foundation for your doll. Patterns provide a clear guide for cutting and sewing fabric pieces. Pick one that matches your skill level and the doll style you want. Simple patterns work well for beginners, while complex ones offer more detail. Look for patterns that include clear instructions and visuals.
Customizing Features
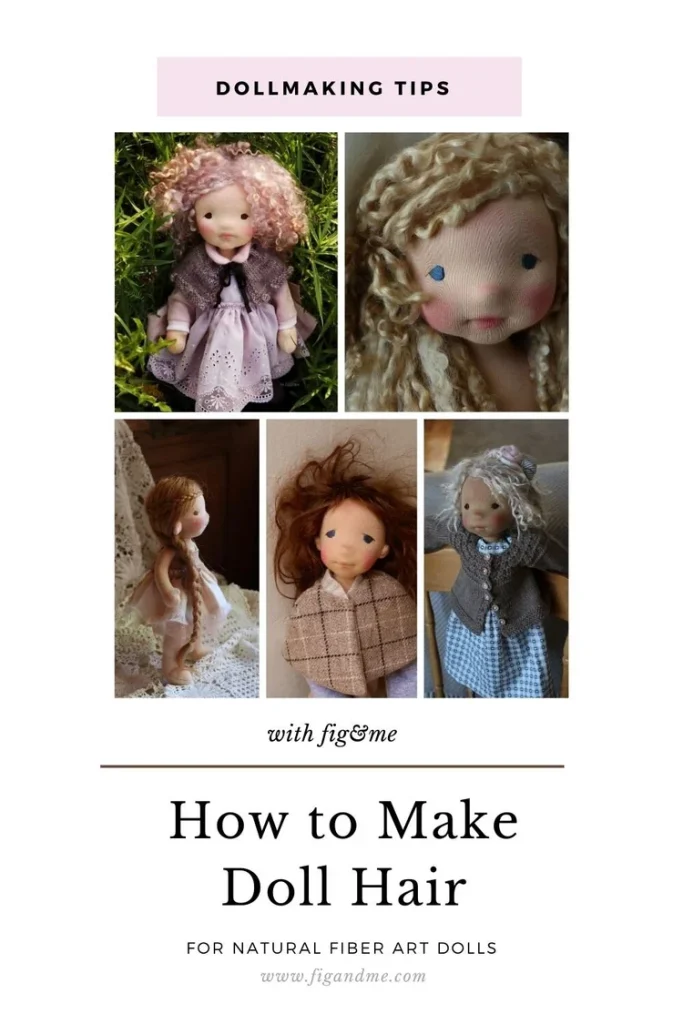
Personalize your doll by changing its features. Adjust the eyes, nose, and mouth shapes to give your doll a unique face. Add accessories like hats, glasses, or jewelry for extra charm. Try different hairstyles using yarn, fabric, or synthetic hair. Small details make your doll special and full of character.
Color Coordination
Choosing colors carefully enhances your doll’s appeal. Match fabric colors with the doll’s personality and style. Use soft pastels for a gentle look or bright colors for a lively effect. Combine colors that complement each other well. Consider skin tone, hair color, and clothing to create a balanced appearance.
Cutting And Sewing
Cutting and sewing form the heart of doll making. This phase shapes the doll’s body and brings it to life. Precise cutting ensures all parts fit perfectly. Careful sewing holds everything together. Both skills need patience and attention. A well-cut and sewn doll looks neat and lasts long.
Preparing Patterns
Start by choosing or creating a clear pattern. Patterns guide the shape of your doll’s parts. Use thin paper to trace the design. Pin the pattern firmly to the fabric. Cut slowly and carefully along the edges. Make sure to cut two pieces for each side of the doll. Mark important points like seams and folds on fabric.
Essential Sewing Techniques
Learn basic stitches like running stitch and backstitch. Use small, even stitches for strength and neatness. Sew slowly to avoid mistakes. Use a needle size that matches the fabric thickness. Knot the thread securely at the start and end. Keep stitches close on curved parts for smooth edges. Turn the fabric inside out after sewing to hide seams.
Assembly Tips
Match fabric pieces carefully before sewing. Align edges perfectly to prevent gaps. Pin pieces together to keep them steady. Sew sections in order, starting from small to large parts. Leave a small opening to turn the doll and stuff it. After stuffing, sew the opening closed with tiny stitches. Press seams flat with an iron for a polished look.
Stuffing And Shaping
Stuffing and shaping breathe life into your handmade dolls. This stage defines their softness, form, and feel. Proper stuffing creates a cuddly, well-shaped doll that lasts long. Shaping guides the doll’s contours, making it look neat and inviting.
Selecting Stuffing Material
Choose stuffing based on softness and firmness needs. Common options include polyester fiberfill, cotton, and wool. Polyester fiberfill is light, soft, and easy to shape. Cotton offers natural softness but may compact over time. Wool provides firmness and durability but can be heavier.
Consider allergies and budget when selecting materials. Test a small amount for texture before full stuffing. Avoid materials that clump or cause lumps.
Achieving Desired Shape
Stuff evenly to avoid lumps and misshapen parts. Use small amounts of stuffing and add gradually. Pay attention to corners and curves for smooth shaping. Use tools like chopsticks or pencils to push stuffing into tight spots. Shape the doll as you go, adjusting to get the right form.
Ensuring Durability
Secure stuffing with tight, even stitches to prevent shifting. Avoid overstuffing, which can stress seams and fabric. Reinforce seams with double stitching for extra strength. Choose strong thread that matches fabric durability. Test the doll by gently squeezing to check firmness and shape hold.
Creating Facial Details
Creating facial details is where your doll truly comes to life. The face expresses personality, mood, and charm, making it essential to get these details just right. Whether you prefer stitching, painting, or attaching features, each technique offers unique ways to add character to your creation.
Embroidery Techniques
Embroidery gives your doll’s face a soft, handcrafted look. Use simple stitches like satin stitch or backstitch to outline eyebrows, eyelashes, and lips. Choosing thread colors that match your doll’s style helps create subtle, natural expressions.
Try adding tiny knots for freckles or dimples to make your doll more unique. Embroidery also allows for easy corrections if you’re experimenting with expressions. Have you noticed how even small stitch variations can change a face’s emotion?
Painting Facial Features
Painting offers bold control over your doll’s facial details. Use fine brushes and acrylic paints to add highlights, shadows, and blush. Thin layers build depth without overwhelming the fabric or surface.
Practice on scrap material before painting directly on your doll’s face to avoid mistakes. Mixing colors can create realistic skin tones or playful designs for fantasy dolls. How would a bright blush or sparkling eyes change your doll’s story?
Attaching Eyes And Mouth
Attaching pre-made eyes and mouths can speed up your process and add realism. You can choose glass, plastic, or embroidered eyes depending on your doll’s look. Secure them tightly with thread or fabric glue to withstand play or display.
Consider the placement carefully—small shifts can alter the doll’s expression dramatically. Experiment with different sizes and shapes to find the perfect fit. What expression do you want your doll to wear when you choose these features?

Credit: www.youtube.com
Dressing The Doll
Dressing the doll is where your creation truly comes to life. The clothes and accessories you choose add personality and charm, turning a simple figure into a cherished companion. You get to decide its style, mood, and story—all through fabric and details.
Sewing Clothes
Start with simple patterns that fit your doll’s size perfectly. Use soft, easy-to-sew fabrics like cotton or felt to avoid frustration. If you’re new to sewing, hand-stitching small pieces can be easier than using a machine.
Try making basic outfits like a dress, pants, or a shirt. Keep seams neat and edges clean to give a polished look. Don’t hesitate to experiment with colors and textures to see what suits your doll best.
Accessorizing
Accessories bring style and uniqueness. Think tiny hats, scarves, or even miniature jewelry. You can use buttons, beads, or ribbons to create eye-catching details.
Adding pockets or belts can also enhance the outfit’s realism. What small touch could make your doll stand out? Sometimes, a little bow or a tiny bag tells a bigger story.
Final Touches
Check your doll’s outfit for any loose threads or uneven stitches. Iron the clothes gently if needed to smooth wrinkles. Adding small decorations like lace trims or embroidered initials can give a professional finish.
Remember, the final touches are what make your doll feel special. How can you add a personal flair that reflects your creativity? These small details often become the most memorable parts of your work.
Personalizing Your Creation
Personalizing your doll makes it truly special and unique. This step brings life and character to your creation. It reflects your style and emotions. Each detail you add tells a story and makes the doll more meaningful.
Personal touches create a bond between you and your doll. This bond turns a simple craft into a cherished keepsake. Let’s explore how to add unique features, personal touches, and stories to your doll.
Adding Unique Features
Start by choosing distinct facial expressions or eye colors. Small changes make your doll stand out. Use different fabrics, textures, or accessories. Add freckles, scars, or birthmarks for realism. Experiment with hair styles and colors. These features give the doll personality and charm.
Incorporating Personal Touches
Include elements that reflect your life or interests. Sew initials or favorite symbols onto the doll’s clothing. Use fabric from meaningful clothes or old shirts. Add tiny accessories like glasses, hats, or scarves. These details make the doll feel closer to you or the person it’s for.
Creating A Story
Give your doll a background or personality. Imagine where it lives or what it likes. Write a short story or description to go with your doll. This story adds depth and makes the doll more special. It also helps children connect with their new friend.
Care And Maintenance
Proper care and maintenance keep your dolls looking new and beautiful. Handling dolls gently extends their life. Regular cleaning and timely repairs help preserve their charm and value.
Cleaning Techniques
Use a soft cloth to dust dolls regularly. For fabric dolls, spot clean with mild soap and water. Avoid soaking dolls to prevent damage. Use a gentle brush for hair or fur parts. Dry dolls in a shaded area to avoid color fading.
Repairing Damages
Fix small tears in fabric with a needle and thread. Use fabric glue for minor rips if sewing is difficult. For loose limbs, tighten joints carefully without forcing. Replace missing buttons or eyes with similar materials. Repair cracks on plastic dolls with special adhesives made for plastic.
Preserving Quality
Store dolls away from direct sunlight and dust. Keep dolls in a cool, dry place to avoid mold. Use acid-free tissue paper to wrap delicate parts. Avoid placing dolls near heat sources or damp areas. Rotate display dolls to reduce wear on any one doll.

Credit: www.instagram.com
Frequently Asked Questions
What Materials Do I Need To Create Dolls?
To create dolls, gather fabric, stuffing, needles, thread, scissors, and paint. Optional items include buttons and yarn for hair. Choose materials based on the doll type and design you want to create.
How Long Does It Take To Make A Doll?
Making a simple doll can take 1 to 3 hours. More complex dolls may require several days. Time depends on skill level, design complexity, and materials used.
Can Beginners Easily Create Handmade Dolls?
Yes, beginners can create dolls with basic sewing skills. Start with simple patterns and gradually try advanced techniques. Practice improves skill and confidence in doll making.
What Are Popular Doll-making Techniques?
Popular techniques include sewing, knitting, crocheting, and sculpting with clay. Each method offers unique textures and styles. Choose based on your interest and available tools.
Conclusion
Creating dolls can be a fun and rewarding activity. Start with simple materials and basic steps. Practice helps improve your skills over time. Each doll you make will be unique and special. Enjoy the process of bringing your ideas to life.
Keep experimenting with colors and designs. Sharing your dolls with others brings joy. Keep creating, learning, and having fun with each doll. Your creativity can grow with every new project.