In this guide
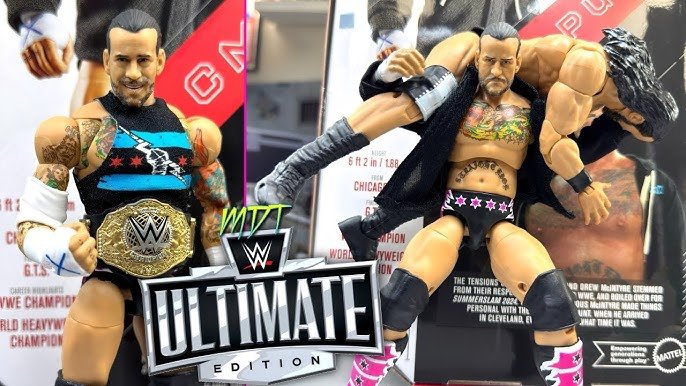
Are you a WWE fan who loves action figures? Imagine creating your very own WWE action figures that look just like your favorite superstars.
Making these figures yourself can be fun, rewarding, and a great way to show off your creativity. In this guide, you will discover simple steps to turn your ideas into cool, custom WWE figures. Ready to start? Let’s dive in and bring your wrestling heroes to life!

Credit: m.youtube.com
Choosing Materials
Choosing the right materials is key to making quality WWE action figures. The materials affect durability, detail, and overall look. Picking suitable plastic, paint, and tools ensures your figure looks great and lasts long. Understanding each component helps you create a figure that stands out.
Plastic Types
Plastic forms the main body of your action figure. Choose plastics that are easy to shape and strong. Common plastics include:
- PVC (Polyvinyl Chloride):Flexible and good for small details.
- ABS (Acrylonitrile Butadiene Styrene):Hard and durable, great for structural parts.
- Polyethylene:Soft and light, used for movable joints.
Each plastic type has unique qualities. Pick the one that fits your design needs best.
Paint Selection
Paint brings your figure to life with color and detail. Use paints that stick well to plastic and do not chip easily. Water-based acrylic paints are popular for action figures. They dry fast and are easy to clean. Choose paints with vibrant colors to match WWE characters accurately.
Tools And Equipment
Having the right tools makes crafting easier and more precise. Essential tools include:
- Fine brushes for detailed painting
- Craft knives for cutting and shaping plastic
- Sandpaper for smoothing surfaces
- Glue designed for plastic bonding
Use tools carefully for clean, sharp results. Proper equipment helps you create professional-looking figures.
Designing Your Figure
Designing your WWE action figure is an exciting part of the creation process. This stage shapes how your figure will look and feel. It sets the foundation for a unique and personalized collectible. Attention to detail helps bring the character to life. Creativity and planning go hand in hand here.
Concept Sketching
Start by drawing rough sketches of your figure. Focus on the pose, costume, and facial features. Sketch from different angles to understand proportions better. Use simple lines to outline muscles and clothing. This helps capture the wrestler’s personality.
Try multiple versions before choosing the best design. Keep the sketches clear and easy to interpret. Use pencil or digital tools to make quick changes. Concept sketches guide the next steps in making your figure.
Character Customization
Customize your figure to match your favorite wrestler or create a new one. Decide on hair style, outfit colors, and accessories. Think about unique traits like tattoos or signature gear. These details make your figure stand out.
- Choose skin tone and facial expression carefully.
- Pick clothing that fits the character’s style.
- Add small elements like wristbands or belts.
- Consider articulation points for posing flexibility.
Personal touches bring personality and realism to your figure. Customization reflects your vision and makes your action figure special.
Creating Molds
Creating molds is a crucial step in making WWE action figures. It allows you to reproduce detailed parts consistently and accurately. Without a good mold, your figures won’t capture the unique features that make each wrestler stand out.
Making Silicone Molds
Silicone is popular for mold making because it captures fine details and is flexible enough to release complex shapes. Start by sculpting your original figure part from clay or resin. This original will be the master copy you want to replicate.
Next, build a mold box around your sculpt. Pour the silicone slowly to avoid air bubbles, which can ruin the details. Let the silicone cure fully before carefully removing your original piece. This creates a negative space that perfectly mirrors your sculpt.
Have you tried using food-grade silicone? It’s safe and easier to work with for beginners. Plus, it cleans up well and lasts through many castings.
Casting Techniques
Once you have your silicone mold, casting brings your WWE figure parts to life. Choose a casting material that matches your needs—resin is common for its durability and smooth finish. Mix your resin carefully according to instructions to avoid weak spots.
Pour resin slowly into the mold, tilting or tapping the mold to release trapped air bubbles. Some creators use a vacuum chamber or pressure pot to improve the quality of castings. These tools push bubbles out, resulting in clearer, stronger parts.
After curing, demold your figure parts gently. Sand any rough edges before assembling. Have you noticed how a tiny bubble can change the look of your figure? Taking time with casting pays off in professional results.
Assembling Parts
Assembling parts is a key stage in making WWE action figures. This step brings the character to life. Each part must fit well and move smoothly. Attention to detail ensures the figure looks authentic and lasts long. Patience and care improve the final result.
Attaching Limbs
Start by preparing the limbs and torso. Check the joints for any rough edges. Smooth them with fine sandpaper if needed. Align the limb’s peg with the socket on the torso. Push gently but firmly until it clicks into place.
Test the movement of each limb. It should bend and rotate without coming loose. Use small amounts of plastic-safe glue if a joint feels weak. Avoid too much glue to keep the limb movable. Repeat the process for arms and legs.
Building Accessories
Accessories add personality to your WWE action figure. Common items include belts, weapons, or removable clothing. Assemble each piece separately before attaching to the figure. Use small screws or snap-fit parts for durability.
Check accessory size for a perfect fit. Trim or sand edges if they are too tight. Attach accessories securely but allow easy removal. This keeps play and display options flexible. Store extra parts safely to avoid loss.
Painting And Detailing
Painting and detailing WWE action figures is where your creation truly comes to life. This stage lets you add personality and realism, making your figure stand out on any shelf. Paying close attention to paint and fine details can turn a simple model into a masterpiece that captures the essence of your favorite wrestler.
Color Application
Choosing the right colors is essential for an authentic look. Use acrylic paints because they dry fast and stick well to plastic surfaces. Thin your paint slightly with water to avoid thick, uneven layers that hide the figure’s sculpted details.
Start with a base coat that matches the wrestler’s outfit or skin tone. Use a small brush for tight areas like facial features or gloves. You might want to apply multiple thin coats instead of one thick one to keep the paint smooth and precise.
Have you ever noticed how a tiny color mistake can change the whole vibe of a figure? Take your time, and don’t rush this step. It’s better to pause and let the paint dry than to smudge your work.
Adding Textures
Texture brings depth and realism to your figure. You can create textures by layering paint or using dry brushing techniques. Dry brushing means dipping your brush lightly in paint, wiping most off, then gently sweeping it over raised areas to highlight them.
Adding textures also means paying attention to details like hair, clothing, and accessories. Use fine brushes or even toothpicks to add small lines or dots that mimic fabric folds or hair strands. For example, a subtle dry brush on a leather jacket can give it a worn, realistic look.
Have you tried mixing matte and glossy finishes? This contrast can make skin look natural while making costumes appear shiny or textured. Experimenting with these finishes makes your figure more visually interesting and closer to the real thing.

Credit: www.youtube.com
Adding Movable Joints
Adding movable joints to your WWE action figures transforms them from static models into dynamic playthings. These joints give your figures flexibility and lifelike poses, making your collection more interactive and fun. Understanding how to add these joints correctly can enhance both the look and functionality of your creations.
Joint Types
There are several types of joints you can use, each offering different ranges of motion and complexity. Ball joints are popular because they allow rotation in multiple directions, perfect for shoulders and hips. Hinge joints, on the other hand, work like elbows and knees, enabling bending in one direction.
Swivel joints provide rotational movement, often used for wrists and necks. You might also consider peg-and-socket joints, which are simple to install and remove but offer limited movement. Choosing the right joint type depends on the figure’s size and the range of motion you want.
Installation Process
Start by carefully planning where the joints will go. Mark the exact spots on the limbs and torso where you want movement. Precision here prevents damage and ensures smooth motion later.
- Use a small drill or knife to create holes that fit the joint pegs snugly.
- Test fit each joint before gluing or fixing permanently to avoid mistakes.
- Apply a small amount of flexible adhesive if needed, allowing some movement without sticking too hard.
When I added ball joints to an old figure, I realized that sanding the peg slightly helped it fit better and moved more smoothly. Have you noticed how a tight joint can limit playability or a loose one can fall apart? Finding that balance is key to making your figures truly poseable.
Creating Packaging
Creating packaging for your WWE action figures is more than just wrapping the toy—it’s about making a lasting impression. Good packaging protects the figure, tells a story, and grabs attention on the shelf. Think about how your packaging can reflect the energy and personality of the wrestler you’ve crafted.
Designing Boxes
Start by choosing the right size and shape for your box to snugly fit the figure and any accessories. Consider using clear plastic windows so buyers can see the detailed figure without opening the box. Simple designs can work well, but adding dynamic graphics and bold colors will make your packaging stand out.
Don’t forget to keep the materials sturdy. Cardboard with a gloss finish can protect your figure and look professional. You might want to test how your box holds up in different environments—will it survive being tossed around during shipping?
Incorporating Branding
Your branding should be clear and consistent on every box. Use your logo, signature colors, and fonts that match the vibe of your WWE line. This helps create a recognizable identity and builds trust with collectors and fans.
Think about adding a tagline or a brief character bio to connect buyers with the wrestler’s story. Personal touches like these can turn a simple package into a collector’s item. What unique element can you add to your packaging that reflects your brand’s personality?
Displaying Your Collection
Displaying your WWE action figures is as important as crafting them. The way you showcase your collection can highlight the details and personalities of each figure. A well-displayed collection not only protects your figures but also brings your passion to life in any room.
Shelving Ideas
Choosing the right shelves sets the foundation for your display. Clear acrylic shelves work great because they give a floating effect, making your figures look like they’re ready for action. Wooden shelves add warmth and can be customized with paint or decals matching your favorite WWE themes.
Consider adjustable shelves so you can fit larger figures or different poses easily. You might want to group figures by era, wrestler, or even their signature moves to tell a story through your display. Have you thought about using risers or tiered stands? They help every figure stay visible without blocking others.
Lighting Techniques
Good lighting turns a simple shelf into a spotlight stage. LED strip lights are popular because they don’t get hot and can be cut to fit any size. Position them above or below shelves to create dramatic shadows and highlight details like costumes and accessories.
Try using colored lights to match the mood of a wrestler’s persona—red for intensity, blue for calm, or even multi-colored for a party vibe. Don’t overlook natural light, but protect your figures from direct sunlight to prevent fading. How would your collection look with a subtle glow around each figure?

Credit: www.tiktok.com
Frequently Asked Questions
What Materials Are Needed To Make Wwe Action Figures?
To make WWE action figures, you need modeling clay, paint, sculpting tools, and reference images. Quality materials ensure durability and detail in your figures.
How Do I Sculpt Realistic Wwe Action Figures?
Start with a basic figure shape, then add muscle details and facial features. Use reference photos to capture likeness and refine with sculpting tools.
What Painting Techniques Work Best For Wwe Figures?
Use acrylic paints for vibrant colors and durability. Apply thin layers, let each dry, and add fine details with small brushes for realism.
Can I Customize Wwe Action Figures At Home?
Yes, you can customize by repainting, adding accessories, or modifying parts. Use safe adhesives and paints designed for plastic surfaces.
Conclusion
Creating WWE action figures is a fun and rewarding project. You only need a few materials and some patience. Each step helps bring your favorite wrestlers to life. Personal touches make your figures unique and special. Keep practicing to improve your skills over time.
Share your creations with friends or online communities. Enjoy the process, and keep crafting new figures!