In this guide
Have you ever wanted to create something truly special with your own hands? Making dolls is a fun and rewarding way to bring your creativity to life.
Whether you’re looking to craft a gift, decorate your space, or simply enjoy a relaxing hobby, this guide will show you exactly how to make dolls step by step. By the end, you’ll have the skills to create beautiful, personalized dolls that tell your unique story.
Ready to start? Let’s dive in and turn your ideas into charming handmade dolls!
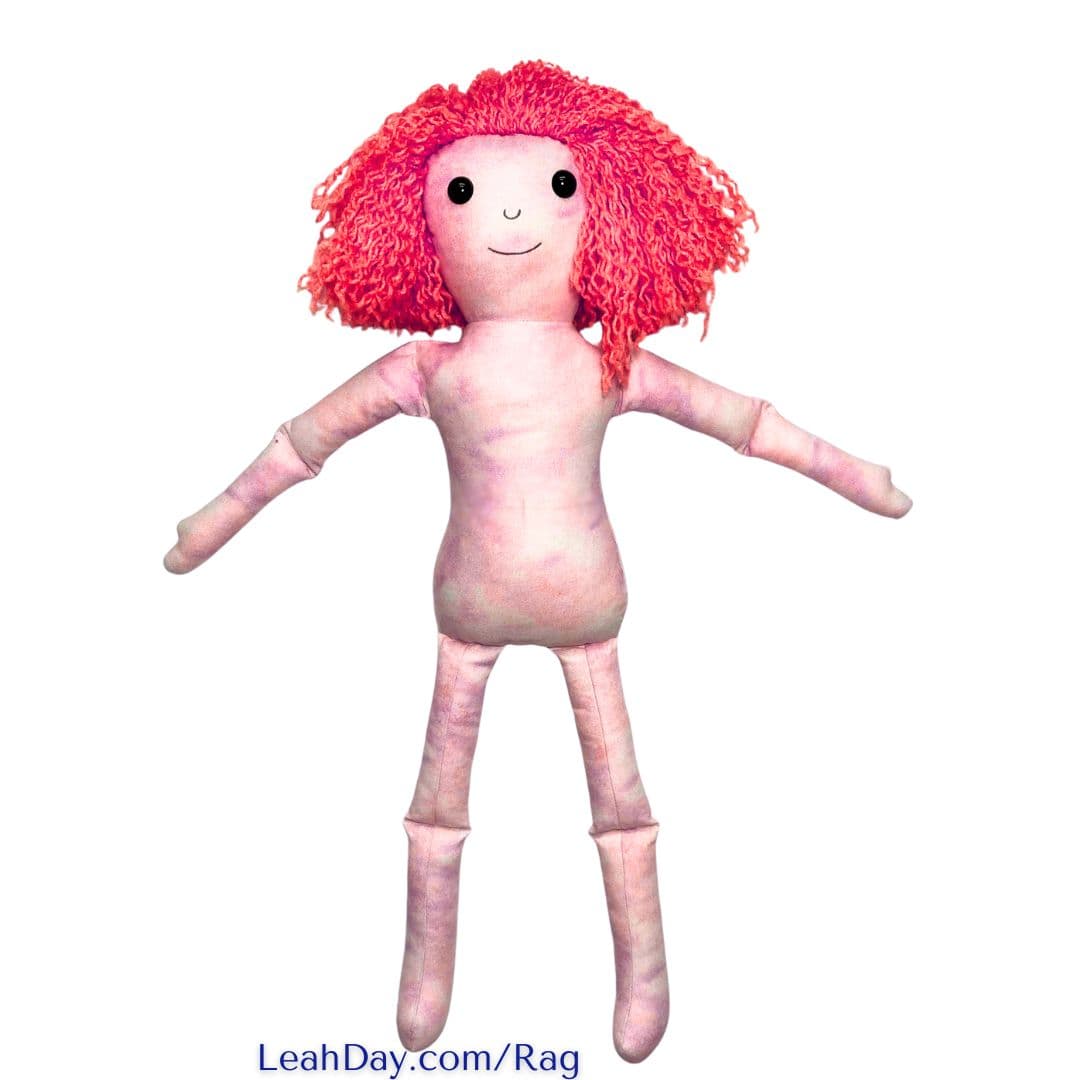
Credit: leahday.com
Materials Needed
Making dolls is a fun and creative hobby. You need the right materials to get started.
This guide covers the main supplies you will need to make your own doll from scratch.
Fabric Choices
Choosing fabric affects your doll’s look and feel. Cotton is soft and easy to sew.
- Felt: Good for small parts and details
- Cotton: Soft and washable
- Flannel: Warm and fuzzy texture
- Velvet: Adds a plush, rich look
- Denim: Durable and sturdy
Stuffing Options
Stuffing gives your doll shape and softness. Pick stuffing that fits your design.
| Stuffing Type | Features |
| Polyester Fiberfill | Lightweight and fluffy |
| Cotton Batting | Natural and firm |
| Wool | Soft and warm |
| Fabric Scraps | Eco-friendly and firm |
| Foam Pieces | Provides structure |
Sewing Tools
You need basic sewing tools to make your doll. They help you cut and join fabric.
- Needles for hand sewing
- Thread matching your fabric
- Scissors for fabric and thread
- Pins to hold fabric pieces
- Measuring tape or ruler
- Sewing machine (optional)
Additional Decorations
Decorations make your doll unique. Choose small items to add charm and personality.
Common decorations include:
- Buttons for eyes or clothes
- Ribbons and lace
- Embroidery thread for details
- Yarn for hair
- Fabric paint for faces

Credit: www.youtube.com
Choosing A Doll Design
Picking the right doll design makes your project fun and easy. Your choice affects how the doll looks and feels.
Think about who will use the doll and what style fits best. This helps you decide the design details.
Simple Patterns For Beginners
Start with simple shapes like circles and rectangles for the body and head. These patterns are easy to cut and sew.
- Use basic shapes without too many small parts
- Choose patterns with few seams
- Pick designs that do not need special tools
Customizing Your Doll
Add personal touches to make your doll unique. You can change the hair style, clothes, and facial features.
Try these ideas for customizing:
- Use buttons or beads for eyes
- Add embroidery for a smile
- Make clothes from old fabric scraps
- Attach yarn for hair in different colors
Selecting Colors And Themes
Choose colors that match your doll’s personality or the theme you want. Bright colors make playful dolls, soft colors make calm dolls.
| Theme | Color Choices |
| Playful | Red, Yellow, Blue |
| Calm | Pastel Pink, Light Blue, Soft Green |
| Nature | Brown, Green, Cream |
| Fantasy | Purple, Silver, Gold |
Cutting And Preparing Fabric
Cutting and preparing fabric is the first step in making a doll. You need clean cuts and clear markings to get good results.
Taking time to prepare the fabric carefully helps your doll look neat and last longer.
Tracing Patterns
Start by placing your paper pattern on the fabric. Use a pencil or fabric chalk to trace around the edges carefully.
Make sure the fabric is flat and smooth. This prevents mistakes in size and shape when you cut the pieces.
Cutting Fabric Pieces
Use sharp fabric scissors to cut along the traced lines. Cut slowly and follow the edges closely for accuracy.
Keep the fabric steady while cutting. This keeps the pieces the right size and shape for sewing.
- Cut on a flat surface
- Use sharp scissors for clean edges
- Cut one piece at a time for precision
Marking Sewing Lines
After cutting, mark the sewing lines on the fabric. Use a fabric pen or tailor’s chalk that can wash out later.
Marking sewing lines helps you sew straight and keep seams even. This makes the doll look neat and strong.
- Draw lines about ¼ inch from the edge
- Mark where to leave gaps for stuffing
- Label each piece to avoid confusion

Credit: www.youtube.com
Sewing The Doll Body
Sewing the doll body is a key step in making a doll. It shapes the doll and holds the stuffing inside.
You can sew the body by hand or use a sewing machine. Both ways have their benefits for different projects.
Hand Sewing Vs Machine Sewing
Hand sewing lets you work slowly and carefully. It is good for small parts and detailed shapes.
Machine sewing is faster and makes strong seams. It works well for bigger doll pieces and simple shapes.
- Hand sewing is slower but precise
- Machine sewing is quick and durable
- Hand sewing allows easy control on curves
- Machine sewing needs straight seams mostly
Seam Allowance Tips
Seam allowance is the space between the fabric edge and the seam. It helps keep the doll shape strong.
Use a ¼ inch to ½ inch seam allowance. This size is easy to sew and leaves enough fabric to turn and stuff.
- Mark seam lines before sewing
- Keep seam allowance consistent
- Trim corners to reduce bulk
- Clip curves for smooth edges
Leaving An Opening For Stuffing
Leave a small gap in the seam to turn the doll inside out. This opening is for stuffing the doll body.
Make the opening about 2 to 3 inches long. It should be easy to reach but not too big to weaken the seam.
- Sew all seams except a small part
- Use pins to keep the opening edges aligned
- Stuff the doll firmly but gently
- Hand sew the opening closed after stuffing
Stuffing And Shaping
Stuffing and shaping are key parts of making a doll. They give the doll its form and feel. Proper stuffing makes the doll soft but firm.
Shaping the doll helps create its features and personality. It is important to do these steps carefully for a nice result.
Choosing The Right Stuffing
Pick stuffing that is soft and safe for your doll. Common options are polyester fiberfill, cotton, or wool. Each has a different feel and firmness.
Polyester fiberfill is light and easy to use. Cotton feels natural but may be heavier. Wool adds firmness and shape.
- Polyester fiberfill: soft and fluffy
- Cotton: natural and denser
- Wool: firm and holds shape well
Filling The Doll Evenly
Put stuffing inside the doll carefully. Fill it little by little to avoid lumps. Make sure every part is evenly stuffed.
Use a pencil or stick to push stuffing into small parts like arms and legs. Check the doll’s shape as you fill it.
- Add small amounts of stuffing at a time
- Push stuffing into tight spaces gently
- Check for lumps and smooth them out
- Fill all parts to keep shape balanced
Shaping Features
Shape the doll’s head, arms, and legs to look natural. Pinch and mold the stuffing to create curves and joints. This makes the doll more lifelike.
Use stitches to hold the shape if needed. You can add details like fingers or cheeks by shaping the stuffing carefully.
- Mold the head and body gently
- Pinch joints to form arms and legs
- Add stitches to keep shapes firm
- Shape small details for realism
Adding Facial Features
Creating a doll’s face can be a fun and creative task. You have many options to add personality.
Let’s explore different techniques to make your doll’s face unique and expressive.
Embroidering Eyes And Mouth
Embroidery adds a handcrafted touch to your doll’s face. You can use threads of different colors.
- Choose a needle and thread color for the eyes.
- Start with simple stitches for the outline.
- Use satin stitch for filling the eyes.
- Repeat the process for the mouth using a contrasting color.
Using Buttons Or Beads
Buttons or beads can be used as eyes for a charming look. They are easy to attach and come in many styles.
| Material | Effect |
| Buttons | Classic and simple |
| Beads | Shiny and detailed |
| Felt | Soft and cuddly |
Painting Faces
Painting is an artistic way to add features. Use non-toxic paints for safety.
Ensure your brush is fine-tipped for detailed work. Mix colors for a realistic effect.
Creating Hair Styles
Making doll hair can be fun. It adds personality to each doll. There are many ways to create hair styles for dolls. Let’s explore some techniques.
In this guide, we will cover yarn hair techniques, attaching hair securely, and styling options. Each step helps you make beautiful doll hair.
Yarn Hair Techniques
Yarn is a popular choice for doll hair. It is easy to use and comes in many colors. You can cut yarn into strands and attach them to the doll’s head.
Wrap the yarn around a book or cardboard to create even lengths. Cut along one edge to get equal strands. These strands will become the doll’s hair.
- Choose soft yarn for a realistic look
- Mix colors for highlights
- Use thick yarn for voluminous hair
Attaching Hair Securely
Attaching hair securely is important. It keeps the hair in place during play. Use a needle and thread to sew the yarn onto the doll’s head.
Start from the back and work to the front. This helps cover the stitches. You can also use glue, but sewing is more durable.
- Double knot the thread for extra security
- Stitch close to the scalp for a neat look
- Use strong glue if sewing is not possible
Styling Options
Once the hair is attached, you can style it. You can braid, curl, or cut the yarn to your liking. This gives each doll a unique look.
Try different styles to see what suits your doll best. Remember, the yarn can be easily trimmed or adjusted.
- Braid for a classic style
- Use a curling iron for yarn to add curls
- Trim the ends for a polished finish
Dressing Your Doll
Dressing your doll makes it look special and unique. Clothes add personality and fun to your doll.
You can create many outfits using simple patterns and small sewing skills. Accessories make the doll even more charming.
Simple Clothes Patterns
Start with easy clothing patterns for your doll. Simple shapes like rectangles and circles work well.
Use paper to make templates before cutting fabric. This helps keep clothes the right size.
- T-shirt: a rectangle with armholes
- Skirt: a rectangle wrapped around the waist
- Pants: two connected rectangles for legs
- Dress: a triangle or trapezoid shape
Sewing Doll Outfits
Sewing doll clothes is simple and fun. Use a needle and thread or a sewing machine if you have one.
Start sewing edges and seams carefully. Small stitches work best for tiny doll clothes.
- Pin fabric pieces together before sewing
- Sew slowly to keep the fabric from shifting
- Leave openings to turn clothes inside out
- Add fasteners like snaps or Velcro for easy dressing
Accessorizing
Accessories add detail and style to your doll’s outfit. Small items make the doll look complete.
You can make hats, scarves, shoes, or bags from leftover fabric or craft supplies.
- Use buttons or beads for jewelry
- Make hats from felt or fabric scraps
- Create shoes by sewing small fabric pieces
- Add ribbons or lace for decoration
Finishing Touches
Finishing touches bring your doll to life and make it unique. These last steps improve its look and durability.
Take your time with these details. They help your doll feel complete and special.
Adding Details
Small details add personality to your doll. Use buttons, ribbons, or paint to create eyes, lips, and clothes.
- Sew tiny buttons for eyes or decorations.
- Use fabric paint for facial features.
- Attach ribbons or lace for clothes or hair.
- Add small accessories like hats or scarves.
Securing Loose Threads
Loose threads make your doll look unfinished and can cause damage. Secure all threads to keep the doll neat and strong.
Follow these tips to secure threads:
- Pull the thread tight but not too hard.
- Tie a small knot close to the fabric.
- Trim any extra thread close to the knot.
- Use a dab of fabric glue for extra hold if needed.
Final Quality Check
Check your doll carefully before calling it done. Look for loose parts, uneven stitches, or missing details.
| Check Item | What to Look For | Fix If Needed |
| Stitching | Even and tight stitches | Re-sew loose areas |
| Details | Buttons and accessories firmly attached | Sew or glue back in place |
| Threads | No loose or hanging threads | Trim and secure |
| Shape | Stuffing evenly distributed | Add or remove stuffing |
Tips For Beginners
Making dolls is a fun and creative hobby. It lets you bring your ideas to life with fabric and thread.
Starting can feel tricky, but simple tips will help you enjoy the process and improve your skills.
Common Mistakes To Avoid
Many beginners try to make dolls too complex at first. This leads to frustration and mistakes.
Small errors can ruin the doll’s shape or make sewing harder. Avoid these common mistakes to save time.
- Using thick fabric that is hard to sew
- Cutting pieces without checking measurements
- Skipping pins before sewing parts together
- Pulling thread too tight or leaving it loose
- Not stuffing the doll evenly
Improving Sewing Skills
Good sewing skills make your dolls neat and durable. Practice simple stitches regularly to improve.
Work on straight lines first. Keep your stitches even and avoid pulling thread too tight.
- Practice running stitch on scrap fabric
- Try backstitch for stronger seams
- Use a thimble to protect your fingers
- Keep your scissors sharp for clean cuts
- Take breaks to rest your hands
Finding Inspiration
Look around to find ideas for your dolls. Inspiration helps you create unique and fun designs.
Use books, nature, or everyday objects as starting points. Try to add your own twist to each idea.
- Draw sketches from cartoons or animals
- Use colors and patterns you like
- Mix styles to create new looks
- Watch videos to learn new techniques
- Join craft groups to share ideas
Frequently Asked Questions
What Materials Are Needed To Make A Doll?
To make a doll, you need fabric, stuffing, thread, needles, scissors, and decorations. These basic materials help create a soft, handmade doll.
How Long Does It Take To Make A Doll?
Making a simple doll usually takes 1 to 3 hours. Complex designs may take longer, depending on skill and detail.
Can Beginners Easily Make Dolls At Home?
Yes, beginners can make dolls at home using simple patterns and basic sewing skills. Start with easy projects to build confidence.
What Are The Best Fabrics For Doll Making?
Cotton, felt, and fleece are best fabrics for doll making. They are soft, easy to sew, and safe for children.
Conclusion
Making dolls can be a fun and creative activity. You can use simple materials found at home. Each doll you make will be unique and special. Enjoy the process of crafting with your hands. Practice helps you improve your skills over time.
Share your dolls with friends and family for joy. Keep trying new ideas to make your dolls better. Making dolls brings happiness and a sense of pride. Start today and see where your creativity leads.