In this guide
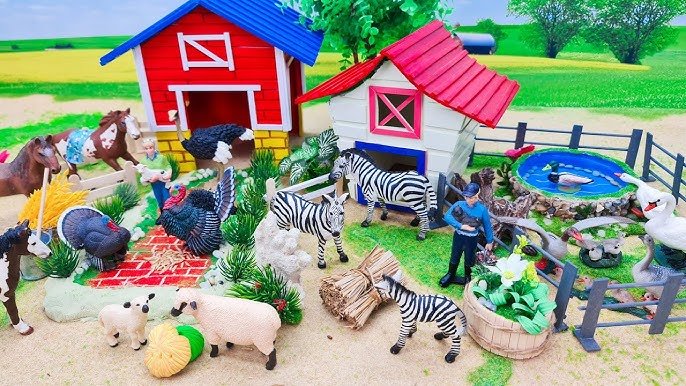
Are you ready to create something fun and meaningful with your own hands? Building a toy farm is a fantastic way to bring your creativity to life while making a special play space for kids or even yourself.
Imagine having a miniature world filled with tiny animals, barns, and fields right on your table. In this guide, you’ll discover simple steps to build your very own toy farm, using easy materials and straightforward techniques. By the end, you’ll have a charming farm that sparks joy and endless hours of play.
Let’s dive in and make your toy farm idea a reality!
Choosing The Right Materials
Choosing the right materials sets the foundation for a toy farm that lasts and delights. It affects not only the look and feel but also how safe and enjoyable the toy will be for children. Picking materials wisely helps you create something both fun and responsible.
Selecting Safe And Durable Materials
Safety should always be your top priority. Avoid materials with sharp edges or toxic paints that can harm kids. Look for non-toxic, child-safe finishes and sturdy options that can withstand rough play.
Wood is a popular choice because it’s strong and smooth when sanded properly. It also offers a warm, natural feel that plastic often lacks. If you use plastic, choose BPA-free and phthalate-free types to ensure safety.
Think about how the materials will hold up over time. Durable materials mean fewer repairs and a toy farm that kids can pass down. Have you tested how different woods or plastics react to drops or spills? This small step can save frustration later.
Exploring Eco-friendly Options
Building a toy farm from eco-friendly materials reduces waste and supports a healthier planet. Bamboo, recycled wood, and natural fabrics are great choices that don’t sacrifice quality or safety.
You might be surprised how many suppliers offer sustainably sourced wood or recycled plastics today. These materials often have certifications like FSC or recycled content labels. Checking these can help you make responsible choices.
Consider how you can reuse scraps or leftover materials to create smaller farm accessories. This not only cuts down on waste but adds unique details to your project. How can you turn what might be trash into treasure during your build?
Designing Your Toy Farm Layout
Designing your toy farm layout is a fun and creative part of building a toy farm. It sets the stage for how your farm will look and feel. A good layout helps make playtime more enjoyable and realistic. Planning carefully saves time and effort later. It also helps you use space wisely and include all important features.
Creating A Blueprint
Start with a simple sketch or blueprint of your toy farm. Draw the shape of the area you have. Mark where you want buildings, fields, and paths.
- Use grid paper or plain paper for better accuracy.
- Keep the scale small but clear.
- Plan space for moving toy animals and vehicles.
- Leave room for future additions or changes.
A clear blueprint guides you through the building process. It helps avoid crowded or empty spots.
Incorporating Essential Farm Elements
Think about the key parts every farm needs. Add these elements to your layout to make it real and fun.
- Barns and Stables:Houses for animals and storage.
- Fields and Crops:Spaces for planting crops or grass.
- Fences and Gates:Keep animals safe and organized.
- Water Sources:Ponds, wells, or troughs for animals.
- Farm Roads and Paths:Connect different areas for easy access.
Place these elements logically, like near each other or along paths. This creates a natural flow on your farm.
Constructing Farm Structures
Constructing farm structures is a key step in creating a realistic toy farm. These structures give life to your farm and provide spaces for animals and equipment. Building simple yet sturdy structures makes the toy farm more fun to play with. Focus on easy designs that look good and are safe to handle.
Building Barns And Stables
Start with barns and stables as they are central to any farm. Use wood or thick cardboard to create walls and roofs. Cut pieces to size and glue or tape them firmly. Add small doors that open and close for animal access.
- Use red or brown paint for a classic barn look.
- Include windows for detail and light.
- Make the roof removable for easy play inside.
Stables need partitions to separate animals. Use thin strips of wood or cardboard for stalls. Label each stall with animal names or pictures. This keeps the setup organized and clear for children.
Crafting Fences And Gates
Fences keep animals safe and define farm areas. Use popsicle sticks, toothpicks, or thin wooden dowels to build fences. Glue sticks vertically and connect with horizontal bars for strength. Paint fences white or natural wood color.
- Create gates that open and close with small hinges or string.
- Make fence sections in different lengths to fit various spaces.
- Place fences around pastures and garden areas.
Simple fences add structure and realism to the toy farm. They also help teach children about animal safety and farm layout.

Credit: www.youtube.com
Adding Farm Animals
Adding farm animals brings life and fun to your toy farm. It creates a lively scene that kids enjoy. Choosing the right animals and placing them carefully makes the farm look real and interesting. This part is key to building a great toy farm.
Choosing Toy Animals
Select animals that match your farm theme. Common farm animals include:
- Cows
- Sheep
- Pigs
- Chickens
- Horses
- Ducks
Choose animals made of durable materials. Size matters. Make sure the animals fit well with your toy buildings and vehicles. Variety adds fun and learning opportunities. Pick animals with bright colors and simple shapes for young children.
Positioning Animals For Realism
Place animals in natural spots on the farm. For example:
- Cows near the barn or in the pasture
- Chickens around the coop or pecking on the ground
- Horses near the stable or fence
- Sheep grazing on grassy areas
- Pigs near mud or pen areas
Group animals in small herds or pairs for a natural look. Leave space for movement and play around them. Change positions sometimes to keep the scene fresh and fun. This simple step makes your toy farm feel alive and real.
Decorating The Farm Environment
Decorating the farm environment transforms your toy farm from a simple setup into a lively miniature world. It invites creativity and attention to detail, making playtime more immersive and fun. Think about how the little touches can bring your farm to life and spark stories in your mind.
Adding Greenery And Landscaping
Greenery is the backbone of any farm scene. Use small artificial grass mats, felt pieces, or even moss to create fields and pastures. Mixing different shades of green can give the landscape depth and a natural look.
Try adding tiny trees or bushes made from craft materials. You could use small twigs with glued-on green sponge or paper leaves. These create a realistic and varied environment for your toy animals.
Have you thought about adding a water feature? A small mirror or blue cellophane can mimic a pond or stream, adding another layer of interest. It also helps you imagine how animals gather around water on a real farm.
Personalizing With Unique Details
Personal touches make your toy farm truly yours. Add little fences from popsicle sticks or toothpicks to mark boundaries. You can paint or decorate them to match your farm’s style.
Think about including tiny farm tools or equipment made from clay or found objects. Maybe a wheelbarrow or a tractor adds a story element to your scene. These details make your farm interactive and give you more to play with.
Consider small signs or nameplates for different areas or animal pens. Writing or drawing these yourself gives you a chance to practice creativity and labeling. What unique feature will make your farm stand out to your friends?
Incorporating Interactive Elements
Incorporating interactive elements makes a toy farm more fun and engaging. Kids enjoy playing with toys that respond to their actions. Interactive features keep their attention longer and spark creativity. These elements turn simple toys into lively playsets. Let’s explore how to add interactive parts to your toy farm.
Creating Movable Parts
Movable parts bring a toy farm to life. Think about adding doors, gates, or tractor wheels that kids can turn. Use hinges or small screws for durability. Simple sliders or rotating pieces work well too. Movable parts encourage hands-on play and improve motor skills.
- Attach barn doors that open and close smoothly.
- Include wheels on tractors or carts for easy movement.
- Add a windmill with blades that spin.
- Create fences with sections that swing open.
These features make the farm feel real and interactive. Keep parts safe and easy to use for young children.
Designing Play Scenarios
Play scenarios guide children’s imagination on the toy farm. Create simple storylines or activities for kids to follow. This adds purpose and structure to their playtime. Use small props or animal figures to support each scenario.
- Farm chores like feeding animals or collecting eggs.
- Harvesting crops with toy tools and baskets.
- Driving tractors around fields or loading trailers.
- Animal care, including grooming or moving animals to pens.
Label areas or add signs to help kids understand each scenario. Interactive storytelling makes the toy farm more exciting and educational.
Maintaining Your Toy Farm
Maintaining your toy farm keeps it fun and functional for a long time. Regular care prevents damage and helps your farm stay vibrant and ready for play. It also gives you a chance to get creative with improvements and fixes.
Cleaning And Storage Tips
Dust and dirt can build up quickly on your toy farm, especially if it sits out for a while. Use a soft cloth or a small brush to gently clean surfaces and crevices. Avoid harsh chemicals; mild soap and water usually work well without damaging paint or materials.
Storing your toy farm properly is just as important as cleaning. Keep it in a dry, cool place to avoid warping or mold growth. Using clear plastic bins with compartments helps keep small pieces organized and easy to find.
Have you noticed how a simple cleaning session can make your farm look brand new? It’s surprising how much a little upkeep boosts the joy of play.
Repairing And Upgrading Structures
Toys can break or wear out, but repairing them is easier than you think. Use wood glue for wooden parts and strong adhesive for plastics to fix cracks or loose joints. Clamps or rubber bands can hold pieces in place while the glue dries.
Upgrading your toy farm can be as simple as adding new accessories or repainting old buildings. Try swapping out fences or adding tiny signs to give the farm more character. Sometimes a fresh coat of paint can make old structures look exciting again.
Have you ever fixed a broken barn and felt proud of saving your toy? That hands-on care not only restores your farm but also makes it uniquely yours.

Credit: www.youtube.com
Encouraging Creative Play
Encouraging creative play with a toy farm helps children explore their imagination. It gives them a chance to invent stories and act out different farm life scenarios. This type of play boosts problem-solving skills and emotional growth. Children learn by doing and imagining, which makes playtime both fun and educational.
Developing Storylines
Creating stories around the toy farm brings the scene to life. Kids can pretend to feed animals, plant crops, or sell produce at a market. These storylines help children understand daily farm routines and roles. They practice language skills by describing actions and events. Letting kids guide the story promotes independence and confidence.
Sharing With Friends
Playing with others adds a social element to the toy farm. Children learn to take turns and cooperate. They share ideas and build new stories together. Group play encourages listening and communication skills. It also teaches respect and teamwork while having fun on the farm.

Credit: m.youtube.com
Frequently Asked Questions
What Materials Are Best For Building A Toy Farm?
Wood, plastic, and cardboard are ideal materials. They are durable, safe, and easy to work with. Choose non-toxic paints for decoration. These materials ensure the toy farm lasts long and is child-friendly.
How Do I Design A Toy Farm Layout?
Start with a simple sketch of fields, barns, and animal areas. Keep pathways clear for play. Balance space for crops and animals. A well-planned layout enhances play value and creativity.
What Animals Should I Include In A Toy Farm?
Include common farm animals like cows, pigs, chickens, and horses. These animals are familiar and educational for children. Adding variety encourages imaginative play and learning about farm life.
How Can I Make A Toy Farm Educational?
Use labels and signs to name crops and animals. Include tools and vehicles for farming tasks. This approach teaches children about farming processes and vocabulary while playing.
Conclusion
Building a toy farm can be a fun and rewarding project. It helps kids learn about animals and nature. Using simple materials keeps the process easy and affordable. Creativity plays a big role in making it unique. Watching the farm come together brings a sense of pride.
This activity also encourages teamwork and patience. Try adding new details over time to keep it exciting. Enjoy every step and share the joy with family. A toy farm offers both fun and learning in one. Give it a try and see the smiles grow.